
Desserts
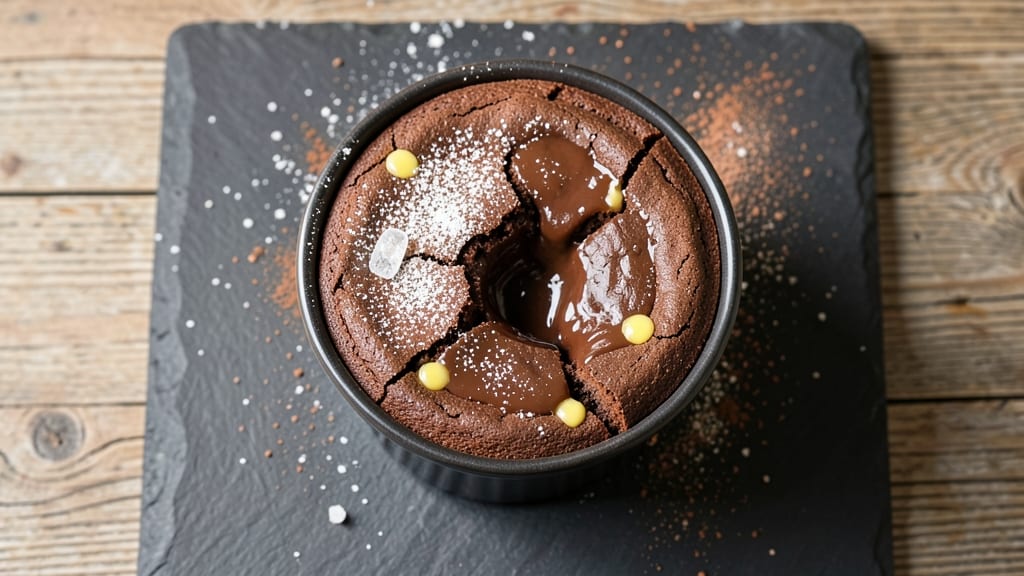
This bakers chocolate lava cake recipe delivers restaurant-quality molten ganache hearts in just 12 minutes—perfect for impressing guests or satisfying a sudden sweet tooth. The secret lies in a precise balance of rich chocolate cake batter and a velvety ganache center that stays perfectly gooey when baked.
I've perfected this technique after countless trials, ensuring every bite reveals that signature lava effect without being overly sweet or dry.
The recipe combines simple ingredients—flour, sugar, eggs, and of course, high-quality bakers chocolate—to create a tender cake crust that encases a luscious chocolate filling.
What sets this apart is the baking method: a high-heat oven and precise timing transform the center into a molten surprise while keeping the exterior perfectly set. This isn't just dessert; it's an experience that turns any kitchen into a café.
By the time you're done, you'll have individual cakes with golden-brown tops and a crack revealing the rich, liquid chocolate inside. The contrast of warm cake and cool ganache is pure indulgence, and the texture—crispy outside, velvety inside—is impossible to resist.
Garnish with powdered sugar or fresh berries for an elegant touch, or serve as-is for a classic presentation.
Whether you're hosting a dinner party or treating yourself, this recipe delivers foolproof results every time. The best part? It's ready in under 15 minutes from start to finish, making it the perfect dessert for busy weeknights or last-minute celebrations. Let's get started—your taste buds will thank you.
Ingredients for bakers chocolate lava cake
These luxurious ingredients transform your kitchen into a chocolate lover's paradise in minutes.
| Ingredient | Amount | Notes |
|---|---|---|
| Bakers Chocolate 🍫 | 8 oz | High-quality, semi-sweet or dark |
| Unsalted Butter 🧈 | ½ cup | Room temperature, full-fat preferred |
| Granulated Sugar 🍚 | ¾ cup | Superfine for smoother batter |
| Large Eggs 🥚 | 2 whole | Room temperature, separated yolks |
| All-Purpose Flour 🌾 | ½ cup | Sifted for light texture |
| Cocoa Powder 🍫 | ¼ cup | Natural or Dutch-processed |
| Vanilla Extract 🌸 | 1 tbsp | Pure, high-quality vanilla |
| Salt 🧂 | ¼ tsp | Fine sea salt |
| Heavy Cream 🥛 | ½ cup | Cold for ganache |
| Powdered Sugar 🍚 | ¼ cup | For garnish |
| Fresh Raspberries 🍓 | ½ cup | Optional garnish |
The bakers chocolate is non-negotiable here—Ghirardelli or Guittard are my go-tos for that perfect balance of richness and melt. Grab the semi-sweet version for a classic lava cake flavor, or go dark for a more intense chocolate experience. The butter needs to be room temperature (about 65°F)—press it to test, it should leave a slight indentation but not flatten completely. For the flour, I always sift it to avoid lumps, which can ruin that silky batter texture. The cocoa powder? Hershey's Special Dark is a solid budget pick, but Valrhona takes it to the next level if you're feeling fancy.
No vanilla extract? Pure vanilla bean paste works beautifully—just use the same amount. Running short on heavy cream? Full-fat coconut cream makes a decent substitute, though the ganache will have a slight coconut flavor. The powdered sugar is just for garnish, but if you're feeling extra, a pinch of flaky sea salt sprinkled on top creates a perfect sweet-salty contrast. For the raspberries, grab the freshest you can find—they should be deep red and firm, not mushy. If they're out of season, frozen raspberries (thawed) work in a pinch, but they won't have that same bright pop of color.
Store the bakers chocolate in a cool, dry place for up to 12 months—it's shelf-stable but best used fresh. The butter and eggs should be used within a week of opening for best results. Once baked, these cakes are best served immediately, but you can reheat them in the microwave for 10-15 seconds to revive that molten center. For make-ahead prep, bake the cakes without the chocolate center, store them at room temperature, then add the ganache just before serving—game-changer for dinner parties. The ganache itself keeps for up to 3 days in the fridge, so you can prep it ahead and reheat it gently before assembling.
Why You'll Love This Recipe
- Five-Ingredient Magic: I swear by this recipe because it’s that simple—just melt butter, mix in chocolate, crack eggs, and fold in flour. No sifting, no measuring cups cluttering your counter, just pure, effortless baking.
- Rich Without Guilt: That first bite of molten chocolate center? It’s like dessert stole my heart. The baker’s chocolate adds depth, while the sugar and butter keep it velvety smooth—no weird aftertaste, just pure, satisfying indulgence.
- Date Night Ready: Serve it warm with vanilla ice cream, dusted with powdered sugar, and suddenly you’ve got a restaurant-worthy dessert that took less time than scrolling through takeout menus. (Yes, even on a Tuesday night.)
- Budget-Friendly Luxury: A single bar of baker’s chocolate and a stick of butter stretch across multiple cakes—perfect for feeding a crowd or saving leftovers for breakfast (trust me, it’s a thing). Plus, eggs and flour? Pantry staples that won’t break the bank.
Step-by-step instructions for bakers chocolate lava cake
Here's how to create decadent molten centers with a perfectly set exterior—every time.
Melt Chocolate and Butter for the Ganache
Place the 8 oz Bakers Chocolate and 0.5 cup Unsalted Butter in a heatproof bowl set over a saucepan of gently simmering water. Stir occasionally until completely melted and smooth—this should take about 5 minutes. The mixture should be glossy and free of any graininess, indicating the chocolate has fully dissolved.
Remove from heat and let cool slightly for 2-3 minutes while you prepare the cake batter. This step is crucial—if the ganache is too hot when added to the cream, it won't set properly in the center. I like to stir in 1 tbsp Vanilla Extract at this stage to infuse the ganache with flavor while it cools.
Whisk Eggs and Sugar for Lightness
In a separate bowl, whisk together the 2 whole Large Eggs and 0.75 cup Granulated Sugar until the mixture is pale, thick, and nearly doubles in volume—this should take about 3-4 minutes of vigorous whisking. You'll see ribbons form when you lift the whisk. This process incorporates air, which creates the cake's tender crumb and helps it rise properly.
Add 0.25 cup Cocoa Powder and 0.25 tsp Salt to the egg mixture and whisk until just combined. The batter should be smooth and glossy. Here's the thing—don't overmix or you'll develop gluten in the flour later, resulting in a dense cake instead of the light, airy texture we want.
Combine Dry Ingredients and Fold Gently
Sift the 0.5 cup All-Purpose Flour into the egg mixture and gently fold it in using a spatula, being careful not to deflate the batter. The goal is to create just enough structure to hold the cake together while keeping it light. Add the cooled chocolate mixture and fold until evenly distributed throughout the batter.
Divide the batter evenly among 4 (6-ounce) ramekins, filling them about ¾ full. Tap each ramekin gently on the counter to release any air bubbles. This step ensures your cakes rise evenly and don't overflow in the oven. Place the ramekins in the refrigerator for 15 minutes to help them set slightly before baking.
Bake Until Golden with Molten Centers
Preheat your oven to 425°F and place a baking sheet on the middle rack. Arrange the chilled ramekins on the baking sheet. Bake for 10-12 minutes until the edges are golden brown and the tops spring back when lightly touched. The centers should still look slightly underdone—this is where the magic happens.
Remove from the oven and immediately stir the 0.5 cup Heavy Cream until frothy. Spoon 1 tablespoon over each cake and return to the oven for 30 seconds to let the cream set slightly. The contrast of warm cake and cool cream creates that perfect lava effect when you cut into it.
Serve with Raspberry Garnish
Let the cakes cool for 1-2 minutes before serving. Dust generously with 0.25 cup Powdered Sugar and top with 0.5 cup Fresh Raspberries for a pop of color and acidity that cuts through the richness. The raspberries should be fresh and chilled—this prevents them from melting into the warm cake.
Cut into each cake to reveal that glorious molten center. The exterior should be just set enough to hold its shape, while the interior remains gooey and rich. Serve immediately with vanilla ice cream or whipped cream for the ultimate indulgence. The contrast of temperatures and textures makes this dessert truly unforgettable.
Pro Tips For Making Bakers Chocolate Lava Cake
- MELT THE CHOCOLATE RIGHT: Heat the bakers chocolate and butter together over low heat—low, not medium—until the butter just starts to foam, then remove from heat and let the chocolate melt in the residual warmth. I used to blast it on high and end up with seizing chocolate or burnt butter. This way, you avoid lumps and keep the flavor pure.
- WHISK EGGS UNTIL THICK: Beat the eggs and sugar until the mixture is pale, thick, and ribbon-like—it should coat the back of a spoon and hold its shape for a second. This isn’t just about sweetness; it’s what makes the cake tender and the lava center actually lava. Skip this, and you’ll get a dense, sad cake with a lukewarm goo.
- DON’T OVERMIX THE BATTER: Fold in the flour last, and do it just enough to combine—think of it like gently turning over a blanket, not kneading dough. Overmixing develops gluten, which turns your silky lava cake into a chewy brick. If you’re nervous, use a rubber spatula and stop when there’s no more flour streaks.
- BAKE UNTIL THE EDGES ARE SET: Pull the cakes out when the edges are firm but the center still jiggles like a wobbly Jell-O shot—about 10-12 minutes total, depending on your oven. If you wait for the cake to fully spring back, you’ll end up with a solid chocolate block instead of a molten surprise. Trust the jiggle.
Make-ahead tips for this dish
Batter Prep Ahead
Mix the cake batter up to 24 hours in advance and store it in an airtight container in the fridge. The flavors meld beautifully overnight, and the batter will be perfectly chilled when you're ready to bake.
Just let it sit at room temperature for 10 minutes before dividing into ramekins to prevent condensation from forming. I like to label the container with the date—this batter keeps well for 1 day before baking. 💫
Ganache Prep
Prepare the chocolate ganache 1 day ahead and store it in a sealed container at room temperature. It'll thicken slightly but can be reheated gently in a microwave (30-second intervals) until smooth.
For extra convenience, make the ganache 2 days ahead and refrigerate it—just let it come to room temperature before using. This is especially helpful for dinner parties when you want to assemble everything last-minute. 🍫
Ramekin Prep
Grease your ramekins with butter or line them with parchment circles the night before. This prevents sticking and makes assembly faster on baking day. Store them in a sealed container or bag to keep them clean.
If using parchment, cut circles slightly larger than the ramekin diameter and press them gently into the bottom. This trick saves time and ensures perfect release when serving. ✨
Chilled Batter Shortcut
Skip the 15-minute fridge chill by placing your filled ramekins in the freezer for 5 minutes before baking. The rapid cooling helps set the batter faster, reducing the risk of overflow. Just
Garnish Prep
Wash and dry the raspberries 1 day ahead and store them in a sealed container in the fridge. This keeps them fresh and ready to garnish. For powdered sugar, sift it into a small bowl with a fine-mesh strainer to remove any lumps. Store both in airtight containers near your baking station. A quick sprinkle of flaky salt alongside the powdered sugar adds a sophisticated touch without extra effort. 🍓
Timing for Parties
Bake the cakes 30 minutes before serving and keep them warm in a 200°F oven while you finish other dishes. The residual heat maintains the perfect texture. For a dramatic presentation, transfer the ramekins to individual plates just before serving.
This keeps the cakes looking fresh and allows guests to cut into them tableside for that wow factor. 🌟
Nutrition facts
Frequently asked questions
Why does my lava cake center stay firm instead of molten?
This usually happens when the cakes bake too long or the oven temperature is too high. The secret is baking at 425°F for exactly 10-12 minutes—the center should look slightly underdone. For extra insurance, chill the ramekins for 15 minutes before baking, which helps create that perfect lava effect when the warm cake meets the cool center.
Can I make this recipe without ramekins?
Use 6-ounce oven-safe ceramic cups or even small oven-safe bowls. Just make sure they're heat-resistant up to 425°F. For a fun twist, try individual mugs that double as serving dishes—just grease them well first to prevent sticking. The key is using containers that hold 6 ounces of batter for proper baking.
How do I fix a cracked lava cake?
Cracks happen when the cake bakes unevenly, but they're actually a good sign—they reveal the molten center! If you want to minimize them, chill the batter slightly longer (up to 20 minutes) before baking. For presentation, use the cracks to your advantage by dusting them with extra powdered sugar or adding a dollop of whipped cream along the crack.
What's the best way to reheat leftover lava cake?
Microwave for 10-15 seconds on medium power to revive the molten center. For a more even heat, wrap the cake in a damp paper towel and microwave for 5 seconds at a time. Never reheat in the oven—it'll dry out the cake. The best approach is to serve these immediately, but if you must reheat, do it quickly!
Can I substitute bakers chocolate with regular chocolate bars?
Not recommended! Bakers chocolate has a higher cocoa content and no added sugar, which gives the perfect rich flavor and texture. If you must substitute, use 8 oz of high-quality dark chocolate (70% cocoa or higher) and reduce the cocoa powder by 1 tablespoon. The result won't be identical, but it'll still be delicious—just slightly sweeter.