
Desserts
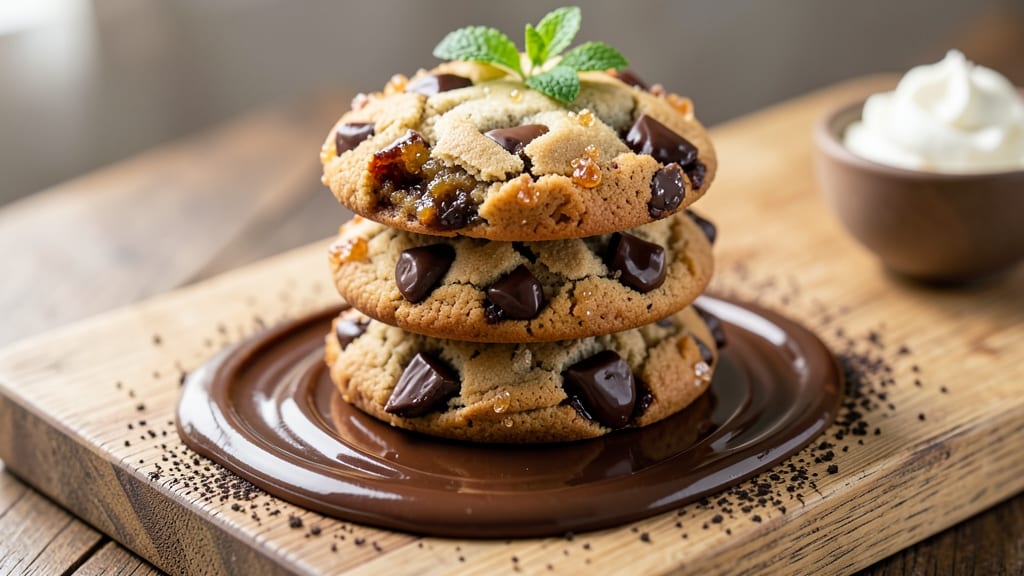
This Baker's Death by Chocolate Cookie recipe delivers triple-layered decadence with a hidden espresso boost that deepens the chocolate flavor without tasting like coffee. 💫 The secret lies in the precise balance of rich dark chocolate, toasted espresso powder, and a crispy outer shell that gives way to a fudgy center—each bite is a revelation of texture and intensity.
The recipe begins with a foolproof dough that combines butter, sugar, and espresso-infused chocolate for maximum flavor depth. Chilling the dough ensures perfect texture, while baking at the right temperature creates that signature crispy exterior and gooey interior.
The result is a cookie so rich and complex, it lives up to its name—every bite feels like a dessert experience.
What makes these cookies truly special is the espresso boost, which enhances the chocolate's natural bitterness without overpowering it. The triple-layered crunch—from toasted nuts in the base to chocolate chunks in the middle—adds an unexpected depth that keeps you reaching for another bite.
Serve warm with a dusting of powdered sugar or a scoop of vanilla ice cream for the ultimate indulgence.
Perfect for holidays, dinner parties, or satisfying a serious chocolate craving, these cookies are worth the effort. The recipe scales easily, so you can make a batch to share—or keep them all for yourself. Let's get baking!
Ingredients for baker's death by chocolate cookie
Rich butter, deep chocolate, and espresso powder—these are the stars of your triple-layered indulgence.
| Ingredient | Amount | Notes |
|---|---|---|
| Unsalted Butter 🧈 | 1 cup | Cold, cut into cubes for best texture |
| Granulated Sugar 🍚 | 1 ½ cups | Superfine preferred for smoother texture |
| Light Brown Sugar 🍚 | ½ cup | Packed firmly for accurate measurement |
| Dark Chocolate Chunks 🍫 | 1 ½ cups | 70% cacao minimum for rich flavor |
| Instant Espresso Powder ☕ | 2 tbsp | High-quality for deep espresso flavor |
| Large Eggs 🥚 | 2 whole | Room temperature for even mixing |
| Vanilla Extract 🌿 | 1 tbsp | Pure Madagascar bourbon preferred |
| All-Purpose Flour 🌾 | 2 ½ cups | Sifted for light, airy texture |
| Baking Powder 🧂 | ½ tsp | Fresh for proper leavening |
| Salt 🧂 | ½ tsp | Fine sea salt for balanced flavor |
| Toasted Chopped Walnuts 🌰 | 1 cup | Lightly toasted for enhanced flavor |
| Powdered Sugar 🍚 | 1 cup | For dusting finished cookies |
| Flaky Sea Salt 🧂 | 1 tsp | For finishing and contrast |
The chocolate chunks make all the difference—Ghirardelli or Valrhona are my go-to brands for that melt-in-your-mouth quality. Costco or Williams Sonoma often have great deals on premium chocolate, but even the grocery store's 70% cacao bar works in a pinch. Toast your walnuts in a dry pan until fragrant—about 3-4 minutes—then chop them while still warm. The espresso powder? Starbucks or Lavazza are reliable, but any instant espresso will do. Pro tip: Measure your butter cold and cut it into even cubes for perfect texture.
No dark chocolate chunks? Chop a 12-ounce bar yourself—just make sure it's at least 65% cacao. Short on walnuts? Pecans or hazelnuts work beautifully, but toast them first. Running low on instant espresso? Dissolve 2 tablespoons of espresso beans in 2 tablespoons of hot water and let it cool before mixing. The powdered sugar can be swapped for confectioners' sugar if that's what you have on hand, but it's slightly finer for dusting. For a nut-free version, omit the walnuts entirely—just don't tell anyone I said that.
Store dough in an airtight container in the fridge for up to 48 hours—the flavor deepens overnight. Baked cookies keep their crunch for 5 days in an airtight container at room temperature, but they're best enjoyed fresh. Freeze unbaked dough balls for up to 3 months—bake straight from frozen, adding 1-2 minutes to the time. For extra decadence, store finished cookies in a sealed container with a vanilla bean to keep them moist and aromatic.
Why You'll Love This Recipe
- No Mixer Needed: I swear by this recipe when I’m too tired to cream butter and sugar—just use a fork to mash it all together. The dough still comes out rich and tender, and honestly? The effort is half the work of most cookie recipes.
- Espresso Kicks It Up: That little pinch of instant espresso powder isn’t just for show—it deepens the chocolate flavor so much, you’ll forget it’s there until you take a bite. It’s like a secret handshake between the chocolate chunks and the butter.
- Freezer-Friendly Fudge: Between us, these cookies only get better after a few days. I make a double batch, let them cool, then stash half in the freezer. Pull one out anytime—no thawing needed—and it’s like fresh-baked magic.
- Budget Luxury: Good chocolate chunks and real butter don’t have to break the bank. This recipe uses just enough to feel indulgent without requiring a grocery haul. Plus, the dough keeps for days, so I’m not tempted to overbuy. Smart, satisfying, and still feels like a treat.
Step-by-step instructions for triple-layered chocolate cookies
Here's how to create decadent cookies with a crispy exterior, gooey center, and espresso-kissed depth.
👨🍳 Step 1: Create the Espresso-Infused Chocolate Dough Layer
In a stand mixer fitted with the paddle attachment, cream together the 1 cup unsalted butter and both sugars (1.5 cups granulated sugar, 0.5 cup light brown sugar) on medium speed for 4-5 minutes. You'll notice the mixture lighten and nearly triple in volume—this is crucial for that signature crackly top.
Reduce speed to low and add the 2 whole large eggs one at a time, mixing just until combined after each addition. Then stir in the 1 tbsp vanilla extract and 2 tbsp instant espresso powder. The espresso powder might seem odd, but it deepens the chocolate flavor and balances the sweetness beautifully. Mix until just combined—overmixing develops gluten and makes cookies tough.
👨🍳 Step 2: Build the Chocolate-Walnut Crunch Layer
In a separate bowl, whisk together the 2.5 cups all-purpose flour, 0.5 tsp baking powder, and 0.5 tsp salt. Gradually add this dry mixture to the wet ingredients, mixing on low speed just until the dough comes together. Don't overmix—you should still see small flour streaks.
Remove the bowl from the mixer and fold in the 1.5 cups dark chocolate chunks and 1 cup toasted chopped walnuts using a silicone spatula. The walnuts add a satisfying crunch that contrasts perfectly with the soft cookie interior. Divide the dough into three equal portions (about 10 ounces each) and flatten each into a ¼-inch thick disk. Wrap two of the disks tightly in plastic wrap and refrigerate for 30 minutes while you prepare the final layer.
🍳 Step 3: Assemble the Triple-Layer Cookies
Preheat your oven to 350°F and line two baking sheets with parchment paper. Take one of the chilled dough disks and place it on a floured surface. Roll it out to ⅛-inch thickness using a rolling pin. Cut into 2-inch circles using a round cutter and transfer to the prepared baking sheets, spacing them 2 inches apart. Repeat with the second chilled disk, but this time cut into 1½-inch circles for the middle layer.
For the top layer, roll out the remaining dough to ⅛-inch thickness and cut into 2-inch circles again. Gently place a 1½-inch circle on top of each 2-inch circle, then add the final 2-inch circle on top. Press lightly to adhere the layers. Bake for 12-14 minutes until the edges are golden brown and the centers still look slightly underdone—they'll firm up as they cool.
🔪 Step 4: Finish with Powdered Sugar and Flaky Salt
Remove the cookies from the oven and let them cool on the baking sheets for 5 minutes before transferring to a wire rack. While still warm, dust generously with the 1 cup powdered sugar using a fine-mesh sieve. The powdered sugar creates that signature "snowy" finish while the cookies are still soft.
Finally, sprinkle each cookie with a pinch of flaky sea salt for a perfect sweet-salty contrast. Let them cool completely before serving—this allows the powdered sugar to set and the flavors to meld. The result? A triple-layered masterpiece with crispy edges, gooey chocolate pockets, and that hidden espresso boost that makes every bite unforgettable.
Pro Tips For Making Baker'S Death By Chocolate Cookie
- Chill the Dough First: I used to skip this, but trust me—rolling the dough into balls and refrigerating them for 30 minutes makes a real difference. The cookies spread less, hold their shape better, and develop deeper flavor while baking.
- Use Room-Temp Butter: Cold butter creates tough cookies, but don’t melt it either. Let the butter sit out for 30-45 minutes until it’s soft but still holds its shape—like a warm stick of butter, not puddle-y. This keeps the cookies tender yet crisp-edged.
- Don’t Overmix the Dough: Once you fold in the chocolate chunks, stop mixing as soon as they’re evenly distributed. Overworking the dough makes cookies dense and chewy instead of the perfect balance of crispy and fudgy.
- Toast the Chocolate Chunks: Spread the dark chocolate chunks on a parchment-lined tray and bake at 300°F for 5-7 minutes until fragrant and slightly softened. This intensifies their flavor and prevents them from melting too fast during baking.
Serving suggestions for baker's death by chocolate cookie
Warm Coffee Pairing
These cookies practically beg for a steaming cup of coffee to cut through their richness. I always serve them with a medium-roast Arabica—something like Starbucks Sumatra or Blue Bottle's California Blend—because the caramel and nutty notes complement the espresso boost in the cookies.
For a true indulgence, try a cortado with a splash of vanilla syrup to echo the vanilla in the recipe. ☕
Ice Cream Contrast
The contrast of warm cookies and cold ice cream is irresistible. Vanilla bean ice cream (like Breyers Premium or Häagen-Dazs) balances the chocolate perfectly, while coffee-flavored ice cream (such as Ben & Jerry's Coffee Caramel Swirl) amplifies the espresso notes.
For a lighter option, try coconut milk ice cream—its subtle sweetness lets the cookie's flavors shine. Serve cookies slightly warm for the best texture combo.
Dessert Plating
For a restaurant-worthy presentation, arrange cookies on a slate board or wooden tray with a dusting of powdered sugar around them. Add a few fresh raspberries for color contrast and a drizzle of dark chocolate sauce (melt Ghirardelli 72% bar with 1 tsp heavy cream).
Garnish with edible gold leaf for a luxurious touch—trust me, it elevates everything. 💫
Gift-Worthy Packaging
Wrap individual cookies in parchment paper, tie with twine, and place them in a clear cellophane bag with a ribbon closure. Add a handwritten note or a small chocolate chip as a favor.
For bulk gifts, use mason jars with a cookie cutter lid—it’s both practical and adorable. I’ve even seen bakeries use mini cookie boxes with a sprinkle of powdered sugar on top for a professional finish.
Leftovers Strategy
Store cookies in an airtight container with a silica gel packet to keep them crispy for up to 5 days. Reheat in a 350°F oven for 3-4 minutes to restore that warm, gooey center.
For a quick fix, pop them in the microwave for 10 seconds—just don’t overdo it, or they’ll turn rubbery. Pair with a cold glass of milk to reset your palate between bites.
Seasonal Twists
In summer, serve cookies chilled with a scoop of mint chip ice cream and a sprinkle of crushed pistachios. For holiday gifting, add a candy cane or peppermint stick on the side for a festive touch.
In winter, warm them with a hot chocolate drizzled with sea salt caramel—it’s like a cozy hug in cookie form. 🌟
Frequently asked questions
Why does this recipe use espresso powder instead of coffee?
The espresso powder intensifies the chocolate flavor without adding moisture that would make the cookies spread too much. Just 2 tablespoons enhances the depth of the chocolate, creating that signature "death by chocolate" experience. Regular coffee would add too much liquid and weaken the cookie structure.
Can I make these cookies without a stand mixer?
Use a sturdy mixing bowl and hand mixer (or even a wooden spoon) to cream the butter and sugars. Work in 2-minute intervals to avoid overheating your arms. The key is to mix until light and fluffy—about 5-7 minutes total—just like with a stand mixer.
What's the secret to getting the perfect triple-layer texture?
Chilling the dough disks for 30 minutes before assembly prevents spreading and helps the layers hold together. Use a ¼-inch thick rolling pin guide to maintain even layers. Press gently when stacking—too much pressure will squish the chocolate chunks and walnuts.
Can I substitute the walnuts for something else?
Yes! Try pecans, hazelnuts, or even pretzels for a salty crunch. Toast them first (3-4 minutes in a dry pan) to enhance flavor. For nut-free versions, omit them entirely—the chocolate layers will still be delicious, just without the crunch contrast.
How do I store these cookies to keep them fresh?
Store in an airtight container at room temperature for 5 days—they'll stay crispy. For longer storage, freeze unbaked dough balls for 3 months or baked cookies for 2 months. Reheat baked cookies at 350°F for 3-4 minutes to restore their gooey center.