
Desserts
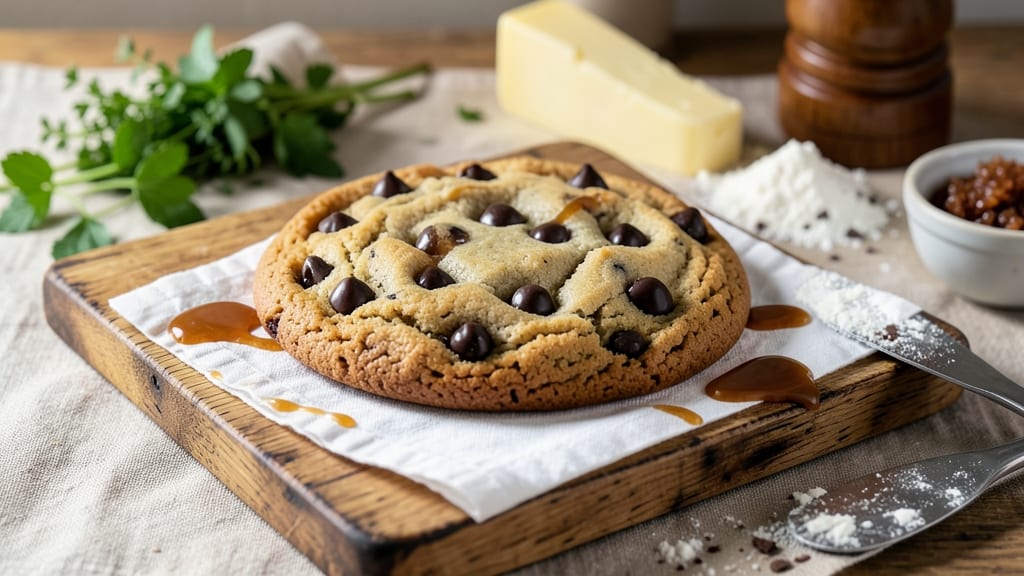
This basic chewy chocolate chip cookie recipe transforms ordinary cookies into something extraordinary—thanks to one game-changing ingredient: brown butter. 🔥 The nutty, caramelized depth from browned butter elevates every bite, creating cookies with crisp edges, chewy centers, and pockets of melty chocolate that make them impossible to resist.
I perfected this recipe after years of baking experiments, and it’s now my go-to for foolproof, restaurant-quality cookies at home.
The secret lies in the technique: brown butter adds complexity without overpowering the classic chocolate chip flavor, while a precise mix of brown and white sugar ensures the perfect balance of chew and crisp.
Chilling the dough for 30 minutes (a step I can’t emphasize enough) prevents spreading and intensifies the flavor. This isn’t just another cookie recipe—it’s a method that delivers results every time, with minimal fuss and maximum impact.
By the time these cookies emerge from the oven, you’ll have golden-brown edges, soft yet sturdy centers, and chocolate chips that stay gooey even after cooling. The aroma alone will have everyone gathering in the kitchen, and the first bite will confirm why this recipe is worth the effort.
Whether you’re baking for a crowd or treating yourself, these cookies are the kind of dessert that turns ordinary moments into something special.
Ready to master the art of chewy chocolate chip cookies? The process is straightforward, and the payoff is undeniable. Let’s get started—your taste buds will thank you.
Ingredients for basic chewy chocolate chip cookie
Brown butter and chocolate chips—just ten ingredients for cookies that taste like a bakery secret.
| Ingredient | Amount | Notes |
|---|---|---|
| Unsalted Butter 🧈 | 1 ½ cups | Browned for nutty depth |
| Granulated White Sugar 🍚 | ¾ cup | Standard white sugar works |
| Packed Brown Sugar 🍚 | ¾ cup | Light brown preferred |
| Large Eggs 🥚 | 2 whole | Room temperature preferred |
| Vanilla Extract 🌿 | 2 tsp | Pure vanilla preferred |
| All-Purpose Flour 🌾 | 2 ½ cups | Sifted for best texture |
| Baking Soda 🧂 | 1 tsp | Diamond Crystal preferred |
| Salt 🧂 | 1 tsp | Kosher or sea salt |
| Semi-Sweet Chocolate Chips 🍫 | 2 cups | Enjoy Life brand for allergies |
| Flaky Sea Salt 🧂 | ½ tsp | For finishing cookies |
The butter is non-negotiable. Grab unsalted from the dairy case—Land O’Lakes or Plugrá both brown beautifully. If you’re nervous about browning butter, Trader Joe’s pre-made brown butter saves time. For the chocolate chips, Ghirardelli or Enjoy Life are my go-tos—Ghirardelli for classic flavor, Enjoy Life if you’re avoiding allergens. The vanilla extract should be pure, not imitation—Nestlé or McCormick are solid choices. And the sugars? Light brown over dark for a subtle molasses flavor that doesn’t overpower.
No brown butter? Regular butter plus 1 tsp brown sugar mimics the caramel notes, though it’s not the same. Short on vanilla? Vanilla bean paste at half the amount adds flecks of real vanilla. The flour must be sifted—King Arthur or Gold Medal are reliable brands. For chocolate chips, chopped chocolate bars work in a pinch, but they’ll melt unevenly. The flaky sea salt? Maldon or Jacobsen are perfect, but any coarse salt will do—just taste before sprinkling.
Brown butter loses its magic fast, so make it fresh or store it in the fridge for 1 week. The dough keeps for 3 days wrapped in plastic, but it’s best baked fresh. Baked cookies? Store in an airtight container for 5 days—they’ll stay chewy, not dry. Freeze dough balls for 3 months**; bake straight from frozen, adding 1-2 minutes to the time. Pro tip: Portion dough into 1.5 oz balls for perfect cookies every time.
Why You'll Love This Recipe
- No-Mess Mixing: I swear by the "cream everything first" trick—just butter, sugars, and eggs in one bowl, then fold in the dry stuff. No food processor, no extra bowls, and no sticky fingers. My kitchen looks cleaner than it has any right to after baking these.
- Chewy Magic: That crispy edge with the soft, gooey center? It’s all in the brown sugar and underbaking. The vanilla ties it together like a warm hug, and the chocolate chips melt just enough to make every bite feel like a reward.
- Party in a Jar: Freeze half the dough in balls for when you’re too tired to bake. Toss a batch in the oven while you’re roasting dinner or setting the table—no one will guess they’re last-minute. (Yes, even on a Tuesday night.)
- Budget-Friendly Staples: Butter, sugar, eggs—these are the ingredients I already have. No specialty items, no markup, and they last forever. Plus, the leftovers? They’re the reason I always bake a double batch.
Step-by-step instructions for brown butter chocolate chip cookies
Here's how to make chewy, flavor-packed cookies with that nutty brown butter magic.
🔥 Step 1: Brown the Butter for Maximum Flavor
Start by melting the 1.5 cups unsalted butter in a light-colored saucepan over medium heat. Watch closely as it foams and bubbles—when it turns golden brown with nutty aroma (about 5-7 minutes), immediately remove from heat. Let it cool for 2 minutes before pouring into a bowl.
This browning step is everything—it adds deep, toasty flavor that transforms these from basic cookies to something special. Don't rush it, but don't let it burn either. You want that rich, caramelized color and aroma before proceeding.
👨🍳 Step 2: Mix Wet Ingredients and Cool Completely
To the browned butter, add the 0.75 cup granulated white sugar, 0.75 cup packed brown sugar, and 2 whole large eggs. Mix until smooth, then stir in the 2 teaspoons vanilla extract. Let the mixture cool completely to room temperature—this prevents the butter from melting when we add it to the flour later.
I like to spread this mixture in a thin layer in the fridge for 10 minutes while I prep the rest. This cooling step is crucial—it ensures your cookies hold their shape instead of spreading into flat pancakes. Trust me, your cookies will thank you.
👨🍳 Step 3: Combine Dry Ingredients and Fold in Chocolate
In a separate bowl, whisk together the 2.5 cups all-purpose flour, 1 teaspoon baking soda, and 1 teaspoon salt. Gently fold these dry ingredients into the cooled butter mixture until just combined—you should still see some flour streaks. Remove the bowl from the mixer and fold in the 2 cups semi-sweet chocolate chips by hand.
Here's the thing—overmixing develops gluten, which makes cookies tough. We want that tender, chewy texture, so mix just until everything comes together. The chocolate chips should be evenly distributed throughout the dough, with a few larger chunks visible in each cookie.
⏰ Step 4: Chill the Dough (The Secret to Perfect Cookies)
Cover the bowl with plastic wrap and refrigerate for at least 1 hour (I prefer 2 hours or even overnight). This chilling step does three critical things: it firms up the butter so cookies hold their shape, allows flavors to meld, and prevents excessive spreading in the oven.
Pro tip: If you're short on time, pop the dough in the freezer for 30 minutes—it works in a pinch. Just don't skip this step entirely. Cold dough means better cookies, no exceptions. While it chills, preheat your oven to 350°F and line two baking sheets with parchment paper.
🔥 Step 5: Bake to Golden Perfection
Scoop the chilled dough into 2-tablespoon portions (I use a cookie scoop for uniform size) and place them 3 inches apart on the prepared baking sheets. Bake for 11-13 minutes until the edges are golden brown but the centers still look slightly underdone—they'll continue cooking on the hot pan.
As soon as they come out of the oven, sprinkle each cookie with a pinch of 0.5 teaspoon flaky sea salt while they're still warm. Let them cool on the baking sheet for 5 minutes before transferring to a wire rack. The salt enhances all those caramelized flavors and gives you that bakery-style finish.
Pro Tips For Making Basic Chewy Chocolate Chip Cookie
- Brown Butter First: I learned this the hard way—melted butter straight from the fridge makes for flat, greasy cookies. Brown the butter until it smells nutty (about 5-6 minutes over medium heat), then cool it completely before mixing. The flavor depth is worth the extra 10 minutes.
- Use Cold Eggs: Room-temperature eggs? Skip it. Cold eggs keep the dough firm enough to hold its shape without spreading too much. Crack them into an ice bath for 5 minutes if your kitchen’s warm—this guarantees chewy centers, not gooey messes.
- Avoid Overmixing: The moment the dough looks shaggy and pale, stop stirring. Overmixing develops gluten, turning your cookies into crackers. Scoop immediately after mixing—lumpy dough is fine, tough dough is not.
- Chill Dough for 24 Hours: I was skeptical until I tried it: wrap the dough in plastic and refrigerate overnight. The flavors meld, and the cookies spread just enough for thick edges without burning. (Yes, even if you’re impatient like me.)
Make-ahead tips for this dish
Dough Prep Ahead
Make the dough up to 3 days in advance and store it in an airtight container in the fridge. The flavors deepen over time, and chilling prevents spreading.
I like to portion the dough into 1.5 oz balls (using a kitchen scale) and store them in a single layer on a tray, then transfer to the container. This way, you can bake straight from frozen or fridge—just add 1-2 extra minutes if using frozen dough. 🧊
Freezer-Friendly Dough
For long-term storage, freeze the dough balls in a single layer on a parchment-lined tray for 1 hour before transferring to a freezer bag. This prevents sticking. When ready to bake, let them thaw on the counter for 10-15 minutes before baking.
The texture stays perfect—no need to defrost completely. I keep a stash of these in my freezer for last-minute cravings. ❄️
Baked Cookies Storage
Store freshly baked cookies in an airtight container at room temperature for up to 5 days. The chewy texture holds up better than crispy cookies, but avoid stacking them too high—they’ll get soggy.
For longer storage, freeze baked cookies in a single layer, then transfer to a bag. Reheat in the oven at 300°F for 3-5 minutes to restore chewiness. 🍪
Portion Control Pro Tip
Use a 2-tablespoon cookie scoop (or a 1.5 oz portion) for consistent size. I weigh my dough balls to ensure uniformity—40g each gives perfect cookies. Label your stored dough with the date to track freshness.
If you’re making a big batch, divide the dough into 4 portions and freeze 3 for later. This keeps your fridge from getting crowded. 📅
Make-Ahead Baking Schedule
Plan your baking day like a pro: Day 1, make the dough and chill overnight. Day 2, scoop and freeze dough balls. Baking Day, pull out what you need and bake fresh.
This schedule ensures you always have cookies ready for guests or cravings. I often bake a batch on Sundays and freeze extras for the week. 💪
Reheating for Maximum Chew
Microwave reheating kills chewiness—always use the oven. Place cookies on a baking sheet at 300°F for 3-5 minutes until warmed through. For a crispy edge, broil for 30 seconds at the end.
If you’re reheating from frozen, add 1 extra minute. The oven method preserves that perfect texture you worked so hard to achieve. 🔥
Frequently asked questions
Why does brown butter make these cookies taste different?
Brown butter adds a rich, nutty depth that regular butter can't match. The caramelization creates complex flavors that complement the chocolate chips beautifully. This step transforms ordinary cookies into something truly special—worth the extra effort!
Can I substitute regular butter for brown butter?
Yes, but you'll lose that signature flavor. Use 1.5 cups unsalted butter plus 1 teaspoon brown sugar> to mimic some of the caramel notes. For best results, brown the butter fresh—it's the secret to that bakery-quality taste!
How do I prevent my cookies from spreading too much?
Chilling the dough for at least 1 hour (or overnight) is key! Cold butter holds its shape better. Also, scoop 2-tablespoon portions and bake at 350°F—don't overbake. The edges should be golden while centers stay soft.
What's the best way to store these cookies?
Keep them in an airtight container at room temperature for up to 5 days. For longer storage, freeze dough balls for 3 months> or baked cookies for 1 month. Reheat in the oven at 300°F for 3-5 minutes to restore chewiness!
Can I make these cookies gluten-free?
Yes, but results may vary. Replace the 2.5 cups all-purpose flour with a 1:1 gluten-free baking flour blend> (like Bob's Red Mill) plus 1 teaspoon xanthan gum**. Expect slightly denser cookies—adjust baking time as needed.