
Desserts
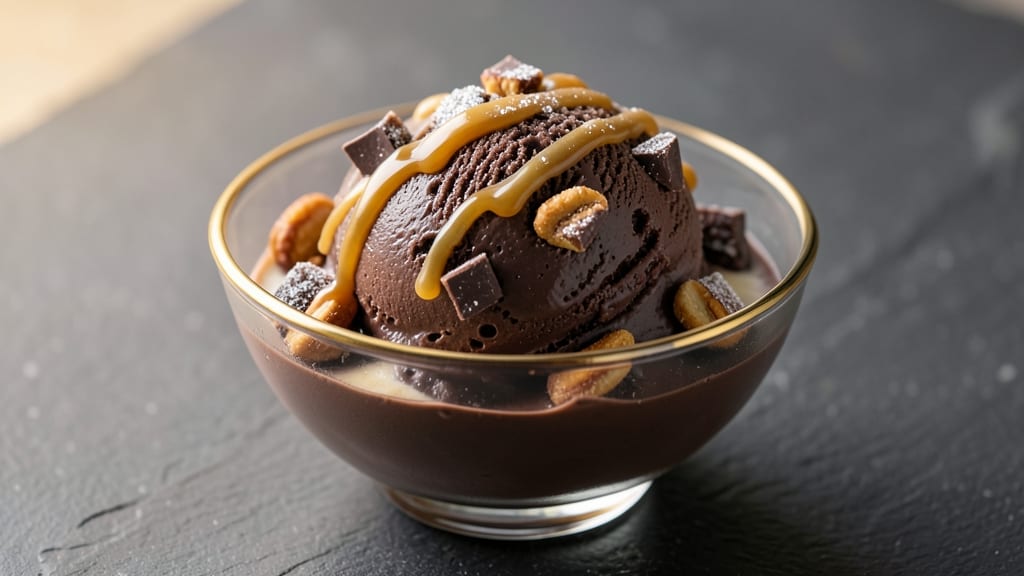
This Belgian chocolate ice cream recipe delivers restaurant-quality richness without the grainy texture that ruins so many homemade versions. The secret lies in using high-quality Belgian cocoa and a precise tempering technique that creates velvety smoothness in every spoonful.
I developed this recipe after years of testing—it’s the one that finally earned me compliments instead of "Is this from a store?" questions.
The foundation starts with a simple but crucial method: melting and cooling the chocolate to the perfect temperature before incorporating it into the base. This ensures the cocoa dissolves completely, eliminating those dreaded gritty bits.
Belgian cocoa brings deeper, more complex flavors than regular cocoa powder—think layers of dark chocolate, caramel, and even a hint of spice. The recipe also includes a touch of heavy cream for ultra-smooth texture, though I’ll show you how to adapt it for lighter or vegan versions.
What you’ll end up with is decadent ice cream that’s creamy, intensely chocolatey, and perfectly balanced—not too sweet, not too bitter. The texture is silky, with no ice crystals, and the flavor develops even more richness as it ages in the freezer.
This isn’t just dessert; it’s an experience that rivals the best Belgian chocolatiers. Ready to master it?
Whether you stick to classic Belgian chocolate or experiment with praline, hazelnut, or even a splash of bourbon, the technique remains the same. The instructions walk you through every step—from tempering to churning—so you’ll get foolproof results every time. Let’s get started on creating something truly special.
Ingredients for belgian chocolate ice cream
High-quality Belgian cocoa and tempered chocolate create velvety, restaurant-worthy ice cream—no graininess in sight.
| Ingredient | Amount | Notes |
|---|---|---|
| High-Quality Belgian Cocoa Powder 🍫 | ½ cup | Ensure 100% cocoa content, no additives |
| Heavy Cream 🥛 | 2 cups | Full-fat for ultra-smooth texture |
| Whole Milk 🥛 | 1 cup | Warmed for better emulsification |
| Granulated Sugar 🍚 | 1 cup | Fine grain preferred for dissolution |
| Dark Chocolate Chips 🍫 | 1 ½ oz | 70% cocoa, chopped finely |
| Vanilla Extract 🌿 | 2 tsp | Pure Madagascar vanilla preferred |
| Salt 🧂 | ¼ tsp | Fine sea salt for balance |
| Unsalted Butter 🧈 | ¼ cup | Cold, cubed for tempering |
| Egg Yolks 🥚 | 4 whole | Fresh, room temperature |
| Corn Syrup 🍯 | ¼ cup | Light corn syrup for texture |
| Heavy Whipping Cream 🥛 | 1 cup | For final churning consistency |
The Belgian cocoa is non-negotiable here. Valrhona or Cacao Barry are industry standards, but Ghirardelli Belgian cocoa works beautifully too. Look for packages labeled "100% cocoa"—anything with fillers or additives will compromise texture. The dark chocolate chips should be at least 70% cocoa for that authentic Belgian depth. I always buy mine from Whole Foods or specialty chocolate shops where they keep the bars fresh. For the eggs, pasture-raised yolks add richness, but regular eggs work fine if that's what you have. The butter? European-style unsalted (like Plugrá) melts more smoothly than American brands.
No Belgian cocoa? High-quality Dutch-process cocoa is your next best bet, though the flavor won't be identical. Running short on egg yolks? Substitute with 1/4 cup aquafaba per yolk—it mimics the emulsifying properties surprisingly well. For a lighter version, swap half the heavy cream for light cream or coconut milk, though texture will be slightly less luxurious. The corn syrup can be replaced with honey or agave (reduce other liquids by 1 tbsp), but it won't prevent ice crystals as effectively. Pro tip: if you're making this ahead, add 1 tbsp vodka to the mix—it lowers the freezing point for a creamier texture. And trust me on the vanilla—imitation extracts will ruin the flavor profile.
This ice cream develops best after 24 hours in the freezer—patience pays off for that silky texture. Store in an airtight container with parchment between layers to prevent freezer burn. It keeps for up to 2 weeks, though I rarely have leftovers that long. For serving, let it sit at room temperature for 10-15 minutes—it softens beautifully without melting completely. The tempered chocolate base means you can even pipe it into fancy shapes if you're feeling fancy. And if you're making this for a crowd, double the recipe—it disappears faster than you'd think.
Why You'll Love This Recipe
- Here’s the real win: this stuff stays creamy for days. I make a big batch, stash it in the freezer, and pull it out whenever cravings hit. Budget-friendly, zero waste, and always delicious.
- No Churn Magic: I swear by this method—just whisk, freeze, and boom. No ice cream maker needed, no waiting for hours. The Belgian cocoa powder does all the heavy lifting while I sip my coffee and scroll.
- Rich Without Guilt: That first bite? Pure Belgian cocoa depth with just enough sweetness to balance. The dark chocolate chips melt into little pockets of indulgence, but somehow it still feels lighter than most ice creams. (Yes, I’ve compared.)
- Date Night Ready: Serve it straight or drizzle with melted chocolate—either way, it’s fancy enough for guests but simple enough to make last-minute. My partner calls it “restaurant-worthy,” and I just call it “my secret.”
Step-by-step instructions for Belgian chocolate ice cream
This method delivers velvety Belgian chocolate ice cream with deep cocoa flavor and no grainy texture.
Temper the Egg Yolk Base
In a medium saucepan, whisk together the 4 whole egg yolks, 1 cup granulated sugar, 0.25 cup corn syrup, 0.25 tsp salt, and 1 cup whole milk over medium-low heat. Stir constantly until the mixture reaches 160°F and thickens enough to coat the back of a spoon—about 8-10 minutes. This temperature is critical for proper emulsification.
Remove from heat and immediately whisk in the 0.5 cup high-quality Belgian cocoa powder until completely dissolved. The mixture should be smooth and glossy with no lumps. Return the pan to low heat and stir continuously for another 2-3 minutes until it reaches 170°F. This step ensures your ice cream develops that signature Belgian richness without bitterness.
Incorporate Chocolate and Butter
Transfer the warm custard to a heatproof bowl and stir in the 0.25 cup cold unsalted butter, cut into small cubes, until fully melted and incorporated. Add the 1.5 oz dark chocolate chips and 2 tsp vanilla extract, whisking until the chocolate melts completely and the mixture is perfectly smooth. The chocolate should be fully dissolved with no visible flecks.
Cover the bowl with plastic wrap, pressing the wrap directly onto the surface to prevent a skin from forming. Refrigerate for at least 4 hours or until completely chilled—this resting period allows flavors to meld and the texture to stabilize. I like to place it in the fridge overnight for even better results.
Churn the Ice Cream
Pour the chilled custard into an ice cream maker and churn according to the manufacturer's instructions, typically 20-25 minutes, until thick and creamy with a soft-serve consistency. The ice cream should pull away from the sides of the bowl and hold its shape when scooped. Don't skip this step—proper churning is what creates that signature Belgian texture.
While churning, I like to add the 2 cups heavy cream during the last 5 minutes of churning. This creates a lighter, airier texture while maintaining the rich chocolate base. The ice cream is now ready for freezing, but there's one more crucial step.
Freeze for Perfect Texture
Transfer the churned ice cream to a lidded airtight container and freeze for 4-6 hours until completely firm. Here's the secret: after the initial 2 hours, remove the container from the freezer and vigorously whisk the ice cream with a fork. This breaks up ice crystals and prevents graininess. Return to the freezer for the remaining 2-4 hours until fully set.
The final product should be dense yet creamy, with deep chocolate flavor and no icy texture. For serving, let it sit at room temperature for 5-10 minutes before scooping to achieve that perfect velvety consistency. Store any leftovers in an airtight container for up to 2 weeks—though I doubt it will last that long!
Pro Tips For Making Belgian Chocolate Ice Cream
- Temper the Cocoa: Whisk the Belgian cocoa powder into the warm milk first—before adding sugar or cream—so it dissolves completely. I learned this the hard way: clumps in the base mean grainy ice cream, no matter how well you churn it later.
- Whisk the Cream Cold: Chill your heavy cream in the fridge for at least 2 hours before whipping it into the base. Warm cream folds in unevenly and can turn your ice cream greasy instead of silky. (Yes, even if you’re impatient like me.)
- Fold in Chocolate Last: Add the dark chocolate chips after the mixture has cooled to room temperature—otherwise, they’ll melt and separate. I used to toss them in early, and the result was always streaky. Save them for the final stir.
- Churn Until Firm: Run the ice cream in your machine for 20-30 minutes past the "soft-serve" stage—until it’s thick enough to hold its shape when scooped. Skimping here means a messy, soupy texture that’ll stick to your bowl. (Your future self will thank you.)
Pro cooking tips for perfect results
Temperature Control Secrets
The key to silky Belgian chocolate ice cream lies in precise temperature management. Heat the egg yolk mixture to exactly 160°F—any lower and the custard won't thicken properly, any higher and you risk scrambling the yolks. Use a candy or ice cream thermometer for accuracy.
When tempering the chocolate, maintain the mixture at 170°F—this ensures the cocoa dissolves completely without burning. I recommend a thermometer with a dimple (like the Thermoworks Thermapen) for quick, reliable readings. 🌡️
Churning Like a Pro
Your ice cream maker's bowl should be pre-chilled for at least 24 hours before use—this prevents melting during churning. Add the 2 cups heavy cream only in the final 5 minutes of churning to maintain a stable texture.
If your ice cream maker lacks a built-in timer, set a timer for 20-25 minutes—over-churning can make the texture icy. For a smoother finish, I like to add 1 tablespoon vodka to the mixture before freezing (it lowers the freezing point).
Preventing Graininess
Graininess happens when ice crystals form during freezing. The solution? After the initial 2 hours in the freezer, remove the container and whisk vigorously with a fork for 2-3 minutes. This breaks up any forming crystals.
For extra insurance, spread the ice cream evenly in the container with parchment paper between layers—this prevents ice buildup at the top. Store with the lid slightly ajar for 15 minutes after opening to release excess moisture. ✨
Chocolate Tempering Hacks
For the smoothest texture, melt the 1.5 oz dark chocolate chips and 0.25 cup butter together first, then slowly incorporate them into the warm custard. This creates a stable emulsion that prevents separation. If you notice any lumps, strain the mixture through a fine-mesh sieve before churning.
For an extra touch of Belgian authenticity, fold in 1 tablespoon praline paste or crushed hazelnuts during the final whisking stage. The secret to perfect tempering? Patience—never rush the cooling process.
Equipment Upgrades
While you can make this recipe with basic tools, I recommend these upgrades for restaurant-quality results: a Cuisinart ICE-50 ice cream maker (durable and consistent), a stainless steel whisk (for smoother mixing), and a food-safe silicone spatula (to scrape every last bit from the bowl).
For tempering, a double boiler gives you better control than microwave melting. And if you're making this often, invest in a stand mixer with a whisk attachment—it's a game-changer for emulsifying the custard without lumps.
Frequently asked questions
Why does Belgian chocolate ice cream turn grainy?
Graininess happens when ice crystals form during freezing. The solution is simple: after the initial 2 hours in the freezer, remove the container and whisk vigorously with a fork for 2-3 minutes. This breaks up any forming crystals. Also, spread the ice cream evenly in the container with parchment paper between layers to prevent ice buildup at the top.
Can I make this without an ice cream maker?
Yes! Pour the chilled custard into a freezer-safe container, cover tightly with plastic wrap (pressing it directly on the surface), and freeze for 6-8 hours. Every 30 minutes, remove and whisk vigorously to break up ice crystals. This method takes longer but still yields creamy results. For extra insurance, add 1 tablespoon vodka to lower the freezing point.
What's the difference between Belgian cocoa and regular cocoa?
Belgian cocoa is Dutch-processed, meaning it's treated with an alkali to neutralize acidity, creating a smoother, darker flavor with deeper chocolate notes. Regular cocoa retains its natural acidity and has a more bitter, earthy taste. For this recipe, Belgian cocoa delivers that signature rich, velvety Belgian chocolate flavor without bitterness.
How can I make this vegan-friendly?
Replace the egg yolks with 1/4 cup aquafaba per yolk (chickpea brine) and use full-fat coconut milk instead of dairy. For richness, add 2 tablespoons melted coconut oil when incorporating the chocolate. The texture will be slightly denser but still delicious. Churn for 30 minutes to ensure proper freezing.
Can I add alcohol to enhance the flavor?
A splash of dark rum (1 tbsp) or bourbon (2 tbsp) adds depth while lowering the freezing point for creamier texture. For Belgian-style, try 1 tbsp Belgian beer (like Duvel) or Grand Marnier. Add the alcohol with the vanilla extract during Step 2. Just be mindful—alcohol content will be higher in the final product.