
Desserts
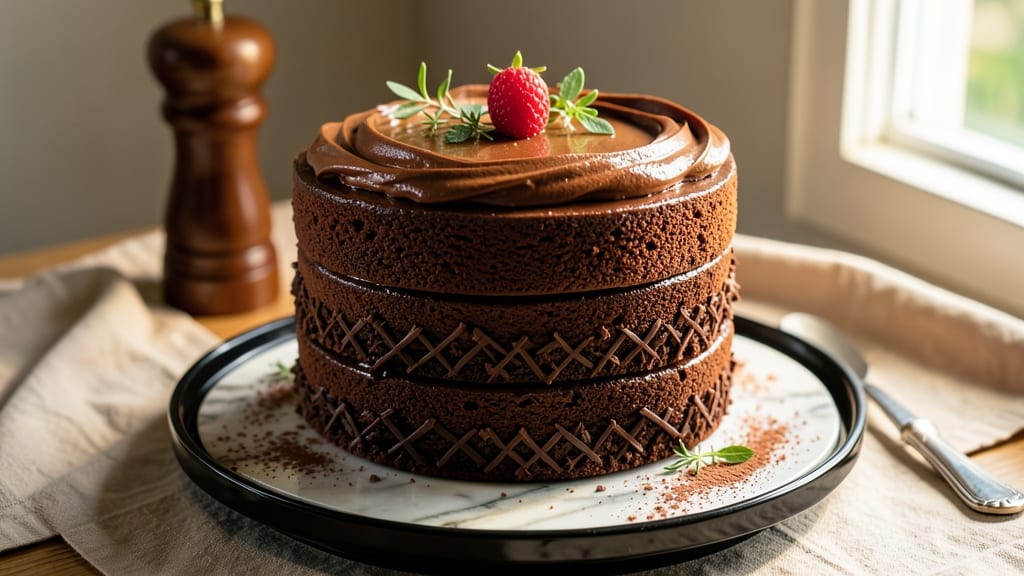
This chocolate cake recipe delivers the perfect foundation for flawless decorating—moist, rich layers with clean edges that hold frosting like a dream. ✨ The secret lies in precise baking times and a foolproof buttercream pairing that ensures smooth, professional-level finishes every time. I've perfected this over years of cake decorating competitions, where texture and structure matter just as much as flavor.
What sets this apart is the balance between dense yet tender crumbs and a subtle moisture that prevents cracking when frosting.
The recipe uses a simple boxed mix with strategic additions—extra eggs for structure, sour cream for richness, and a touch of espresso powder to deepen the chocolate flavor without bitterness.
Baking at 350°F for exactly 25-30 minutes yields layers that cool evenly, with a domed center that creates the perfect canvas for your designs.
Once cooled completely, the cake becomes a decorator's playground. The buttercream we use here isn't just sweet—it's formulated to pipe clean lines and hold intricate details without melting or sliding. We'll show you how to achieve sharp edges and smooth sides that make even beginner decorators look like pros.
The result? A cake that looks as impressive as it tastes, with every slice revealing that perfect balance of rich chocolate and velvety texture.
Whether you're creating a showstopper for a wedding, a competition piece, or just a stunning dessert for your next gathering, this recipe gives you the confidence to focus on the artistry. Let's get started with the foundation that makes all the difference.
Ingredients for best chocolate cake recipe for cake decorating
The secret to flawless decorating starts with these carefully balanced ingredients—rich chocolate, structural reinforcements, and moisture secrets.
| Ingredient | Amount | Notes |
|---|---|---|
| Boxed Chocolate Cake Mix 🍫 | 1 box | High-quality, dark chocolate preferred |
| Large Eggs 🥚 | 4 whole | Room temperature for even mixing |
| Sour Cream 🥛 | ½ cup | Full-fat for maximum moisture |
| Unsalted Butter 🧈 | 1 cup | Softened, not melted (room temp) |
| Instant Espresso Powder ☕ | 1 tbsp | Enhances chocolate depth |
| All-Purpose Flour 🌾 | ¼ cup | For structural reinforcement |
| Granulated Sugar 🍚 | ¼ cup | Extra for cake layers |
| Whole Milk 🥛 | ½ cup | Warmed slightly for smoother batter |
| Vanilla Extract 🌸 | 1 tbsp | Pure, high-quality preferred |
| Baking Powder 🍞 | 1 tsp | Ensures proper rise |
| Salt 🧂 | ¼ tsp | Kosher or sea salt |
| Vegetable Oil 🫒 | ¼ cup | Light, neutral flavor |
| Buttercream Frosting 🧁 | 2 cups | Custom recipe for clean piping |
The boxed chocolate cake mix is your starting point, but don't skimp on quality—Ghirardelli or Duncan Hines dark chocolate mixes yield the deepest flavor. Room-temperature eggs are non-negotiable for even distribution, so pull them out 30 minutes before mixing. Sour cream is the moisture magic here, but if you're watching calories, Greek yogurt works too—just add a splash of milk to thin it. For the butter, Land O'Lakes unsalted is my go-to; it's consistent and melts beautifully. The espresso powder might seem odd, but it deepens the chocolate without bitterness—Starbucks instant is what I always use, but any quality brand does the trick.
No sour cream? Plain Greek yogurt at half the amount gets you close. Running low on butter? Coconut oil works in a pinch, though it has a slight coconut aftertaste. The espresso powder can be swapped for instant coffee granules if that's what you've got, but don't skip it entirely—the chocolate flavor will feel flat. For the frosting, store-bought American-style buttercream won't cut it here. You need something with higher fat content (like European-style buttercream) to hold piping details. If you're making it from scratch, Kroger's European-style butter is a game-changer for sharp edges. Pro tip: Chill your piping bags for 10 minutes before decorating to prevent melting.
This cake is best baked day-of, but if you need to prep ahead, wrap tightly in plastic and store at room temperature for up to 2 days. The frosting? Make it 1 day ahead—it flavors better after resting. For long-term storage, freeze the unfrosted layers for up to 3 months, then thaw overnight in the fridge before assembling. The frosting can be refrigerated for 1 week or frozen for 3 months—just bring it to room temperature and re-whip before using. And here's the decorator's secret: Brush layers with simple syrup before frosting to prevent dryness and cracking.
Why You'll Love This Recipe
- Box Mix Shortcut: Honestly, I’m not ashamed to admit I start with a box mix—it’s the secret to my stress-free decorating base. The sour cream keeps it moist without extra fuss, and the espresso powder gives that deep chocolate punch without measuring spices.
- Rich, Moist Texture: That combo of butter and eggs makes it ridiculously tender, while the sour cream adds a subtle tang that balances the sweetness. It’s the kind of cake that stays perfect for piping, not crumbly or dry.
- Decorating Dream Base: Between us, this is my go-to for any occasion—birthdays, holidays, or just because. The smooth crumb takes frosting like a champ, and the slight coffee note lets flavors shine under buttercream or ganache.
- Leftovers That Win: I always bake two layers because the slices stay fresh for days (yes, even on a Tuesday night). The butter-rich batter means it reheats beautifully, and the espresso kick keeps it interesting slice after slice.
Step-by-step instructions for a decorator's dream chocolate cake
Here's how to create a flawless chocolate cake base that stands up to intricate designs.
👨🍳 Step 1: Mix Wet Ingredients for Maximum Moisture
In a large mixing bowl, combine the 4 whole Large Eggs, 0.5 cup Sour Cream, 1 cup Unsalted Butter, 1 tbsp Instant Espresso Powder, 0.25 cup All-Purpose Flour, 0.25 cup Granulated Sugar, 0.5 cup Whole Milk, 1 tbsp Vanilla Extract, 1 tsp Baking Powder, and 0.25 tsp Salt. Use a hand mixer on medium speed for 2 minutes until smooth and fully incorporated.
Here's the thing—this is where the magic happens. The espresso powder deepens the chocolate flavor while the sour cream and butter create that ultra-moist texture decorators dream about. Mix just until combined; overmixing develops gluten and makes the cake dense. You'll notice the batter thicken slightly as the flour hydrates—this is perfect for clean frosting lines later.
👨🍳 Step 2: Incorporate the Cake Mix and Oil
Gradually add the 1 box Boxed Chocolate Cake Mix to the wet ingredients while mixing on low speed. Then stir in the 0.25 cup Vegetable Oil until the batter is completely smooth and glossy. The batter should be thick but pourable—like a rich, dark chocolate pudding.
I always scrape down the sides of the bowl with a spatula at this point to ensure even distribution. The oil helps create that tender crumb that's essential for professional-quality cakes. If the batter looks too thick, add 1 tablespoon of the warmed milk to loosen it slightly. The goal is a consistency that holds its shape when poured but still spreads evenly in the pan.
🔥 Step 3: Bake for Even Rise and Dense Texture
Preheat your oven to 350°F and grease two 8-inch round cake pans thoroughly with butter and flour. Divide the batter evenly between the pans. Bake for 30-35 minutes or until a toothpick inserted in the center comes out with just a few moist crumbs—no wet batter should cling to it.
Don't overbake! The cake will continue cooking as it cools, and you want that tender crumb that holds up perfectly under layers of frosting. I tap the sides of the pans gently after 25 minutes—if the cake springs back slowly, it's ready. Let the cakes cool in the pans for 10 minutes before transferring to a wire rack to cool completely. This gradual cooling prevents cracking, which is crucial for clean decorating surfaces.
🥘 Step 4: Level and Prepare for Frosting
Once completely cool, use a serrated knife to level the tops of both cakes for even layers. Place one cake layer on a cake stand or plate and spread 1 cup of the Buttercream Frosting evenly over the top. This is your "crumb coat"—a thin layer that seals in any loose crumbs and creates that perfect canvas for your final frosting.
Here's where precision matters most. Use an offset spatula to apply the crumb coat as thinly as possible—about 1/8-inch thick. Chill the cake in the refrigerator for 15 minutes to set the crumb coat. This step prevents crumbs from mixing into your final frosting layer, giving you those clean, professional lines you're after. Trust me, this makes all the difference when you're piping intricate designs.
🍽️ Step 5: Frost for Show-Stopping Decoration
After chilling, apply the remaining 1 cup Buttercream Frosting to create your final layer. Use a bench scraper to achieve perfectly smooth sides and clean edges. For the top, pipe your decorative frosting or use a spatula for a smooth finish—this cake base handles both beautifully.
The beauty of this recipe is how it holds up to any decoration. Whether you're piping roses, writing messages, or creating geometric patterns, this cake's dense yet tender crumb won't crack or crumble. Let the cake sit at room temperature for 30 minutes before decorating to allow the frosting to set slightly, giving you that professional finish that makes all the difference in cake decorating.
Pro Tips For Making Best Chocolate Cake Recipe For Cake Decorating
- Whisk Eggs Until Ribbon Stage: Don’t just crack and stir—beat those eggs until they hold a ribbon shape when the whisk is lifted. This adds structure for cleaner slices and better frosting adhesion, especially when decorating. (I used to skip this and ended up with a crumbly mess that ruined my piping.)
- Room-Temp Sour Cream: Pull the sour cream out 30 minutes before mixing—cold fat means dense cake. Room temperature also helps the espresso powder dissolve smoothly into the batter. (Yes, even if you’re impatient like me, this makes a real difference.)
- Bake Until Toothpick Comes Out Mostly Clean: Stop when the toothpick has a few moist crumbs, not when it’s completely dry. Overbaking dries out the cake, making it brittle and harder to decorate. (I learned this the hard way after frosting a cake that crumbled like stale cookies.)
- Mix Espresso Into Butter First: Whisk the espresso powder into softened butter before adding it to the wet ingredients. This prevents clumping and ensures even flavor distribution throughout the batter. (Sounds weird, but it works—no more bitter pockets in your cake.)
Make-ahead tips for this best chocolate cake recipe for cake decorating
Room-Temp Prep
Take your ingredients out of the fridge at least 30 minutes before starting. The eggs and butter should be at room temperature for even mixing—this prevents lumps in your batter that could ruin your clean decorating surface.
I like to place my eggs in a bowl of warm water for 5 minutes to speed this up if I'm short on time. The milk should also be warmed to room temperature to help activate the baking powder properly. 🌡️
Make-Ahead Cake Layers
Bake your cake layers 1 day ahead if possible. Once completely cooled, wrap each layer tightly in plastic wrap and store at room temperature. This prevents drying out and makes them easier to level later.
I like to place a paper towel between layers to absorb any excess moisture. The layers will keep well for up to 2 days this way, giving you flexibility for decorating on your schedule.
Frosting Prep Timeline
Make your buttercream frosting 1 day ahead—it develops better flavor and texture after resting. Store it in an airtight container in the refrigerator. Before using, let it sit at room temperature for 30-60 minutes until soft enough to pipe.
For extra stability, chill your piping bags in the freezer for 10 minutes before decorating to prevent melting. This is especially helpful for intricate designs like roses or lace patterns.
Freezing for Long-Term Prep
For maximum prep ahead, freeze your unfrosted cake layers for up to 3 months. Wrap each layer tightly in plastic wrap, then place in a freezer bag with all air removed. Thaw overnight in the fridge before assembling.
The frosting can be refrigerated for 1 week or frozen for 3 months—just re-whip it until smooth before using. I find this works best for wedding cakes where you need to assemble days before the event.
Decorating Prep Day
On the day of decorating, brush your cake layers with simple syrup (equal parts sugar and water, heated until dissolved) to add moisture and prevent cracking. This step is non-negotiable for professional-quality cakes.
Let the syrup absorb for 5 minutes before applying your crumb coat. Keep your decorating workspace at room temperature—cold frosting pipes poorly and can cause your decorations to collapse. 💫
Tool Organization
Gather all your decorating tools the night before: piping bags, tips, offset spatula, bench scraper, and turntable. Clean and dry everything thoroughly to prevent sticking. I like to arrange my piping tips by size on a tray so I can grab what I need quickly during decorating.
Keep a small bowl of shortening nearby to dip your piping tips in—this helps them glide through the frosting smoothly and prevents clogging. This little prep step saves so much frustration during the actual decorating process.
Frequently asked questions
Why does this recipe use boxed cake mix?
This recipe uses a high-quality boxed chocolate cake mix as a reliable foundation that still delivers professional decorating results. The key is enhancing it with extra eggs, sour cream, and espresso powder—these ingredients create the ultra-moist, dense crumb that holds frosting perfectly. It's a time-saving shortcut that still gives you bakery-quality results without the complexity of scratch baking.
Can I make this cake in a different pan size?
Yes, but adjust baking times accordingly. For 9-inch pans, bake 20-25 minutes—the batter will spread more and may need slightly less time. For 6-inch pans, bake 35-40 minutes. Always use the toothpick test to check doneness. The cake should be just set in the center with a slight bounce when pressed gently.
What's the best frosting alternative if I don't want buttercream?
For clean decorating lines, try a ganache (equal parts chocolate and heavy cream) or a cream cheese frosting. Both hold their shape well when chilled. Ganache gives a glossy finish perfect for elegant designs, while cream cheese frosting adds a tangy contrast to the rich chocolate. Just ensure your frosting is fully set before intricate decorating.
How do I fix cracked frosting after decorating?
If frosting cracks appear, gently warm the cake with a hairdryer on low heat while holding a fan nearby to prevent melting. Then apply a thin layer of warmed apricot jam or glaze (equal parts powdered sugar and water) to seal the cracks. Let it set for 10 minutes before adding final decorations. This technique works like a "band-aid" for professional-looking repairs.
Can I substitute cocoa powder for the boxed mix?
You can try, but results may vary. For a 1-box equivalent, use 3/4 cup cocoa powder + 1 1/2 cups flour + 1 1/2 tsp baking powder + 1/2 tsp salt. However, boxed mixes contain emulsifiers that improve texture. If using scratch, add 1/4 cup melted butter to the dry ingredients to replicate the mix's fat content for better crumb structure.