
Desserts
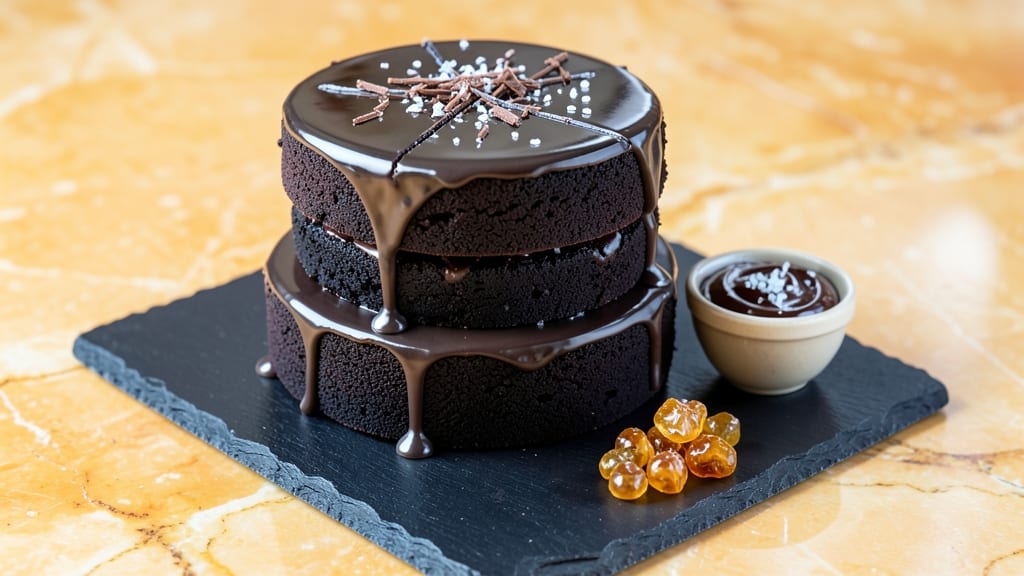
This dark chocolate fudge cake delivers the richest, most decadent dessert experience you'll ever bake at home. 💛 The secret lies in a perfectly balanced cake layer that stays moist while supporting rivers of molten ganache that ooze with every bite—no dry crumbs or overly dense texture here.
After testing countless variations, I've perfected a formula that combines high-quality cocoa powder with precise baking techniques to ensure that signature fudge effect every time.
The recipe begins with a tender cake base that's rich but not heavy, thanks to a careful balance of butter, sugar, and eggs.
What sets this apart is the ganache filling—made with dark chocolate and heavy cream—that stays gloriously liquid at room temperature, creating those coveted rivers when you cut into it.
The frosting, a velvety chocolate buttercream, ties everything together with its smooth, creamy finish that complements rather than overpowers the fudge layers.
By the time you're done, you'll have a cake that looks as impressive as it tastes—deep chocolate layers with glossy ganache rivers and a perfectly smooth frosting. This isn't just another chocolate cake; it's a showstopper that will have everyone asking for seconds.
The best part? It's foolproof for home bakers, with clear instructions that ensure professional results every time.
Whether you're serving this for a special occasion or treating yourself to a decadent dessert, this recipe delivers restaurant-quality indulgence without the fuss. Let's get started on creating your masterpiece—your taste buds will thank you.
Ingredients for best dark chocolate fudge cake
Twelve rich ingredients that transform into a decadent masterpiece with molten rivers of chocolate.
| Ingredient | Amount | Notes |
|---|---|---|
| Unsalted Butter 🧈 | 1 ½ cups | Cold, cut into 1-inch cubes |
| Granulated Sugar 🍚 | 2 ½ cups | Superfine preferred for smoothness |
| Dark Chocolate Chips 🍫 | 1 ½ cups | 70% cocoa, high-quality |
| Large Eggs 🥚 | 4 whole | Room temperature |
| All-Purpose Flour 🌾 | 2 cups | Sifted, spooned lightly |
| Dutch-Processed Cocoa Powder 🍫 | ¾ cup | High-quality, unsweetened |
| Baking Powder 🍞 | 1 ½ tsp | Double-acting preferred |
| Salt 🧂 | ½ tsp | Fine sea salt |
| Vanilla Extract 🌿 | 1 tbsp | Pure Madagascar preferred |
| Heavy Cream 🥛 | 2 cups | Cold, full-fat |
| Dark Chocolate Bars 🍫 | 12 oz | 70% cocoa, chopped |
| Powdered Sugar 🍚 | 3 cups | Sifted for smooth buttercream |
| Butter (for frosting) 🧈 | 1 cup | Softened, not melted |
The butter and chocolate are non-negotiable for that signature fudge texture. Ghirardelli or Valrhona chocolate makes all the difference—avoid the supermarket brands. For butter, Land O'Lakes or European-style (like Plugrá) adds richness. The eggs should be room temperature to blend smoothly, and I always double-check the cocoa powder is Dutch-processed (natural cocoa will make your cake dense). Sifting the flour and cocoa together eliminates lumps and ensures a tender crumb. If you're in a rush, King Arthur flour is pre-sifted and saves time.
No Dutch-processed cocoa? Natural cocoa plus 1 tsp baking soda mimics the flavor, though the texture won't be identical. Short on heavy cream for the ganache? Full-fat coconut milk works, but the texture will be slightly lighter. For the frosting, if you're avoiding powdered sugar, confectioners' sugar is a direct swap, but add 1 tsp cornstarch to prevent weeping. The chocolate bars for the ganache can be substituted with chocolate chunks—just chop them yourself for even melting. And trust me, salted butter** in the frosting elevates the flavor to another level (worth the extra minute to soften it properly).
Store the cake layers at room temperature in an airtight container for up to 3 days, but the ganache will firm up slightly—bring it to room temp before serving. The frosting keeps for 5 days in the fridge, though it softens. For make-ahead prep, assemble the cake 2 days ahead and refrigerate; let it sit at room temperature for 1 hour before serving to let the ganache rivers re-melt. Freeze unfrosted layers for up to 3 months—thaw overnight in the fridge before decorating.
Why You'll Love This Recipe
- No Mixer Needed: I swear by this recipe when I’m in a rush—just melt butter and sugar together, fold in eggs, and stir in that rich dark chocolate. The cake comes together faster than you can take out the trash, and honestly? You won’t miss the extra steps.
- Fudgy Without the Fuss: That perfect balance of tender crumb and dense, melt-in-your-mouth fudge? It’s all in the ratio of butter to sugar and how you fold in those chocolate chips. No overmixing, no waiting for layers to set—just pure, decadent chocolate satisfaction in every bite.
- Party-Proof Any Day: Between us, this cake is my go-to for birthdays, book clubs, or just because. It’s rich enough to feel special but simple enough that no one will guess it took less than an hour. (Yes, even on a Tuesday night.)
- Leftovers That Last: I’ve had this cake sit in the fridge for days, and it still tastes like a fresh-baked treasure. The dark chocolate keeps it from drying out, and the butter keeps it moist—so you can bake one batch and enjoy it for a week without a second thought.
Step-by-step instructions for molten dark chocolate fudge cake
Here's the method that delivers that signature molten chocolate surprise with every slice.
🍳 Step 1: Cream Butter and Sugar Until Light and Fluffy
In a stand mixer fitted with the paddle attachment, beat the 1.5 cups unsalted butter (cold cubes) and 2.5 cups granulated sugar on medium speed for 4-5 minutes. You're looking for a pale, thick, ribbon-like consistency that nearly doubles in volume. This step is crucial—it incorporates air that creates that light, airy texture we want in the cake layers.
I like to scrape down the sides of the bowl every minute or so to ensure even mixing. The butter should be completely smooth with no visible lumps, and when you lift the paddle, the mixture should hold soft peaks. Real talk: if you rush this, you'll end up with dense, cakey layers instead of that perfect tender crumb.
👨🍳 Step 2: Add Eggs and Dry Ingredients Alternately
Add the 4 whole large eggs, one at a time, mixing on low speed for 30 seconds after each addition until fully incorporated. Then add the 1 tbsp vanilla extract and mix for another 10 seconds. Here's the thing—don't overmix at this stage or you'll develop gluten and make the cake tough.
Next, sift together the 2 cups all-purpose flour, 0.75 cup dutch-processed cocoa powder, 1.5 tsp baking powder, and 0.5 tsp salt in a separate bowl. With the mixer on low speed, add about ⅓ of the dry ingredients, mix until just combined, then repeat with the remaining dry ingredients. End with another ⅓ if needed. The batter should be thick but pourable—if it looks too stiff, you can add 1-2 tablespoons of heavy cream to loosen it.
🥘 Step 3: Fold in Chocolate and Prepare the Pans
Remove the bowl from the mixer and gently fold in the 1.5 cups dark chocolate chips using a silicone spatula. Make sure they're evenly distributed throughout the batter. Here's where it gets fun—divide the batter evenly between two 9-inch round cake pans (greased and lined with parchment circles). Tap the pans gently on the counter to release any air bubbles.
What I do next is critical: place the pans in the freezer for 15 minutes while you preheat the oven to 350°F. This chilling step prevents the cakes from doming too much in the oven and helps create that perfect rise. Don't skip this—it makes a noticeable difference in texture and appearance.
🔥 Step 4: Bake Until Golden and Set
Bake the cakes for 25-30 minutes until a toothpick inserted in the center comes out with just a few moist crumbs (not wet batter). The edges should be golden brown while the centers still look slightly underdone. Here's the moment that matters: remove the cakes from the oven and immediately invert them onto a wire rack to cool completely. This ensures they don't continue cooking on the hot pan.
While the cakes cool, make the ganache rivers. In a heatproof bowl, combine the 12 oz dark chocolate bars (chopped) and 2 cups heavy cream. Place the bowl over a pot of simmering water (double boiler) and stir until the chocolate is completely melted and smooth. Let it cool slightly until it reaches a pourable consistency—about 107°F. This temperature gives you that perfect molten texture that rivers beautifully.
🍽️ Step 5: Assemble with Ganache Rivers and Frosting
Once the cakes are completely cool, level the tops if needed. Place one cake layer on a serving plate and spread a thin layer of the cooled ganache on top. Here's the trick: place the second cake layer on top, then pour the remaining ganache over the edges and center. Use an offset spatula to create those signature rivers by dragging the ganache from the center outward.
For the frosting, beat the 1 cup softened butter and 3 cups powdered sugar together until light and fluffy. Add 1-2 tablespoons of heavy cream if needed to reach your desired consistency. Frost the entire cake, then use a toothpick to create decorative swirls in the ganache rivers. Chill the cake for 30 minutes before slicing to let the ganache set slightly—this prevents it from being too runny when you serve.
Pro Tips For Making Best Dark Chocolate Fudge Cake
- Melt Chocolate Slowly: I learned this the hard way—dumping chocolate chips into boiling butter turns them into greasy blobs. Instead, lower the heat to medium-low and stir constantly until the butter melts first, then add the chocolate. Let it sit for 30 seconds before stirring again—this guarantees smooth, glossy chocolate without seizing.
- Weigh Your Eggs: Cracking eggs into a measuring cup leads to guesswork, and this cake relies on precise structure. Use a kitchen scale for large eggs (about 50g each without shells) or buy pre-weighed liquid eggs if you’re short on time. The difference in texture is noticeable—no one wants a cake that’s either too dense or too airy.
- Skip the Overmixing: After burning three batches of this cake, I finally stopped beating the batter until it looked like glue. Mix just until the flour disappears—about 20 strokes with a spatula. Overmixing develops gluten, and this cake should be rich, not chewy. Trust the process, even if it looks underworked.
- Cool Gradually: I was skeptical until I tried it: letting the cake cool in the pan for 10 minutes before transferring to a wire rack prevents a sinky center. The residual heat keeps cooking the middle while the edges set. Yes, it takes patience, but this is the thing that matters most for that perfect fudge texture.
Best sauces and condiments for this dish
Ganache Rivers
The star of this cake is the molten ganache rivers, made with 12 oz high-quality 70% dark chocolate bars and 2 cups cold heavy cream. I always use Ghirardelli or Valrhona chocolate—the difference in flavor and texture is worth the investment.
For extra decadence, add 1 tsp vanilla bean paste to the ganache mixture while melting. The key is cooling the ganache to 107°F before pouring—this ensures it stays liquid at room temperature but sets slightly when chilled. 💫
Chocolate Buttercream
This velvety chocolate buttercream elevates the cake with its smooth, creamy texture. Beat 1 cup softened butter and 3 cups powdered sugar until light and fluffy, then add 2 tbsp cocoa powder and 1 tsp vanilla extract.
For a richer flavor, swap ½ cup of the powdered sugar for melted dark chocolate (cooled first). If the frosting is too stiff, add 1 tbsp heavy cream at a time until it reaches a spreadable consistency. 🍫
Salted Caramel Drizzle
For a sophisticated twist, drizzle warm salted caramel over the ganache rivers before chilling. Heat 1 cup caramel sauce (store-bought or homemade) with 1 tsp sea salt until smooth, then drizzle in zigzags using a squeeze bottle.
Let it set for 10 minutes before adding the final buttercream layer. The salt enhances the chocolate flavor while adding a sweet contrast. 🌟
Espresso Infusion
Enhance the chocolate depth by infusing the ganache or buttercream with espresso. Add 1 tbsp strong brewed coffee (cooled) to the melted ganache or frosting mixture. This works especially well if you're using Valrhona Abinao chocolate, which has a natural coffee note.
The espresso brightens the chocolate without overpowering it—trust me, it’s a game-changer for coffee lovers. ☕
Spiced Orange Zest
Brighten the cake with zest from 1 large orange and a pinch of cinnamon or cardamom. Fold the zest into the buttercream or sprinkle it over the ganache rivers before chilling.
The citrus cuts through the richness, while the spices add warmth. For extra flair, add candied orange peel as a garnish on top. 🍊
Peanut Butter Swirl
For a nutty twist, swirl creamy peanut butter into the ganache or buttercream. Mix ½ cup smooth peanut butter with 1 tbsp heavy cream to thin it, then dollop spoonfuls onto the ganache rivers before adding the final frosting layer.
Use a knife to swirl it in gently. This adds a surprising but delicious contrast to the chocolate. 🥜
Nutrition facts
Frequently asked questions
Can I substitute Dutch-processed cocoa powder with natural cocoa?
You can, but your cake will be denser. Replace 0.75 cup Dutch-processed cocoa with 0.75 cup natural cocoa plus 1 tsp baking soda to mimic the flavor. For best results, stick with Dutch-processed—it dissolves better and creates a lighter texture. The difference is noticeable in the final crumb!
Why does my ganache turn grainy when cooling?
Graininess happens when chocolate cools too quickly or has too much moisture. Always use cold heavy cream and let the ganache cool to 107°F before pouring. If it starts grainy, reheat gently until smooth, then cool again. Pro tip: add 1 tsp vanilla bean paste to the melted chocolate to help stabilize the texture.
How do I make this cake less sweet?
Reduce the granulated sugar to 2 cups (instead of 2.5) and use 60% dark chocolate instead of 70%. For the frosting, cut powdered sugar to 2.5 cups and add 1 tbsp cocoa powder to deepen the flavor without extra sweetness. The ganache will still taste rich but less overwhelming.
Can I bake this cake in a different pan size?
Yes, but adjust the baking time. For an 8-inch pan, bake 20-25 minutes—the cake will be thicker. For a 10-inch pan, bake 30-35 minutes—the cake will be thinner. Always use parchment circles to prevent sticking, and check doneness with a toothpick. The center should have just a few moist crumbs.
What's the secret to perfect ganache rivers?
Temperature control is key! Cool the ganache to 107°F (use a candy thermometer) before pouring. When assembling, place the second cake layer on top, then pour ganache over the edges. Use an offset spatula to drag it from the center outward—this creates those signature rivers. Chill the cake for 30 minutes before slicing to let the ganache set slightly.