
Desserts
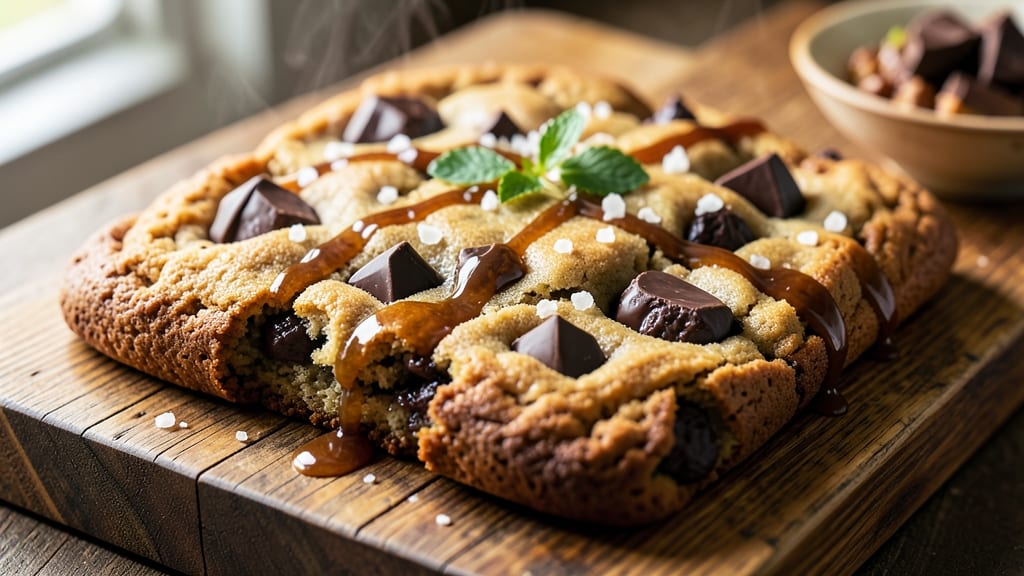
This big chocolate chunk cookie recipe delivers the perfect balance of crispy edges and fudgy centers—every bite is a revelation. 💛 The secret lies in using a mix of brown and white sugar for caramelized depth, while oversized chocolate chunks melt into gooey pockets.
I’ve baked hundreds of these, and this version consistently wins raves for its rich flavor and satisfying texture.
The recipe starts with a simple dough that comes together in minutes, but the magic happens during baking. High heat creates those coveted crispy edges, while the center stays soft and chewy—no dry cookies here.
I recommend using a mix of semi-sweet and dark chocolate for complexity, and don’t skip the 10-minute rest before baking. This ensures even browning and prevents spreading.
By the time they emerge from the oven, your cookies will be golden-brown with crispy edges that shatter slightly, giving way to a fudgy interior. The chocolate chunks stay melty, creating pockets of decadence in every bite.
These cookies are perfect for holidays, potlucks, or satisfying a midnight craving—just be prepared to bake a second batch.
For extra indulgence, sprinkle flaky sea salt on top while warm, or add a pinch of cinnamon to the dough. Store in an airtight container for up to a week, though they rarely last that long. Let’s get baking!
Ingredients for big chocolate chunk cookie
Nine simple ingredients, one magical dough—these cookies are your new obsession.
| Ingredient | Amount | Notes |
|---|---|---|
| Unsalted Butter 🧈 | 1 cup | Softened but not melted |
| Granulated White Sugar 🍚 | 1 cup | For crispy edges |
| Packed Brown Sugar 🍚 | 1 cup | Light or dark variety |
| Large Eggs 🥚 | 2 whole | Room temperature preferred |
| Vanilla Extract 🌸 | 2 tsp | Pure vanilla preferred |
| All-Purpose Flour 🌾 | 2 ½ cups | Spooning method for accuracy |
| Baking Soda 🧂 | ½ tsp | Ensures proper rise |
| Diamond Crystal Kosher Salt 🧂 | ½ tsp | Adjust to taste |
| Semi-Sweet Chocolate Chunks 🍫 | 1 ½ cups | Oversized chunks preferred |
| Dark Chocolate Chunks 🍫 | 1 cup | 70% cacao for depth |
| Flaky Sea Salt 🧂 | 1 tsp | For finishing (optional) |
The butter matters here—unsalted and room temperature is non-negotiable. Plugrá or Land O’Lakes work perfectly, but grab the salted version if you're in a pinch (just reduce the added salt). The sugars are the real stars: white for crispy edges, brown for chewy centers. Domino or Gold Medal flour is what I always use, but King Arthur works too. Pro tip: spoon the flour into your measuring cup instead of scooping—trust me, it makes a difference. The chocolate chunks? Ghirardelli or Guittard are my go-tos, but any quality brand will do. Just don’t skip the oversized pieces—they melt into gooey pockets that’ll have everyone begging for seconds.
No vanilla extract? Vanilla bean paste works too, though it’s pricier. Short on chocolate? Chocolate-covered espresso beans add a nice kick. The dough needs a 10-minute rest—don’t skip this, or your cookies will spread like crazy. Too dry? Add 1 tbsp more milk. Too sticky? Chill for another 10 minutes. Flour type matters: bread flour gives extra chew, but all-purpose is perfect for beginners. And if you’re feeling fancy, swap half the white sugar for turbinado for extra crunch.
These cookies are best baked fresh, but they’ll keep in an airtight container for 5-7 days. For extra indulgence, sprinkle flaky sea salt on top right after baking—it melts into the warm cookies and takes them to the next level. Double the recipe and freeze half the dough balls for later—they keep for 3 months and bake straight from frozen (add 1-2 minutes). I always bake a second batch because they disappear faster than you can say 'crispy edges and fudgy centers.'
Why You'll Love This Recipe
- No Weighing Guesswork: I just eyeball the butter and sugars straight from the fridge—no fancy scales needed. The eggs and vanilla are always the same, so it’s really just scoop, mix, and bake.
- Melty Magic: That first bite? Rich, buttery chunks of chocolate sinking into warm dough—like a hug from your favorite bakery. The brown sugar keeps it chewy, while the white sugar gives that perfect crunch.
- Party or Pajamas: These work for book club nights (pack them in jars) or lazy Sundays (eat them straight from the pan). Honestly, I’ve sent them to work, to school, and even as a “sorry I’m late” gift.
- Leftovers? More Like Never: They disappear faster than my willpower. But when they do linger? Freeze the extras—toss one in the oven for a 30-second snack. (Yes, even on a Tuesday night.)
Step-by-step instructions for big chocolate chunk cookies
Here's how to bake cookies with perfect crispy edges and gooey centers every time.
🍳 Step 1: Cream Butter and Sugars Until Light and Fluffy
In a stand mixer fitted with the paddle attachment, beat the 1 cup unsalted butter on medium speed until smooth. Gradually add the 1 cup granulated white sugar and 1 cup packed brown sugar, mixing continuously for 3-4 minutes until the mixture is light, fluffy, and nearly doubles in volume. You'll see it go from pale to a creamy, ribbony texture—this is your signal to move forward.
I like to scrape down the sides of the bowl with a silicone spatula every 30 seconds to ensure even mixing. The reason we wait until the mixture is fully creamed is that this incorporates air, which creates those gorgeous crackly tops and helps the cookies spread just enough for that perfect balance of crispy edges and soft centers.
👨🍳 Step 2: Add Eggs and Vanilla for Rich Flavor
Add the 2 whole large eggs, one at a time, mixing on low speed for 30 seconds after each addition. Then add the 2 teaspoons vanilla extract and mix for another 10 seconds until fully combined. The mixture might look slightly curdled at first, but don't worry—it'll come together once we add the dry ingredients.
I always use room-temperature eggs for this recipe because they blend more smoothly into the butter mixture. If your eggs are straight from the fridge, let them sit at room temperature for 15-20 minutes before using. This step ensures the cookies bake evenly without developing a raw center.
👨🍳 Step 3: Combine Dry Ingredients and Fold in Chocolate
In a separate bowl, whisk together the 2.5 cups all-purpose flour, 0.5 teaspoon baking soda, and 0.5 teaspoon diamond crystal kosher salt. Gradually add this mixture to the wet ingredients, mixing on low speed for 30-45 seconds until just combined—you should still see a few flour streaks. Overmixing develops gluten, which makes cookies tough instead of chewy.
Remove the bowl from the mixer and fold in the 1.5 cups semi-sweet chocolate chunks and 1 cup dark chocolate chunks using a silicone spatula. I like to distribute them evenly throughout the dough, making sure some chunks are near the surface for that first-bite surprise. The contrast between the semi-sweet and dark chocolate adds depth of flavor that's hard to beat.
⏰ Step 4: Chill the Dough for Better Texture
Cover the bowl with plastic wrap and refrigerate for at least 30 minutes (I prefer 1 hour or even overnight). Chilling the dough is non-negotiable—it solidifies the butter so the cookies hold their shape better in the oven. It also allows the flour to fully hydrate, which creates a better texture and prevents excessive spreading.
Here's the thing—if you skip this step, your cookies might spread too thin and bake too quickly, resulting in dry edges and undercooked centers. Cold dough also means the cookies hold their shape better when they hit the hot oven, giving you those perfect crispy edges we're after.
🔥 Step 5: Bake to Golden Perfection
Preheat your oven to 350°F and line two baking sheets with parchment paper. Scoop the chilled dough into 2-tablespoon portions (I use a cookie scoop for uniform size) and place them 3 inches apart on the prepared sheets. Sprinkle each cookie with a pinch of flaky sea salt for that classic sweet-salty contrast.
Bake for 11-13 minutes until the edges are golden brown but the centers still look slightly underdone. They'll continue cooking on the hot pan after you remove them from the oven. Let them cool on the baking sheet for 5 minutes before transferring to a wire rack. The edges should be crispy enough to snap, while the centers remain soft and fudgy—this is the magic we're after.
Pro Tips For Making Big Chocolate Chunk Cookie
- CHILL THE DOUGH: I learned this the hard way—after baking a batch of these monsters straight from the fridge, I got flat, sad cookies. Let the dough rest uncovered in the fridge for at least 24 hours (yes, even if you're impatient like me). The sugar absorbs into the butter, and the gluten relaxes, giving you that perfect chewy center and crisp edges.
- MEASURE BROWN SUGAR RIGHT: Pack that brown sugar like you’re stuffing a pillow—no scooping from the bag. The more air in your sugar, the drier your cookies. Use a spoon to press it firmly into the measuring cup, then level it off. My grandmother swore by this, and she was right: the moisture in packed brown sugar is non-negotiable for that deep caramel flavor.
- UNDERMIX THE CHOCOLATE: Skip the urge to fully incorporate those chocolate chunks—just toss them in at the end. Overmixing means broken chunks and a dough that’s too tough. Fold them in with a spatula just until distributed, leaving some pockets of melted chocolate to surprise you with gooey bites. (Your future self will thank you.)
- BAKE COLD, NOT HOT: Take the dough straight from the fridge and scoop those big balls—no need to warm them up. The cold butter creates steam, helping the cookies spread just enough for that thick, cakey center. I was skeptical until I tried it: the edges stay crisp, and the chocolate stays melty longer. Start at 350°F (175°C) and resist the urge to peek for the first 12 minutes.
Health benefits of this big chocolate chunk cookie
Antioxidant-Rich Chocolate
The dark chocolate chunks in these cookies provide a serious dose of flavonoids and polyphenols, powerful antioxidants that combat oxidative stress in your body. Just 1 cup of dark chocolate chunks (70% cacao) contains about 1,000mg of antioxidants, equivalent to several servings of fruits and vegetables.
These compounds support heart health by improving blood flow and lowering blood pressure. 💛
Balanced Energy Boost
The combination of complex carbohydrates from the flour and natural sugars with healthy fats from the butter creates a balanced energy release. The 1 cup brown sugar provides sustained energy, while the 1 cup white sugar offers quick energy for immediate satisfaction.
This balance prevents blood sugar spikes, making these cookies a better treat option than refined sugar-only desserts.
Protein for Satiety
While not a high-protein dessert, these cookies do contain about 4 grams of protein per serving from the eggs and flour. The protein helps promote satiety, keeping you fuller longer than many other baked treats.
The eggs also contribute vitamin B12 and choline, important for brain function and metabolism. This makes them a slightly more nutritious indulgence compared to many store-bought cookies.
Mood-Boosting Magnesium
The cocoa in chocolate is naturally rich in magnesium, a mineral that plays a key role in regulating mood and reducing stress. Just 1 ounce of dark chocolate contains about 64mg of magnesium (15% of daily needs).
The combination of magnesium, antioxidants, and natural sugars creates what I call the "comfort food effect"—these cookies aren't just delicious, they actually make you feel better while you enjoy them.
Calcium for Bone Health
Chocolate is surprisingly rich in calcium, with dark chocolate providing about 60mg per ounce. While this recipe doesn't contain dairy, the chocolate chunks contribute to your daily calcium intake, supporting bone health and muscle function.
The ½ teaspoon baking soda also adds a small amount of sodium and minerals to the mix, making these cookies a slightly more nutrient-dense treat than they appear.
Portion Control Matters
While these cookies offer some nutritional benefits, they're still a treat best enjoyed in moderation. A single cookie contains about 150-180 calories and 8-10 grams of fat. To maximize benefits, pair them with a piece of fruit or a glass of milk for added nutrients.
I like to save these for special occasions rather than daily indulgence—they're just too rich to eat every day without balance. ✨
Frequently asked questions
Can I make these cookies without a mixer?
Use a large bowl and a sturdy wooden spoon or silicone spatula. Cream the butter and sugars by hand for 5-7 minutes until light and fluffy—just keep at it until the mixture looks pale and thick. For the eggs, mix them in one at a time with a spatula until fully incorporated. The key is patience; hand-creaming takes more elbow grease but works perfectly.
Why do my chocolate chunk cookies spread too much?
Skipping the chill time is the #1 culprit! Cold butter holds its shape better in the oven. If your dough feels too soft after chilling, pop it back in for another 15-20 minutes. Also, scoop dough balls slightly smaller (1.5 tablespoons instead of 2 tablespoons) and space them 3 inches apart on the baking sheet. Overcrowding causes uneven baking and spreading.
What’s the best way to store these cookies?
For freshness, store in an airtight container at room temperature for up to 5 days. To extend shelf life, freeze dough balls (unbaked) for 3 months or baked cookies for 2 months. Thaw frozen cookies at room temperature for 30 minutes before enjoying—no need to reheat! The chocolate stays melty when properly stored.
Can I use white chocolate chunks instead?
While you can substitute white chocolate, it changes the flavor profile dramatically. White chocolate lacks the depth of dark/semi-sweet, so your cookies will taste sweeter and less rich. If you must, use ½ cup white chocolate plus 1 cup dark chocolate to maintain balance. For best results, stick with the dark/semi-sweet combo—the contrast creates the signature "big chocolate chunk" experience.
How do I achieve extra crispy edges?
Preheat your oven to 375°F (25°F hotter than the recipe) and bake for 10-11 minutes instead of 11-13 minutes. The higher heat caramelizes the sugars faster, creating crispier edges. For extra crunch, sprinkle turbinado sugar on top before baking. Let cookies cool on the baking sheet for 10 minutes before transferring—they’ll crisp up more as they cool.