
Desserts
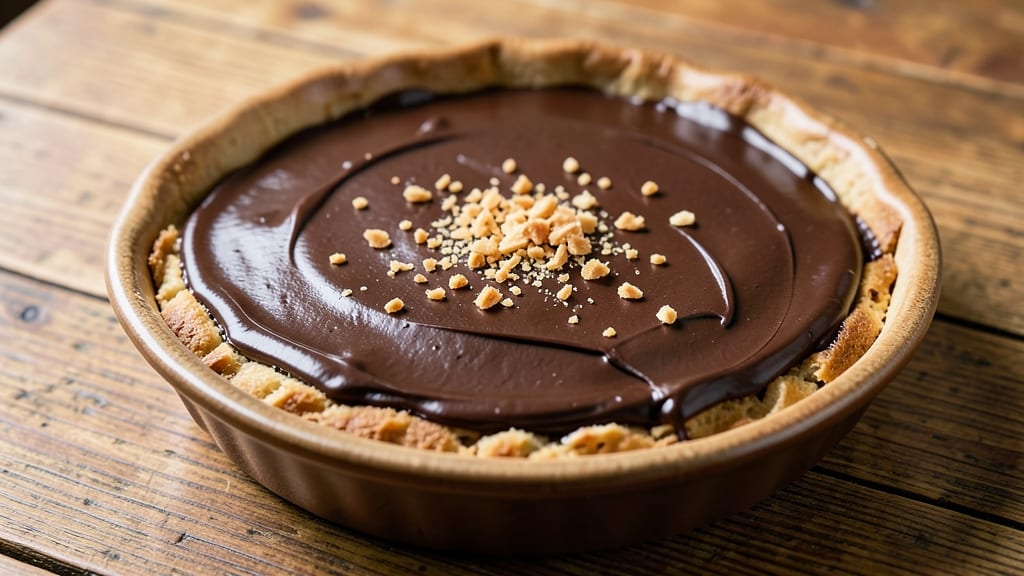
This bitter chocolate tart delivers decadence with every bite—where a crispy almond crust meets velvety dark ganache in perfect harmony. 💫 The secret lies in balancing intense 70% cocoa chocolate with toasted almonds and a touch of citrus zest, creating a dessert that’s both sophisticated and approachable.
No pastry skills required, just precision and patience for that signature marbled effect.
The foundation starts with an almond crust so crisp it shatters with the first forkful, thanks to ground almonds and a touch of brown sugar. The filling transforms into a glossy, crackly-smooth ganache when chilled, with streaks of dark chocolate that add visual drama.
This isn’t your childhood dessert—it’s a restaurant-quality treat that still feels homemade.
What you’ll end up with is a tart that looks as stunning as it tastes: a deep chocolate center, crisp edges, and a subtle almond aroma that lingers. The ganache sets just enough to hold its shape but remains luscious, while the crust stays perfectly crisp even after cutting.
Serve it chilled with a dollop of whipped cream or a sprinkle of flaky sea salt.
Perfect for special occasions or when you want to impress without fuss. This recipe ensures crispy crusts and silky ganache every time—no shortcuts, just results. Let’s get started on creating your showstopper dessert.
Ingredients for bitter chocolate tart
Crisp almond crust meets velvety dark chocolate ganache—just eight ingredients for restaurant-quality decadence.
| Ingredient | Amount | Notes |
|---|---|---|
| Extra-Virgin Olive Oil 🫒 | ½ cup | High quality, fruity flavor |
| Ground Almonds 🥜 | 2 cups | Toasted for enhanced aroma |
| Light Brown Sugar 🍯 | ½ cup | Packed firmly for accuracy |
| Large Eggs 🥚 | 2 whole | Room temperature for even binding |
| Unsalted Butter 🧈 | ½ cup | Cold, cubed for crust texture |
| Dark Chocolate (70% Cocoa) 🍫 | 12 oz | High-quality, chopped finely |
| Heavy Cream 🥛 | 1 cup | Full-fat for velvety ganache |
| Granulated Sugar 🍚 | ¼ cup | Fine grain preferred |
| Orange Zest 🍊 | 1 tbsp | Freshly grated for brightness |
| Salt 🧂 | ½ tsp | Fine sea salt preferred |
| Vanilla Extract 🌿 | 1 tsp | Pure, high-quality extract |
| Dark Chocolate (60% Cocoa) 🍫 | 4 oz | For marbled streaks, chopped |
| Powdered Sugar 🍚 | 2 tbsp | For dusting tart edges |
The almond crust demands quality ingredients. Whole Foods or specialty stores carry the best ground almonds—look for vibrant, toasted ones that smell rich and nutty. Unsalted butter should be European-style (like Plugrá) for superior flavor; skip the salted version. For chocolate, Valrhona or Callebaut 70% cocoa bars are ideal—their deep bitterness balances the sweetness perfectly. Toast your almonds lightly in a dry pan until golden (about 5 minutes) for that signature nutty aroma. The orange zest? Use a fine grater and zest only the peel—no pith, or it'll make the ganache bitter.
No 70% chocolate? 60% works in a pinch, but the tart will be less intense. Heavy cream substitutes? Full-fat coconut milk mimics richness, though it'll taste slightly tropical. For the crust, if you're out of brown sugar, white sugar plus 1 tsp molasses gets you close. Need to toast almonds faster? Pulse them in a food processor for 30 seconds first, then toast. The powdered sugar dusting? Skip it if you prefer a naked tart—just make sure the ganache is fully set before serving. And if you're feeling fancy, add a pinch of flaky Maldon salt on top for contrast.
This tart keeps beautifully—3-4 days in the fridge once fully chilled. For longer storage, wrap tightly in plastic and freeze for up to 2 months. Let it thaw at room temperature before serving. The crust stays crisp for about 2 hours at room temp, so serve it chilled and bring it to the table just before cutting. Pro tip: Make the crust a day ahead and refrigerate it covered; the flavors meld beautifully overnight. And if you're making this for a crowd, double the ganache recipe—it's the star of the show.
Why You'll Love This Recipe
- Here’s what sold me: the olive oil in the crust mellows the bitter chocolate, so it’s deep but never harsh. The brown sugar adds just enough caramel warmth, while the eggs bind everything into a silky filling that’s dangerously easy to over-slice. (I’ve tried.)
- No-Fuss Crust: I swear, the almond crust comes together faster than I can put on a pot of coffee. Just pulse the ground almonds with olive oil and sugar—no rolling, no fuss—then press it into a pan. That buttery, nutty base is always forgiving, even if my hands aren’t perfectly clean.
- Rich Without Overpowering: Here’s what sold me: the olive oil in the crust mellows the bitter chocolate, so it’s deep but never harsh. The brown sugar adds just enough caramel warmth, while the eggs bind everything into a silky filling that’s dangerously easy to over-slice. (I’ve tried.)
- Weekday or Wow Moment: Between us, this tart is my secret weapon for both lazy nights and impressing guests. Serve it warm with a sprinkle of flaky salt for a no-brainer dinner, or chill it for hours—it’s just as good cold. My partner’s coworker asked for the recipe after one bite. (Yes, even on a Tuesday night.)
Step-by-step instructions for bitter chocolate tart
Here's how to build a showstopping tart with a crisp almond crust and velvety ganache swirled with rich dark chocolate.
👨🍳 Step 1: Toast the Almonds and Make the Crust
Preheat your oven to 350°F and spread the 2 cups ground almonds on a baking sheet. Toast for 8-10 minutes until fragrant and lightly golden—this enhances their natural flavor. Let them cool completely while you prepare the crust mixture.
In a food processor, combine the toasted almonds with the 0.5 cup light brown sugar, 0.5 tsp salt, and 1 tbsp orange zest. Pulse until just combined. Add the 0.5 cup extra-virgin olive oil and pulse again until the mixture clumps together like wet sand. Press this firmly into a 9-inch tart pan with a removable bottom, using the back of a measuring cup to create an even, compact crust. Bake for 15 minutes until the edges are lightly golden. Here's the thing—don't overbake or the crust will turn tough. Let it cool completely before filling.
🍳 Step 2: Prepare the Dark Chocolate Ganache
Chop the 12 oz dark chocolate (70% cocoa) into small pieces and place in a heatproof bowl. Warm the 1 cup heavy cream in a saucepan over medium heat until it just begins to simmer—don't boil it. Pour the hot cream over the chocolate and let it sit for 5 minutes to soften. Stir gently until completely smooth. Add the 0.25 cup granulated sugar and 1 tsp vanilla extract, mixing until fully incorporated. The ganache should be glossy and thick enough to coat the back of a spoon.
Let the ganache cool slightly until it reaches 100°F (about 15 minutes). This temperature ensures it sets properly without melting when you add the streaks. If it thickens too much, whisk in a few drops of warm cream to loosen it. This is where patience pays off—the ganache needs to be workable but still fluid enough to create those beautiful marbled streaks.
🥘 Step 3: Create the Marbled Streaks
Chop the 4 oz dark chocolate (60% cocoa) into small pieces and set aside. Pour the cooled ganache into the tart shell, spreading it evenly with an offset spatula. Leave about ½ inch of space at the edges for the chocolate streaks. Using a toothpick, create a grid pattern across the ganache—this helps distribute the chocolate evenly.
Sprinkle the chopped dark chocolate pieces over the ganache, then use the toothpick to gently drag some of the chocolate into the ganache, creating swirling patterns. Place the tart in the refrigerator to set for 30 minutes. This chilling time is crucial—it allows the ganache to firm up while maintaining its glossy sheen. Don't rush this step; the chocolate needs time to meld with the ganache and create those professional-looking streaks.
⏰ Step 4: Chill and Dust with Powdered Sugar
Return the tart to the refrigerator and chill for an additional 2 hours until fully set. This longer chilling time ensures the ganache holds its shape and the chocolate streaks remain distinct. The tart should be firm enough that it releases cleanly from the pan when you run a knife around the edges.
Before serving, dust the top generously with the 2 tbsp powdered sugar using a fine-mesh sieve. This adds a delicate contrast to the deep chocolate tones and balances the bitterness with a touch of sweetness. The powdered sugar also helps create that signature "dusted" look that makes this tart look even more impressive. Slice into wedges and serve immediately—this tart is best enjoyed at room temperature with a dollop of whipped cream or fresh berries on the side.
Pro Tips For Making Bitter Chocolate Tart
- Preheat the Pan: Slide your tart pan into the oven before you start mixing—yes, even if it’s just for 5 minutes. Cold pans pull moisture from the crust, and this recipe’s almond base needs all the help it can get to stay crisp. I learned this the hard way when my first batch turned out dense instead of light.
- Toast the Almonds: Pulse the ground almonds in a dry pan over medium-low for 2–3 minutes until they smell nutty and deepen in color. This step cuts the raw almond taste and adds a toasty richness that balances the bitterness of the chocolate later. (Skip this, and you’ll notice the difference—trust me.)
- Don’t Overmix the Filling: Fold the melted butter and sugar into the egg mixture just until combined—lumps are fine. Overworking the eggs makes the filling grainy, and this tart relies on its silky texture to contrast the nutty crust. I used to blend it smooth, but now I leave it slightly uneven for a better mouthfeel.
- Chill the Crust: Press the almond crust into the pan, then refrigerate it for 20 minutes before baking. Cold butter behaves better, and a chilled crust holds its shape without spreading or cracking. (I know, waiting is hard—just set a timer and make coffee.)
Pro cooking tips for this dish
Crust Perfection
Press the almond crust mixture into your tart pan using the back of a measuring cup—apply firm, even pressure to eliminate air pockets. I like to use a 9-inch tart pan with a removable bottom from Wilton for clean release.
Chill the crust for 30 minutes before baking to prevent spreading. This step is critical for that signature shatter-like texture. 🥜
For extra crispiness, blind-bake the crust for 10 minutes before adding the ganache. Line it with parchment paper, fill with pie weights or dried beans, then bake at 350°F. The weights prevent puffing while ensuring even cooking. Let it cool completely before filling—this prevents soggy crusts.
Ganache Magic
Temperature control is everything with ganache. Heat the cream to just below a simmer—205°F—before pouring it over the chocolate. If the cream boils, the ganache will seize and become grainy. Stir gently in figure-eight motions to incorporate air and create that signature crackly texture. 🍫
For the marbled streaks, use a toothpick to create a grid pattern first—this helps distribute the chocolate evenly. Work quickly once the ganache is in the pan; the streaks should set within 15-20 minutes at room temperature before the final chill.
If the ganache sets too fast, cover it loosely with plastic wrap and let it sit for 5 minutes before continuing.
Chilling Like a Pro
Never rush the chilling process. The tart needs 2 hours in the fridge to fully set, with the ganache firming up just enough to hold its shape but still feeling luscious.
I place mine on a wire rack over a baking sheet to prevent condensation from forming on the bottom. This keeps the crust crisp and the ganache glossy. ❄️
If you're short on time, chill the tart for 1 hour in the freezer (covered loosely), then finish setting at room temperature for 30 minutes. The freezer speeds up the process without compromising texture.
Always let it come to room temperature before serving—this enhances the chocolate's aroma and melts the ganache slightly for the perfect bite.
Flawless Presentation
Dust the powdered sugar through a fine-mesh sieve for an even, professional finish. Hold the sieve 4-6 inches above the tart and tap gently to distribute the sugar evenly.
For extra drama, add a sprinkle of flaky sea salt or toasted almond slivers before serving. These contrasting textures elevate the dish from homemade to restaurant-quality. 💫
Serve the tart at room temperature with a dollop of whipped cream or a side of raspberries to balance the bitterness. I like to arrange the wedges on a slate board with fresh mint leaves for a visually stunning presentation.
The key is to let the tart shine—keep garnishes minimal and purposeful.
Nutrition facts
Frequently asked questions
Can I use a different type of chocolate than 70% cocoa?
You can substitute with 60% cocoa for a slightly sweeter, milder flavor, but the bitterness will be less pronounced. For a true bitter chocolate experience, stick with 70%+ cocoa. If you prefer extra intensity, try 85% cocoa—just balance it with more sugar or citrus zest to prevent overpowering bitterness.
Why does my ganache turn grainy?
Grainy ganache usually means the cream was too hot or the chocolate wasn't finely chopped. Heat the cream to just below a simmer (205°F) and let it sit on the chocolate for 5 minutes before stirring. For extra smoothness, melt the chocolate first, then slowly add the warm cream while whisking constantly.
How do I fix a soggy crust?
Prevent soggy crusts by fully chilling the tart shell before adding ganache and ensuring the crust is completely cooled after baking. If it's already soggy, place the tart on a wire rack over a baking sheet and bake at 300°F for 10-15 minutes to crisp it up again. For future attempts, blind-bake the crust for 10 minutes before filling.
Can I make this tart ahead of time?
This tart keeps well for 3-4 days in the fridge once fully chilled. For longer storage, wrap it tightly in plastic and freeze for up to 2 months. Thaw overnight in the fridge before serving. The crust stays crisp for about 2 hours at room temperature, so bring it to the table just before cutting.
What's the best way to serve this tart?
Serve at room temperature with a dollop of whipped cream or a side of raspberries to balance the bitterness. For extra flair, dust with powdered sugar and add a sprinkle of flaky sea salt or toasted almonds. Arrange wedges on a slate board with fresh mint leaves for a restaurant-worthy presentation.