
Desserts
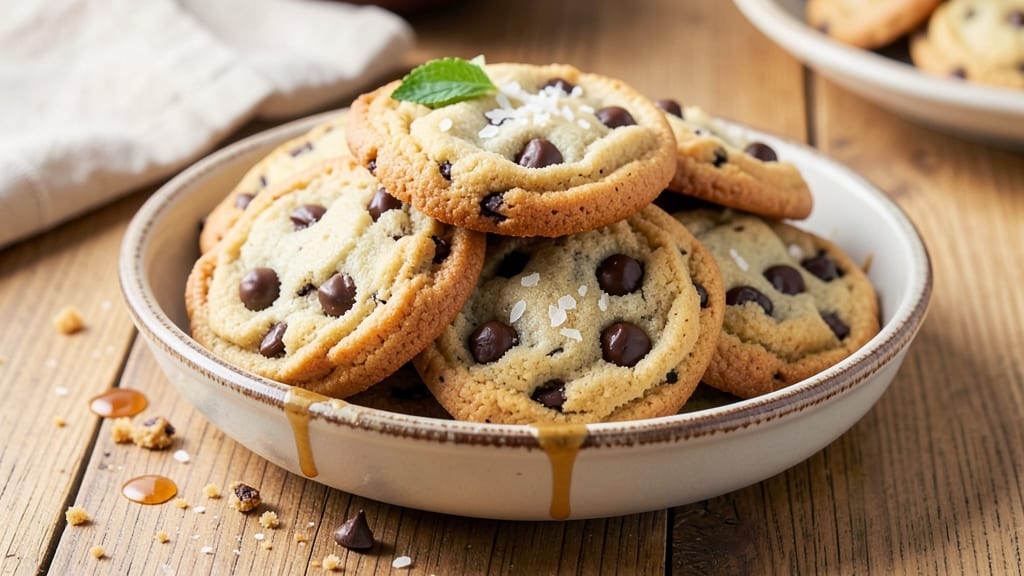
BJ's chocolate chip cookies recipe delivers the perfect balance of crispy edges and gooey centers—just like the ones you crave from your favorite bakery. 🌟 The secret lies in using a mix of brown and white sugar for that signature caramel flavor while maintaining a tender crumb.
I've tested countless variations, and this method consistently produces cookies with those coveted golden-brown edges and pockets of melted chocolate in every bite.
What makes this recipe stand out is the careful technique of chilling the dough for at least 30 minutes before baking. This step ensures the cookies spread just enough to create that classic shape while staying thick in the center.
The butter should be softened but not melted, and the chocolate chips should be added last to prevent them from melting too quickly in the warm dough.
By the time they emerge from the oven, you'll have cookies that are crisp around the edges and soft in the middle, with pools of melted chocolate that make them impossible to resist.
The aroma alone will fill your kitchen with warmth, and the texture is exactly what you're looking for—no more dry, flat cookies or overly crispy ones.
These cookies are perfect for sharing with friends, gifting, or enjoying with a cold glass of milk. They also freeze beautifully, so you can bake a batch ahead and enjoy fresh cookies all month long. Let's get started on making these timeless treats!
Ingredients for bj's chocolate chip cookies
Classic cookie ingredients with a few pro tricks for bakery-style results.
| Ingredient | Amount | Notes |
|---|---|---|
| Unsalted Butter 🧈 | 1 cup | Softened but not melted |
| Granulated White Sugar 🍚 | ¾ cup | For crispy edges |
| Packed Light Brown Sugar 🍚 | ¾ cup | For caramel flavor |
| Large Eggs 🥚 | 2 whole | Room temperature preferred |
| Vanilla Extract 💧 | 2 tsp | Pure vanilla preferred |
| All-Purpose Flour 🌾 | 3 ½ cups | Spooning method for accuracy |
| Baking Soda 🧂 | 1 tsp | Ensures lift |
| Salt 🧂 | 1 tsp | Kosher or sea salt |
| Milk 🥛 | ½ cup | Any kind works |
| Semi-Sweet Chocolate Chips 🍫 | 2 cups | Add last to prevent melting |
| Flaky Sea Salt 🧂 | 1 tsp | For finishing (optional) |
The butter is non-negotiable here—use European-style butter like Plugrá or Land O'Lakes if you can, but any unsalted will work. Grab the light brown sugar (not dark) for that perfect caramel balance. I always buy chocolate chips in bulk at Costco—cheaper and fresher. The vanilla matters too: pure extract from a dark bottle (the imitation stuff smells like perfume). Flour? King Arthur or Gold Medal are my go-tos—they're consistent. And if you're feeling fancy, grab Maldon flaky salt for that gourmet touch.
No vanilla extract? 1 tsp vanilla sugar works in a pinch, but real vanilla is worth it. Short on milk? Heavy cream or even water keeps the dough together. The chocolate chips can be swapped for chopped chocolate bars—just chop them yourself for better texture. And if you're gluten-free, King Arthur gluten-free flour blend is your best bet. Pro tip: Chill your dough for 30-60 minutes—this makes all the difference for that perfect spread and chew.
The dough keeps for 3 days in the fridge, wrapped tightly. For longer storage, freeze dough balls for up to 3 months—just bake straight from frozen, adding 2-3 minutes. Baked cookies? Store in an airtight container at room temp for 5 days or freeze for 3 months. I always bake half, then freeze the rest—perfect for when cookie cravings hit.
Why You'll Love This Recipe
- No Mixer Needed: I swear by this recipe because it only calls for creaming butter and sugars by hand—no electric mixer required. The cold butter cuts into the sugars effortlessly, and before you know it, you’re shaping dough that’s just the right texture.
- Chewy-Crispy Magic: That perfect balance? All in the sugars—white for structure, brown for chew. The vanilla and eggs bind it together so the edges get crispy while the center stays soft. You’ll taste the difference from the first bite.
- Party in a Jar: Between us, these are my go-to for holiday gifts or teacher appreciation gifts. They freeze beautifully, so I bake a batch, wrap them in tins, and boom—you’ve got a thoughtful present that doesn’t require fancy packaging.
- Pantry Staple Power: You’re already using stuff you’ve got: butter, sugar, eggs. No weird ingredients or last-minute grocery runs. And if you make a double batch? They last for days—toss a few in lunchboxes or reheat in the oven for that fresh-baked taste.
Step-by-step instructions for BJ's chocolate chip cookies
Here's how to make cookies so perfect they'll have everyone asking for the recipe.
🍳 Step 1: Cream Butter and Sugars to Fluffy Perfection
In a stand mixer fitted with the paddle attachment, beat the 1 cup unsalted butter on medium speed for 30 seconds until smooth. Add the 0.75 cup granulated white sugar and 0.75 cup packed light brown sugar and beat for 3-4 minutes until light and fluffy—the mixture should nearly double in volume and turn pale.
This creaming process is where the magic happens. You're incorporating air into the butter, which creates those beautiful crackly tops and helps the cookies spread just enough. I press down on the butter mixture with a spatula occasionally to make sure everything's well combined. If you're doing this by hand, use a hand mixer and be patient—it takes about 5 minutes of steady mixing.
👨🍳 Step 2: Add Eggs and Vanilla for Rich Flavor
Add the 2 whole large eggs one at a time, mixing on low speed for 30 seconds after each addition until fully incorporated. Then add the 2 teaspoons vanilla extract and mix for another 10 seconds. The mixture might look slightly curdled, but don't worry—it'll come together when we add the dry ingredients.
Here's the thing—room temperature eggs work best, but if yours are straight from the fridge, no worries. Just let them sit out for 15-20 minutes before using. The vanilla extract should be pure, not imitation, for that authentic flavor. I give everything a quick stir with a spatula to make sure the vanilla is evenly distributed.
🥘 Step 3: Combine Wet and Dry Ingredients
In a separate bowl, whisk together the 3.5 cups all-purpose flour, 1 teaspoon baking soda, and 1 teaspoon salt. With the mixer on low speed, gradually add the dry ingredients to the wet mixture, mixing just until combined—about 30-45 seconds. You should still see some flour streaks, which means you haven't overmixed the dough.
Overmixing develops gluten, which leads to tough cookies. I like to use the "spoon and fold" method here: turn off the mixer, use a silicone spatula to scrape down the sides, then fold everything together by hand. This ensures even distribution without overworking the dough. Now's also the time to fold in the 2 cups semi-sweet chocolate chips—just gently stir them in with a spatula.
⏰ Step 4: Chill the Dough for Better Cookies
Cover the mixing bowl with plastic wrap and refrigerate for at least 30 minutes—I prefer 1 hour if you have the time. Chilling the dough does three important things: it solidifies the butter so the cookies hold their shape, it allows the flour to fully hydrate for better texture, and it gives the flavors time to meld together.
Don't skip this step, I know it seems like too much waiting, but trust me. Cold dough means the cookies won't spread too thin in the oven, resulting in thicker cookies with crispy edges and gooey centers. If you're really in a hurry, you can chill the dough in the freezer for 15 minutes, but bring it back to the fridge for at least 10 minutes before baking.
🔥 Step 5: Bake to Golden, Gooey Perfection
Preheat your oven to 350°F and line two baking sheets with parchment paper. Using a cookie scoop or tablespoon, drop the chilled dough onto the prepared sheets, spacing them 3 inches apart—they'll spread about 1 inch during baking. For 24 cookies, you'll need about 2 tablespoons of dough per cookie.
Bake for 11-13 minutes until the edges are golden brown but the centers still look slightly underdone. They'll continue cooking on the hot pan after you remove them from the oven. Here's where it gets tricky: the cookies should be set around the edges but still soft in the middle. If you pull them out too early, they'll be cakey. If you leave them in too long, they'll be dry.
Let the cookies cool on the baking sheet for 5 minutes before transferring to a wire rack. While they're still warm, sprinkle each cookie with a pinch of flaky sea salt for that gourmet touch. Serve immediately while they're warm and gooey—this is when they're at their absolute best!
Pro Tips For Making Bj'S Chocolate Chip Cookies
- MEASURE BUTTER COLD: Take the butter straight from the fridge—no softening at room temp. I learned this the hard way after making dough that spread like pancake batter into flat, sad cookies. Cold butter creates pockets for the chocolate to melt into, giving you those perfect chewy centers.
- WHISK EGGS FIRST: Crack the eggs into a separate bowl and whisk them vigorously before mixing into the dough. This prevents lumps, especially when adding the wet ingredients to the butter-sugar mix. Skip this, and you’ll end up with a cookie that’s more "lumpy surprise" than "homogeneous joy."
- UNDERBAKE BY 2 MINUTES: Pull the cookies out when the edges are golden but the centers still look slightly underdone—they’ll firm up as they cool. After overbaking three batches (yes, really), I now set a timer for 2 minutes less than the recipe says and watch the oven like a hawk. Trust the process—your cookies will thank you.
- TOAST THE CHOCOLATE: Spread the chocolate chips on a baking sheet and warm them in a 300°F oven for 5–7 minutes before baking the cookies. This melts them just enough to create a gooey, caramelized center in every bite. I was skeptical until I tried it—now it’s non-negotiable.
Troubleshooting your bj's chocolate chip cookies
Dough Too Sticky
If your dough feels like playdough and won't hold its shape, you're likely overmixing or using too much liquid. The fix? Add 1 tablespoon of flour at a time until it's just manageable—don't overdo it, or your cookies will be dry.
I've found that chilling the dough longer (up to 2 hours) also helps firm it up. If you're in a rush, pop the dough in the freezer for 15 minutes while you prep your baking sheets.
Cookies Spread Too Much
Over-spread cookies usually mean your butter was too soft or the dough wasn't chilled enough. For next time, make sure your butter is softened but not melted—it should dent when pressed but not smear.
Also, increase your chill time to 1-2 hours or even overnight. If you're baking in a hot kitchen, try preheating your oven for 10 extra minutes to ensure even heat distribution.
Cookies Too Cakey
Cakey cookies happen when you pull them out too soon or underbake them. Aim for 11-13 minutes at 350°F until the edges are golden but the centers still look slightly soft. A quick trick: press down gently on a cookie—if it springs back slowly, it's done.
If you're worried about underbaking, try baking for 1-2 minutes longer and let them rest on the tray for 5 minutes before transferring.
Chocolate Chips Burned
Burnt chocolate chips are a classic baking fail, usually caused by overbaking or hot spots in your oven. Rotate your baking sheets halfway through baking to ensure even heat. Also, try placing a second baking sheet on the middle rack while your cookies bake—this creates a more even temperature zone.
If you notice your oven runs hot, reduce the temperature to 340°F and add 1-2 minutes to your bake time.
Cookies Too Dry
Dry cookies often result from overbaking or using too much flour. First, check your bake time—pull them out when edges are golden but centers are still soft. For extra moisture, add 1 tablespoon of milk or melted butter to your dough.
If you've already baked them too long, try reviving them by placing the cooled cookies in a 350°F oven for 2-3 minutes with a few drops of water on a paper towel.
No Rise at All
If your cookies look flat and dense, your baking soda might be old or expired. Always check the expiration date—baking soda loses potency over time. Also, make sure you're using baking soda (not baking powder) for this recipe.
For an extra boost, add ½ teaspoon of apple cider vinegar or lemon juice to your dough—this reacts with the baking soda to create lift. Finally, ensure your oven is properly calibrated by testing it with an oven thermometer.
Nutrition facts
Frequently asked questions
Why do I need to chill the dough?
Chilling the dough for 30-60 minutes is key for perfect texture—it prevents excessive spreading while baking, helps the butter firm up for better shape, and lets flavors meld. The longer you chill (up to 24 hours), the thicker and chewier your cookies will be. If you're short on time, freeze the dough balls for 15 minutes before baking.
Can I use dark chocolate instead of semi-sweet chocolate chips?
Dark chocolate adds a richer flavor, but use 60-70% cacao for best results. Chop your own bars for better texture—chocolate chips melt faster. For a fun twist, mix 1 cup semi-sweet and 1 cup dark chocolate chips together. Just be aware dark chocolate makes cookies slightly denser.
How do I store these cookies to keep them fresh?
Store baked cookies in an airtight container at room temperature for 5 days, or freeze for 3 months. For dough, refrigerate for 3 days or freeze dough balls for 3 months. Pro tip: Place a slice of bread in the container to absorb moisture and keep cookies soft. Warm cookies straight from the freezer by baking at 300°F for 5 minutes.
What's the secret to getting those perfect golden edges?
The golden edges come from baking at 350°F for 11-13 minutes until edges are set but centers are still soft. Use light brown sugar (not dark) for caramelization, and rotate pans halfway through baking. For extra browning, sprinkle a pinch of flaky salt on the baking sheet before adding dough—it creates steam for crispier edges!
Can I make these cookies without a mixer?
Yes! Use a sturdy wooden spoon or fork to cream the butter and sugars by hand—it takes 5-7 minutes of vigorous mixing until light and fluffy. For the dough, fold ingredients together with a spatula. Just work quickly to avoid overmixing. The texture will be slightly less airy but still delicious—these cookies are forgiving!