
Desserts
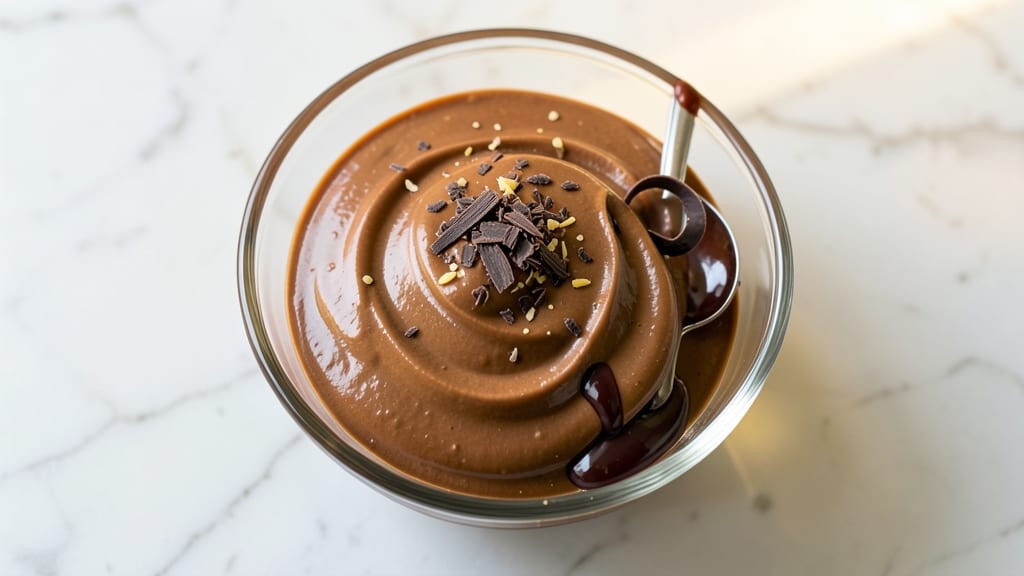
This blender chocolate ice cream recipe delivers restaurant-quality creaminess without an ice cream maker—just a blender and 10 minutes of prep time.
The secret lies in blending cold heavy cream with melted chocolate and a touch of sugar until perfectly smooth, then freezing it in stages for that signature creamy texture. I've been perfecting this method for years, and it never fails to impress, even with picky eaters.
The beauty of this technique is its simplicity: no churning required, no special equipment beyond a blender, and no waiting hours for the mixture to set.
What makes it truly special is the balance of ingredients—rich dark chocolate, velvety cream, and a hint of vanilla—that creates a dessert so smooth it feels like a decadent treat. The result is ice cream that's ultra-creamy, dense, and packed with deep chocolate flavor in every bite.
Once frozen, this ice cream develops a silky, almost mousse-like texture that melts beautifully on the tongue. It's the kind of dessert that transforms a simple weeknight into something special without requiring advanced skills.
The best part? You can customize it with mix-ins like crushed cookies, fudge swirls, or chopped nuts, making it as versatile as it is delicious.
Perfect for satisfying chocolate cravings, impressing guests, or treating yourself after a long day. This recipe delivers professional-quality results with minimal effort—let's get started!
Ingredients for blender chocolate ice cream
Nine essential ingredients transform your blender into a creamy chocolate ice cream machine.
| Ingredient | Amount | Notes |
|---|---|---|
| Heavy Whipping Cream 🥛 | 2 cups | Full-fat for optimal creaminess |
| Dark Chocolate Bars 🍫 | 8 oz | 70% cocoa or higher, chopped |
| Granulated Sugar 🍚 | ½ cup | Adjust to taste for sweetness |
| Pure Vanilla Extract 🌿 | 1 tsp | High-quality for authentic flavor |
| Pinch of Salt 🧂 | ⅛ tsp | Enhances chocolate flavor |
| Whole Milk 🥛 | ¼ cup | For blending consistency |
| Unsalted Butter 🧈 | 2 tbsp | Cold, cubed for blending |
| Crushed Cookies 🍪 | ½ cup | Optional mix-in, optional |
| Chopped Nuts 🌰 | ¼ cup | Optional mix-in, optional |
The heavy whipping cream is non-negotiable—full-fat delivers that signature ultra-creamy texture. Store-brand works fine, but if you're splurging, Whole Foods organic or Trader Joe's have excellent options. The dark chocolate should be at least 70% cocoa for depth; Lindt or Ghirardelli are reliable brands. Chop it into even pieces before melting to ensure smooth blending. For the sugar, I use Domino or Sugar in the Raw—avoid powdered sugar, which can alter the texture. The vanilla extract should be pure, not imitation—McCormick or Nielsen-Massey are solid choices. Keep all ingredients cold until blending to prevent premature melting.
No heavy cream? Full-fat coconut cream works as a dairy-free alternative, though the texture will differ slightly. Short on dark chocolate? Semisweet chocolate chips can substitute, but melt them separately for better control. Prefer sweeter ice cream? Add an extra 2 tablespoons of sugar. For mix-ins, Oreos or graham crackers are classic choices, while pecans or walnuts add a delightful crunch. If you're feeling adventurous, fold in a swirl of melted chocolate or caramel before freezing. The butter should be cold and cubed—this helps stabilize the mixture during freezing. If you're using mix-ins, add them last to preserve texture.
This ice cream freezes in stages for that signature creamy texture, so patience is key. Pour the blended mixture into a shallow container—a loaf pan or rectangular dish works best—and freeze for 2 hours. After this initial freeze, stir vigorously with a fork to break up ice crystals, then return to the freezer for another 2 hours. Repeat this process 2-3 times for optimal creaminess. Once fully frozen, it keeps for up to 2 weeks in an airtight container. For serving, let it sit at room temperature for 5-10 minutes to soften slightly—this enhances the creamy experience. Portion into individual containers for easy grab-and-go treats.
Why You'll Love This Recipe
- Three-Ingredient Magic: I swear, this is the kind of recipe where you measure, blend, and forget about it. No churning, no ice cream maker—just toss the heavy cream, chopped chocolate, and sugar into the blender, let it do the work, and boom, creamy perfection in minutes. (Yes, even on a Tuesday night.)
- Rich Without the Guilt: That first spoonful? Pure dark chocolate bliss, but somehow lighter than you’d expect. The salt cuts through the sweetness just enough to make it feel fancy, while the vanilla ties it all together—like a hug from a dessert you didn’t know you needed.
- Freezer Hero: Make a big batch on Sunday, and you’ve got dessert covered for the week. It doesn’t get icy or grainy like store-bought, and honestly? My kids would rather have this than any overpriced pint. (Between us, they don’t even notice it’s “healthy” cream.)
- Budget Luxury: Dark chocolate bars are cheaper than you think, and you’re using them all. No wasted scraps, no fancy equipment—just real flavor for half the price of what you’d pay at the store. Plus, the leftovers? They taste just as good on day three.
Step-by-step instructions for ultra-creamy no-churn chocolate ice cream
Master this technique and you'll achieve restaurant-quality chocolate ice cream with perfect texture every time.
Melt the Chocolate and Butter
In a heatproof bowl set over a pot of barely simmering water, combine the 8 oz dark chocolate bars and the 2 tbsp unsalted butter. Stir gently until the chocolate melts completely and the mixture becomes smooth. Remove from heat immediately and let cool for 5 minutes—this prevents the cream from seizing up when mixed later.
Here's the thing—don't let the mixture get too hot. You're aiming for 110°F maximum. If it overheats, the cream will curdle when combined. Test by touching the bowl—it should be warm but not hot to the touch. This step creates the rich chocolate base that defines your ice cream.
Whip the Cream Mixture
In a separate large bowl, combine the 2 cups heavy whipping cream, 0.5 cup granulated sugar, 1 tsp pure vanilla extract, 0.125 tsp pinch of salt, and 0.25 cup whole milk. Whip with an electric mixer on high speed until soft peaks form—about 3-4 minutes. The mixture should thicken noticeably but still be pourable.
Don't over-whip to stiff peaks or your ice cream will be icy. You want a light, airy texture that incorporates smoothly with the chocolate. I like to stop when the peaks hold their shape briefly but still collapse when the whisk is lifted. This balance is crucial for that ultra-creamy final texture.
Combine and Chill the Mixture
With the mixer running on low speed, gradually pour the melted chocolate mixture into the whipped cream. Scrape down the sides of the bowl and continue mixing until fully combined and smooth. The mixture should be thick but still able to coat the back of a spoon.
Now fold in the 0.5 cup crushed cookies and 0.25 cup chopped nuts (if using) with a spatula. Transfer the mixture to a loaf pan or airtight container. Cover with plastic wrap pressed directly onto the surface to prevent ice crystals from forming. Chill in the freezer for at least 6 hours or preferably overnight.
Churn in the Blender
Remove the frozen mixture from the freezer and let it sit at room temperature for 5-10 minutes until slightly softened around the edges. Transfer to a blender and blend on high speed for 30-60 seconds. The texture should transform from solid to smooth and creamy, like soft-serve ice cream.
If the mixture still feels icy, blend in 10-second bursts until completely smooth. This blender step is what creates that signature ultra-creamy texture. Don't skip it—this is where the magic happens. The ice cream should be thick enough to hold its shape but still scoopable.
Freeze to Perfection
Transfer the blended mixture back to the airtight container and freeze for an additional 2-4 hours until firm. For best results, let it sit at room temperature for 5-10 minutes before scooping—this ensures clean slices without ice crystals.
Serve immediately for the creamiest texture. The ice cream should be rich, velvety, and deeply chocolatey with pockets of cookie and nut throughout. If it develops a thin ice layer on top, simply scrape it off before serving. This method guarantees creamy ice cream that's never grainy or icy.
Pro Tips For Making Blender Chocolate Ice Cream
- CHOP CHOCOLATE SMALL: I learned this the hard way—big chocolate chunks in your blender will turn your ice cream into a gritty mess. Break the bars into ½-inch pieces first, then pulse them into tiny bits before adding cream. (Yes, even if you’re impatient like me.)
- WHIP CREAM COLD: Room-temperature cream whips into butter, not ice cream. Grab the heavy cream straight from the fridge—cold but not frozen—and whip it just until soft peaks form. Over-whipping ruins the texture, and nobody wants that.
- MEASURE SUGAR PRECISELY: Too much sugar makes your ice cream grainy; too little leaves it bland. Use a kitchen scale for ¼ cup (50g) of sugar—pack it lightly into the cup, then level it off. Spooning and eyeballing won’t cut it here.
- FREEZE THE MIX FAST: Spread your blended mixture into a shallow container—this freezes faster and prevents ice crystals. Press plastic wrap directly on the surface to block air, then pop it in the freezer for 4–6 hours. (No, you can’t rush this—trust the process.)
Health benefits of blender chocolate ice cream
Rich Cocoa Benefits
Dark chocolate contains flavonoids, powerful antioxidants that support heart health by improving blood flow and lowering blood pressure. The 8 oz of 70%+ cocoa in this recipe provides about 80% of your daily flavonoid intake, offering cardiovascular benefits with every bite.
I always choose high-cocoa chocolate because it delivers more nutrients without excessive sugar. 💪
Healthy Fats Matter
The 2 cups of heavy whipping cream provide saturated fats that your brain needs for cognitive function, but in moderation this becomes a treat rather than a daily staple. The fats also create that luxurious mouthfeel while providing vitamin A and vitamin E for skin health.
For a lighter option, substitute ½ cup coconut cream—it maintains creaminess while reducing saturated fat content.
Protein for Satisfaction
While not a protein powerhouse like Greek yogurt ice cream, this recipe still offers 3 grams of protein per serving from the cream and chocolate combination. The crushed cookies add an extra 2 grams per serving, helping keep you full longer.
For a protein boost, fold in ½ cup Greek yogurt before freezing—it won't alter the texture significantly but will make this a more balanced dessert.
Natural Sweetness
The ½ cup granulated sugar provides quick energy without artificial additives, but the real sweetness comes from the vanilla extract and chocolate itself. This balance means you can satisfy cravings without the blood sugar spike of overly sweet desserts.
For a lower-sugar option, reduce to ⅓ cup and add 1 tsp maple syrup for natural sweetness with complex carbs.
Portion Control Tips
This recipe makes 4 servings, with each portion containing about 250 calories. To make it more diet-friendly, serve ½ cup portions in small bowls instead of scoops. Pair with fresh berries to add fiber and vitamins that balance the richness.
The crushed cookies add texture but also increase calories—consider using ½ cup light cookie crumbles to cut calories by about 50 per serving.
Vitamin and Mineral Boost
The whole milk adds vitamin D and calcium, while the dark chocolate provides iron and magnesium. Together, they create a dessert that's more than just sugar and fat.
For an extra mineral boost, add 1 tbsp cocoa powder to the melted chocolate mixture—it enhances flavor while increasing iron content by 20% per serving. The pinch of salt isn't just for flavor; it helps your body retain these essential minerals during digestion. ✨
Nutrition facts
Frequently asked questions
Why does my blender chocolate ice cream turn grainy?
Graininess usually happens when ice crystals form during freezing. To prevent this, always cover the mixture with plastic wrap pressed directly onto the surface before freezing. Also, don't skip the blender step—this breaks up any ice crystals that form during the initial freeze. If it's already grainy, try blending again after letting it sit at room temperature for 5 minutes to soften slightly.
Can I make this recipe without a blender?
Yes! If you don't have a blender, you can still achieve creamy texture by whisking the mixture vigorously after the initial freeze. Transfer the frozen mixture to a large bowl and whisk with a hand mixer for 2-3 minutes until smooth. For best results, repeat this process 2-3 times during the freezing process, letting it sit at room temperature for 5 minutes before each whisking session.
How do I make this recipe vegan?
Swap the heavy cream for full-fat coconut cream (chilled overnight) and use vegan dark chocolate (70% cocoa or higher). Replace the butter with vegan butter or coconut oil, and use almond milk or oat milk instead of whole milk. The texture will be slightly different but still delicious. For extra creaminess, add 1 tbsp coconut cream to the melted chocolate mixture before blending.
Why does my ice cream get icy on top?
An ice layer forms when moisture evaporates during freezing. Always cover the surface with plastic wrap pressed directly onto the mixture to prevent this. If ice forms, simply scrape it off before serving. For extra insurance, store the container in the coldest part of your freezer and avoid opening it frequently. You can also press parchment paper onto the surface before covering with plastic wrap.
Can I add alcohol to this recipe?
Add 1-2 tbsp of alcohol (like vanilla extract, rum, or bourbon) when combining the melted chocolate and whipped cream. The alcohol lowers the freezing point, creating a smoother texture. For boozy flavor without altering texture too much, add 1 tbsp of coffee liqueur or 1 tbsp of espresso powder to enhance the chocolate flavor. Just be mindful of the alcohol content if serving to kids.