
Desserts
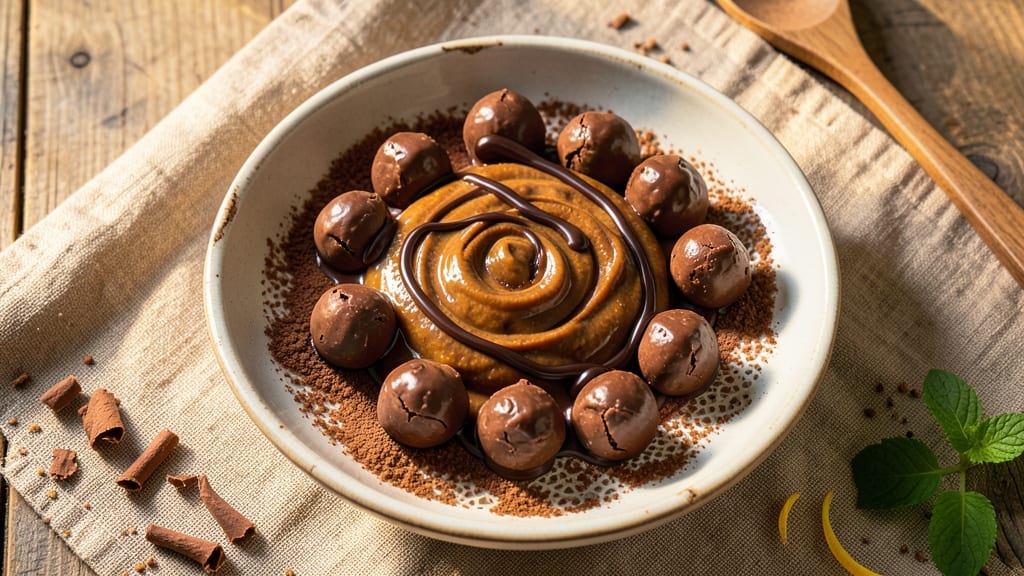
This Brazil chocolate balls recipe delivers no-bake magic with just four simple ingredients that transform into rich, fudgy clusters coated in melted chocolate. The secret lies in the perfect balance of condensed milk, cocoa powder, and butter—simmered until silky smooth before rolling into bite-sized balls.
These aren’t just treats; they’re a nostalgic Brazilian classic that requires no oven, no stress, and only 30 minutes of hands-on time.
The beauty of this recipe is its foolproof technique: no baking skills needed, just a saucepan, a spoon, and your hands. The mixture thickens as it cooks, creating a velvety texture that holds its shape when rolled.
Once chilled, the balls develop a satisfying firmness while keeping their creamy interior—ideal for parties, gifts, or satisfying a sweet craving. The traditional version uses dark chocolate for coating, but you can customize with white chocolate, sprinkles, or even crushed nuts for extra texture.
What makes these chocolate balls truly special is how they taste—decadent yet light, with a perfect snap from the chocolate shell and a melt-in-your-mouth center. The recipe scales effortlessly, so you can make a single batch for two or double it for a crowd.
Serve them at room temperature for the best texture, or chill them slightly to make rolling easier. Every bite is a reminder of why this dessert is a Brazilian staple.
For those who love to experiment, the variations are endless: swap cocoa powder for matcha or cinnamon, or add a pinch of sea salt to enhance the chocolate flavor. The key is keeping the base recipe intact—once you master the no-bake technique, the possibilities are limited only by your imagination.
Let’s get started on these crunchy cocoa clusters that taste like a hug in dessert form.
Ingredients for brazil chocolate balls
Four ingredients transform into these velvety cocoa clusters—no oven needed!
| Ingredient | Amount | Notes |
|---|---|---|
| Sweetened Condensed Milk 🥛 | 1 can | 14 oz can, full-fat preferred |
| Unsalted Butter 🧈 | ½ cup | Full-fat for richness |
| Cocoa Powder 🍫 | ½ cup | Dutch-processed for smoothness |
| Dark Chocolate Bars 🍫 | 8 oz | 70% cocoa, chopped fine |
| Vanilla Extract 🌿 | ½ tsp | Pure, high-quality preferred |
| Salt 🧂 | ¼ tsp | Fine sea salt |
| Powdered Sugar 🍚 | ¼ cup | For dusting, optional |
The condensed milk is the heart of these treats—look for full-fat cans for the richest flavor. Trader Joe's or Costco usually carry the best brands, and you can find them in the baking aisle. Butter matters too—unsalted is a must so you control the saltiness. For cocoa powder, Hershey's Special Dark or Dutch-processed brands work perfectly, but avoid the natural cocoa if you want smoother results. The dark chocolate coating? 70% cocoa or higher gives that perfect snap and deep flavor—Ghirardelli or Lindt are my go-tos, but any good-quality chocolate will do.
No condensed milk? Mix equal parts evaporated milk and sugar (1 cup evaporated + 1 cup sugar = 1 can), but it won’t be quite the same. Swapping butter for coconut oil? Use the same amount, but expect a slightly different texture. Running low on cocoa powder? Melted chocolate at half the amount works in a pinch, though it’ll be thicker. The vanilla extract can be omitted if you’re out, but trust me—it’s worth having. For the chocolate coating, white chocolate or milk chocolate are fun alternatives, though traditionalists will argue for dark. And if you’re feeling fancy, add a pinch of flaky sea salt to the coating for a gourmet touch.
Store the finished balls in an airtight container at room temperature—they’ll keep for about 1 week. For longer storage, freeze them for up to 3 months—just let them sit at room temp for 10 minutes before serving. The mixture thickens as it cools, so don’t worry if it looks too runny while warm. Rolling them into balls is the best part—wet your hands slightly to prevent sticking. These taste even better the next day, so make a big batch and share the love!
Why You'll Love This Recipe
- No Mixing Madness: I swear by this recipe because it’s literally just stirring and rolling—no fancy techniques, no stress. You melt butter, mix in condensed milk and cocoa, add vanilla, then roll into balls before dipping in chocolate. That’s it. Even my toddler could handle it (though I’d supervise the chocolate part).
- Creamy-Cocoa Bliss: The combo of sweetened condensed milk and rich cocoa powder gives these balls a decadent texture—smooth, fudgy, and just sweet enough without being cloying. Plus, the dark chocolate coating adds that perfect snap. Honestly, it’s the kind of treat that makes you feel like you’re indulging, even when you’re just snacking on the couch.
- Party in a Jar: These are my go-to for potlucks, holiday gifts, or just because. They keep beautifully in an airtight container for weeks, so you can make a big batch once and hand them out all season. Between us, they’re also way cheaper than store-bought truffles—same vibe, way more love.
- Zero-Waste Magic: Leftovers? None. Every last ball disappears. And if you’re smart, you’ll make extra—because they’re cheap to whip up (just a few dollars’ worth of ingredients) and disappear fast. I’ve even frozen them; they thaw perfectly and taste just as good. Practical? Absolutely. Worth it? Even more so.
Step-by-step instructions for Brazil chocolate balls recipe
Here's the no-fuss method for creating these addictive cocoa clusters—no oven needed!
Melt Butter and Chocolate Together
In a medium-sized heatproof bowl, combine the 0.5 cup unsalted butter and the 8 ounces chopped dark chocolate bars. Place this bowl over a pot of simmering water, ensuring the bottom of the bowl doesn't touch the water (this is called double-boiling). Stir gently with a silicone spatula until both the butter and chocolate are completely melted and smooth. You'll know it's ready when the mixture looks glossy and silky—about 5-7 minutes.
Remove the bowl from heat immediately and let it cool slightly for 2-3 minutes. This cooling step is crucial—it prevents the condensed milk from curdling when mixed in later. If you rush this, your chocolate balls might turn grainy instead of velvety smooth.
Mix in Condensed Milk and Flavors
Add the 1 can sweetened condensed milk to the melted chocolate mixture. Stir vigorously until fully combined—this should take about 1 minute with steady stirring. The mixture will thicken noticeably as it cools. Next, add the 0.5 cup cocoa powder, 0.5 teaspoon vanilla extract, and 0.25 teaspoon salt. Mix until completely smooth and free of any lumps.
Here's where the magic happens: the cocoa powder should dissolve completely, giving you a rich, dark batter. If you see any dry spots, gently warm the mixture again for 10 seconds in the microwave (just enough to melt any stubborn cocoa). Let the mixture sit for 5 minutes to thicken further—this resting period helps develop the perfect texture.
Shape and Chill the Chocolate Balls
Line a plate with parchment paper and dust it lightly with the 0.25 cup powdered sugar (if using). Using a small cookie scoop or tablespoon, portion out 1-tablespoon-sized balls of the chocolate mixture and roll them gently between your palms to create smooth, round balls. Place them on the prepared plate, spacing them about 1 inch apart. This prevents them from sticking together during chilling.
Refrigerate the chocolate balls for at least 2 hours—this is the most critical step. The longer they chill, the firmer and more crunchy they'll become. I like to leave them overnight for maximum texture. If you're impatient, pop them in the freezer for 1 hour, but they won't be quite as crispy.
Dust and Serve for Maximum Crunch
Once the chocolate balls are completely firm to the touch, remove them from the refrigerator. Generously dust each ball with additional powdered sugar, rolling them gently in your palms to coat evenly. This final step creates that signature crunchy exterior that makes these treats so irresistible. I like to serve them immediately after dusting while the sugar is still fresh and crisp.
Store any leftovers in an airtight container between layers of parchment paper for up to 5 days. These chocolate balls are perfect for parties, potlucks, or just satisfying that sweet tooth craving—no baking required! The contrast of creamy interior and crunchy exterior is what makes them truly special.
Pro Tips For Making Brazil Chocolate Balls
- Melt Butter Slowly: If you dump cold butter into the condensed milk, you’ll end up with a weird, grainy mess. Instead, melt the butter first—just enough to soften it, not turn it into soup—then whisk it into the warm (not hot) condensed milk. I learned this the hard way after scraping lumps out of my first batch.
- Chill the Mixture Fully: Skip the rush and let the dough cool completely before rolling. I used to roll it warm, and the balls would stick to my hands and flatten out. Pop it in the fridge for 20 minutes—your hands will thank you, and the balls will hold their shape.
- Use Real Vanilla: That tiny bottle of imitation vanilla extract? Save it for something else. Splurge on pure vanilla extract or even a scraped vanilla bean—it makes a noticeable difference in the depth of flavor. Trust me, the extra 50 cents is worth it.
- Roll Balls Evenly: Uneven balls = uneven baking. Use a small cookie scoop or two spoons to measure consistent portions—about 1.5 tablespoons each. If you’re rolling by hand, aim for 1.5-inch spheres. This isn’t the time to eyeball it.
Storing and reheating this recipe
Room-Temp Storage
Store your Brazil chocolate balls in an airtight container lined with parchment paper between layers to prevent sticking. At room temperature, they’ll keep their perfect texture for up to 5 days—just make sure they’re sealed tightly.
I like using glass containers with snap-on lids because they’re easy to stack and won’t absorb any flavors. For extra protection, place a piece of parchment paper directly on top of the balls before closing the lid. 💫
Fridge Freshness
If you’re not planning to eat them within a week, transfer the chocolate balls to the fridge. They’ll stay fresh for up to 10 days when stored properly.
The cold helps maintain their firmness, but let them sit at room temperature for 10-15 minutes before serving to soften slightly and bring out their rich flavors. I often make a big batch on weekends and keep extras in the fridge for quick dessert fixes during the week.
Freezer Magic
For long-term storage, freeze your chocolate balls in a single layer on a tray before transferring them to a freezer-safe bag or container. They’ll keep for up to 3 months without losing texture.
When ready to enjoy, thaw them in the fridge overnight or at room temperature for 30 minutes. Pro tip: Sprinkle a little extra powdered sugar on them after thawing to restore that signature crunch. ❄️
Reheating Tips
These treats don’t need reheating—they’re best served at room temperature—but if you prefer them slightly warmer, place them in a microwave-safe bowl and heat for 5-10 seconds on low power. Alternatively, warm them in a small saucepan over low heat with a splash of milk for a creamier texture.
Just avoid high heat, or the chocolate coating might melt unevenly. 🔥
Reviving Sticky Balls
If your chocolate balls lose their crunch and become sticky, don’t toss them! Pop them in the fridge for 15-20 minutes to firm up, then dust with extra powdered sugar or chopped nuts to refresh the texture.
The flavor will still be rich and delicious—just give them a little TLC. I’ve saved many a batch this way, especially when I’ve made them ahead for parties.
Frequently asked questions
Why do I need to cool the melted chocolate mixture before adding condensed milk?
The cooling step prevents the condensed milk from curdling when mixed with hot chocolate. If you combine them too quickly, the heat can cause the milk proteins to break down, resulting in a grainy texture instead of the smooth, velvety consistency these treats need.
Can I make these chocolate balls without powdered sugar?
Yes, but they'll lose their signature crunchy exterior! If you omit it, the balls will still taste delicious but may be stickier. For a substitute, try crushed nuts, shredded coconut, or even a sprinkle of flaky sea salt for a gourmet twist. The sugar helps create that satisfying texture contrast.
How do I fix chocolate balls that turned out too soft?
If your balls are too soft, they likely didn't chill long enough. Pop them back in the fridge for 1-2 extra hours or even overnight. For immediate results, place them in the freezer for 30 minutes to firm up. Once chilled, dust with extra powdered sugar to restore that perfect crunch.
What's the best way to prevent the mixture from sticking to my hands?
Wet your hands slightly with cold water before rolling the balls—this creates a natural barrier that prevents sticking. Alternatively, use a small silicone spatula to shape them into balls, then transfer to parchment paper. If the mixture is still too sticky, it may need more chilling time before shaping.
Can I make these with dairy-free ingredients?
Replace the butter with coconut oil and use dairy-free condensed milk (like coconut condensed milk). For the chocolate coating, choose dairy-free dark chocolate bars. The texture may be slightly different, but the rich cocoa flavor will still shine through. Just ensure all ingredients are fully melted and combined smoothly.