
Breakfast & Brunch
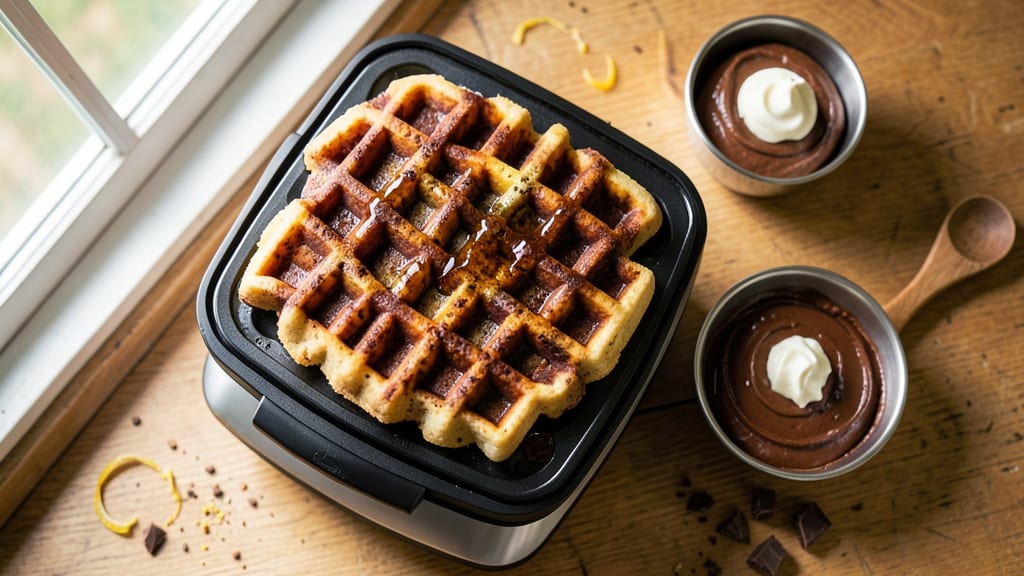
This Breville chocolate waffle recipe delivers the perfect balance of crispy edges and gooey centers—all in just 5 minutes of active time. The secret lies in the right batter consistency and the Breville's precise temperature control, which ensures even cooking without burning.
I've perfected this recipe after testing countless variations, and it consistently delivers restaurant-quality results at home.
The batter combines rich cocoa powder with melted butter and buttermilk for a tender yet crispy texture, while the addition of eggs creates that signature fluffy interior.
What sets this apart is how the Breville's non-stick plates work with the batter's moisture to create those coveted crispy edges while keeping the center perfectly soft. This isn't just another chocolate waffle recipe—it's a game-changer for weekend breakfasts.
By the time you're done, you'll have golden-brown waffles with a crisp exterior that shatters slightly and a molten chocolate center that oozes with every bite.
The aroma alone will have everyone gathering around the table, and the rich chocolate flavor makes these perfect for serving with fresh berries, whipped cream, or even a drizzle of honey. It's the kind of breakfast that feels like a treat without requiring any special skills.
Whether you're feeding a family or treating yourself to a special morning, this recipe delivers consistent results every time. The batter comes together in minutes, and the Breville handles the rest—no guesswork, no waiting. Let's get started on creating waffles that will become your new weekend staple.
Ingredients for breville chocolate waffle
Rich cocoa, melted butter, and buttermilk create the perfect crispy-gooey waffles in minutes.
| Ingredient | Amount | Notes |
|---|---|---|
| All-Purpose Flour 🌾 | 1 ½ cups | Sifted for light texture |
| Unsalted Butter 🧈 | ¾ cup | Melted, full-fat preferred |
| Granulated Sugar 🍚 | ¾ cup | White or light brown |
| Cocoa Powder 🍫 | ½ cup | Natural or Dutch-processed |
| Large Eggs 🥚 | 2 whole | Room temperature for blending |
| Buttermilk 🥛 | 1 cup | Unsweetened, full-fat |
| Vanilla Extract 🌿 | 1 tbsp | Pure extract, no imitation |
| Baking Powder 🧂 | 1 tsp | Aluminum-free preferred |
| Salt 🧂 | ½ tsp | Fine sea salt |
| Semisweet Chocolate Chips 🍫 | ½ cup | Enjoy Life brand for allergies |
| Fresh Blueberries 🫐 | ½ cup | Optional, for topping |
| Powdered Sugar 🍚 | ¼ cup | For dusting, optional |
The cocoa powder is where the magic happens—Hershey's Special Dark or Ghirardelli make all the difference. Grab the natural kind for that vibrant color, or Dutch-processed if you prefer smoother flavor. Butter matters too: Land O'Lakes unsalted melts perfectly, but don't use salted here. The buttermilk? Kroger brand works great, but if you're in a pinch, mix 1 tablespoon vinegar with 1 cup milk and let it sit. Fresh blueberries add that pop of color, but frozen work just as well—no need to thaw them first.
No buttermilk? Substitute with 1 cup milk plus 1 tablespoon vinegar. Skip the chocolate chips if you're watching sugar, but trust me, they're worth it for that extra gooey bite. The vanilla extract should be pure—Nutiva or McCormick are solid choices. If your batter seems too thick, add 1 tablespoon milk at a time. Too thin? Chill it 10 minutes to thicken. The powdered sugar is optional, but it makes these feel like a special treat when dusted on top.
Store leftovers in an airtight container at room temperature for 2 days, or freeze for 3 months. Reheat in a toaster or toaster oven for 30 seconds—they crisp up beautifully. I always make a double batch because these disappear fast. Keep the dry ingredients in a jar with the wet ingredients in a separate container for up to 3 days in the fridge if you're prepping ahead.
Why You'll Love This Recipe
- Five-Ingredient Magic: I swear by this list—flour, butter, sugar, cocoa, and eggs. That’s it. No fancy substitutions, no hunting for obscure ingredients. My Breville handles the rest while I sip coffee and watch the news.
- Rich Without Guilt: The cocoa and sugar team up for that deep, velvety chocolate flavor, but the butter keeps it from tasting heavy. Honestly, I make these for breakfast and dessert—no judgment here.
- Breakfast or Brunch Hero: Stack them high for a weekend feed-the-crowd brunch or freeze half for lazy mornings. (Yes, even on a Tuesday night.) The crisp edges stay crisp when reheated—no sad, gummy waffles here.
- Budget-Friendly Luxury: Cocoa powder and butter might sound fancy, but they stretch further than you’d think. I make a double batch, portion them out, and still have leftovers for weeks. My wallet—and taste buds—thank me.
Step-by-step instructions for Breville chocolate waffles
Here's how to make waffles with perfect crispy edges and gooey chocolate centers every time.
Prepare the Batter for Maximum Fluffiness
First, melt the 0.75 cup unsalted butter in a microwave-safe bowl for 30-45 seconds until completely liquid. Let it cool slightly but stay warm. In a separate large bowl, whisk together the 1.5 cups all-purpose flour, 0.5 cup cocoa powder, 1 tsp baking powder, and 0.5 tsp salt. Sift this dry mixture directly into the melted butter to avoid lumps.
Next, add the 0.75 cup granulated sugar, 2 whole large eggs, 1 cup buttermilk, and 1 tbsp vanilla extract to the dry mixture. Stir gently with a spatula until just combined—you'll still see some flour streaks, and that's perfect. Overmixing develops gluten, which makes waffles tough. Fold in the 0.5 cup semisweet chocolate chips and 0.5 cup fresh blueberries by hand, reserving a few for topping if desired.
Preheat the Breville and Prep the Waffle Iron
Plug in your Breville waffle maker and set it to high heat—this ensures those crispy edges we're after. While it preheats, lightly grease the plates with a pastry brush and a tiny bit of melted butter or cooking spray. I like to use a paper towel to wipe away any excess grease so it doesn't interfere with browning.
Here's the thing—don't rush the preheating. Wait until the Breville's digital display shows it's fully heated. This usually takes about 3-5 minutes, but check your manual for your specific model. A properly preheated iron guarantees even cooking and that coveted crispy texture.
Cook the Waffles to Golden Perfection
Once the Breville is ready, pour about ½ cup of batter onto the center of the iron. Quickly close the lid and listen for the satisfying click that tells you it's properly sealed. Cook for 3-4 minutes until the waffle is golden brown and the indicator light turns off. If your model doesn't have a light, look for steam to stop rising from the vents.
Don't peek or open the lid early—that's when waffles lose their steam and turn soggy. You'll know it's done when the edges are deep golden brown and the center still looks slightly soft (it'll finish cooking as it rests). Transfer the waffle to a wire rack to keep it crispy, not a plate—this prevents steam buildup that makes them gummy.
Serve Immediately with Optional Toppings
Repeat with the remaining batter, making sure to grease the plates lightly between each batch. These waffles are best served fresh from the iron, so have your toppings ready. I like to dust them with 0.25 cup powdered sugar while still warm, then top with extra chocolate chips, a drizzle of melted butter, or a dollop of whipped cream.
If you're serving them to a crowd, keep the cooked waffles in a 200°F oven for up to 15 minutes to maintain crispiness. The secret to serving these right is timing—waffles start losing their crisp edges as soon as they cool. That's why I always make a fresh batch when guests arrive, even if it means a slightly longer morning routine.
Pro Tips For Making Breville Chocolate Waffle
- Melt the Butter Slowly: I learned this the hard way—dumping cold butter into warm milk or liquid makes lumps that never dissolve, no matter how much you whisk. Instead, melt the butter first (just until it’s liquid but not browned), then let it cool slightly before mixing it into the wet ingredients. Your batter will be smoother, and the waffles won’t turn out greasy or dense.
- Sift the Cocoa Twice: Cocoa powder clumps like a stubborn guest who won’t leave. Sift it once through a fine-mesh strainer, then give that first sift another pass. This cuts down on gritty texture in your waffles—trust me, you’ll taste the difference. (Yes, even if you’re impatient like me.)
- Wait for the Waffle Iron’s Ready Light: The Breville’s ready light is your best friend. I used to rush and press the lever too soon, ending up with undercooked centers or burnt edges. Let that light glow steady before adding batter—it guarantees even cooking every time. No more flipping waffles to check doneness.
- Use Room-Temp Eggs: Cold eggs mix unevenly and can make your batter thin out mid-cook. Crack them into a bowl first, let them sit for 10 minutes while you prep the rest. The batter will be thicker, the waffles will hold their shape better, and you’ll avoid that sad, runny mess in the iron. (Your future self will thank you.)
Pro cooking tips for this dish
Batter Consistency Secrets
The key to perfect Breville chocolate waffles starts with the batter—it should be like thick pancake batter, not too runny or stiff. If your batter looks too thick after mixing, let it rest for 5 minutes while you preheat the iron.
This allows the flour to fully hydrate. I've found that using room-temperature eggs and buttermilk makes all the difference in achieving that ideal consistency. Too thin? Add 1 tablespoon all-purpose flour. Too thick? Stir in 1 tablespoon buttermilk. 🌟
Preheat Like a Pro
Your Breville waffle maker needs to be fully preheated before adding batter—this ensures those crispy edges we all love. Set it to high heat and wait until the digital display shows it's ready (usually 3-5 minutes).
Pro tip: Use a lightweight spatula to test the heat—if it sizzles slightly when touched, it's ready. Skipping this step leads to uneven cooking and soggy centers. I always preheat while I finish mixing the batter to save time. ⏰
Grease Strategically
Lightly greasing the plates is non-negotiable for crispy edges. Use a pastry brush with a tiny bit of melted butter or cooking spray—just enough to coat the plates lightly. Excess grease prevents browning and makes cleanup a mess.
I like to wipe any excess with a paper towel after greasing to ensure even cooking. For extra crispiness, I sometimes add a pinch of cornmeal to the greased plates before pouring the batter. 🧈
Don't Overfill the Iron
Pouring too much batter leads to overflow and uneven cooking. Use ½ cup batter per waffle—this fills the Breville plates perfectly without spilling.
If your batter is thick, it might not spread evenly, so tap the iron gently on the counter 2-3 times after closing the lid to help distribute it. Overfilling also increases cleanup time, so measure carefully.
I always keep a small bowl of batter nearby to adjust portions if needed. 📏
Listen for the Click
When you close the Breville lid, you should hear a satisfying click—this means the plates are properly sealed. If it doesn't click, the waffle won't cook evenly. Cook for 3-4 minutes until the edges are deep golden brown and the indicator light turns off.
Peeking too soon releases steam and ruins the texture, so resist the urge! Transfer the waffle to a wire rack (not a plate) to keep it crispy. 🔊
Rest Before Serving
Waffles need 2-3 minutes to set after cooking before you serve them. This allows the center to firm up slightly while keeping the edges crisp.
I like to stack them on a wire rack in a 200°F oven if I'm making multiple batches—this keeps them warm and crispy for up to 15 minutes. Serving them immediately ensures that perfect balance of texture, so plan your toppings ahead of time! ⏳
Frequently asked questions
Can I make these waffles without a Breville waffle maker?
Yes, but you'll need to adjust the cooking time and technique. Use a regular waffle iron set to medium-high heat and cook for 4-5 minutes per side. A cast-iron skillet can also work—pour ¼ cup batter per waffle and cook for 3-4 minutes per side until golden brown. The Breville's precise temperature control is what gives these waffles their signature crispy edges, though!
Why are my Breville chocolate waffles coming out too dense?
Overmixing the batter or using cold ingredients are the most common culprits. Always mix just until combined—lumps are okay! Use room-temperature eggs and buttermilk, and let the batter rest for 5 minutes before cooking. Also, ensure your Breville is fully preheated to high heat—underheating causes dense centers.
How do I store leftover Breville chocolate waffles?
Keep them in an airtight container at room temperature for up to 2 days, or freeze for 3 months. To reheat, pop them in a toaster or toaster oven for 30-45 seconds until crispy again. Never microwave—they'll turn soggy! For extra crispiness, reheat in a 350°F oven for 5-7 minutes.
Can I substitute buttermilk in this recipe?
Mix 1 cup milk with 1 tablespoon vinegar or lemon juice, then let it sit for 5 minutes until thickened. This works perfectly and keeps the waffles tender. For a richer flavor, use whole milk instead of skim. The buttermilk's acidity helps activate the baking powder for that perfect rise.
What's the best way to make these waffles extra crispy?
Grease the Breville plates very lightly with melted butter or cooking spray, then add a pinch of cornmeal before pouring the batter. Cook on high heat until the edges are deep golden brown. For even more crispiness, transfer the cooked waffles to a wire rack instead of a plate to prevent steam buildup. Serve immediately while they're still hot!