
Desserts
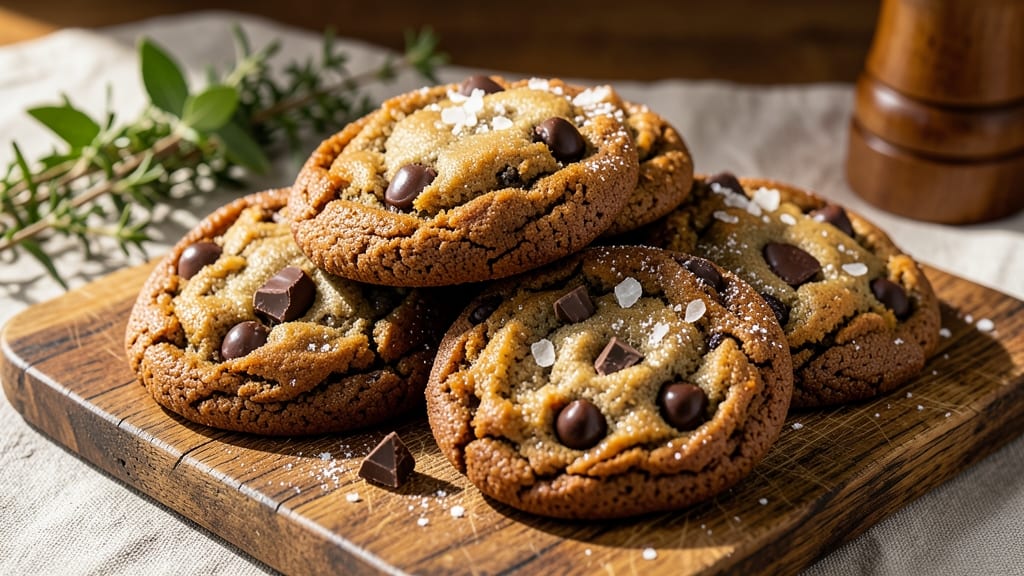
This brown butter pumpkin chocolate chip cookies recipe transforms ordinary cookies into a fall flavor explosion. 🍂 The nutty depth from brown butter meets classic pumpkin spice and melty chocolate in every bite—rich, caramelized, and perfectly balanced.
I perfected this recipe after years of testing, ensuring the dough stays tender while the edges crisp just enough to hold those gooey chocolate pockets.
The secret lies in browning the butter until it's golden and fragrant—this step creates that signature nutty aroma that sets these apart from regular chocolate chip cookies. Pumpkin puree adds natural sweetness and moisture, while cinnamon, ginger, and nutmeg build warm, cozy spice notes.
The dough comes together in minutes, but letting it rest ensures cookies that spread slightly for that classic thick-and-chewy texture.
By the time they emerge from the oven, you'll have cookies with crisp edges, tender centers, and pockets of melted chocolate that feel dangerously addictive. The brown butter adds a sophisticated caramelized depth that pairs perfectly with the pumpkin spice and classic chocolate.
These are the kind of cookies that disappear fast—ideal for holiday gatherings or satisfying that late-night sweet craving.
Adjust the spice levels to taste or swap chocolate chips for white chocolate and pecans for extra richness. The recipe scales easily, so double the batch when company's coming over. Here's everything you need to make them from scratch!
Ingredients for brown butter pumpkin chocolate chip cookies
Rich brown butter meets pumpkin spice and chocolate in these fall-inspired cookies—just 13 ingredients for maximum flavor impact.
| Ingredient | Amount | Notes |
|---|---|---|
| Unsalted Butter 🧈 | 1 cup | Browned to golden color, cooled slightly |
| Pumpkin Puree 🎃 | ½ cup | 100% pure, not pumpkin pie filling |
| Granulated Sugar 🍚 | ¾ cup | Light brown sugar for moisture |
| Dark Brown Sugar 🍚 | ¼ cup | Packed for caramel depth |
| Large Eggs 🥚 | 2 whole | Room temperature for even mixing |
| Vanilla Extract 🌿 | 1 tsp | Pure Madagascar bourbon preferred |
| Ground Cinnamon 🍃 | 1 ½ tsp | Freshly ground for maximum aroma |
| Ground Ginger 🌿 | ½ tsp | Freshly ground preferred |
| Ground Nutmeg 🌿 | ¼ tsp | Freshly grated nutmeg preferred |
| Salt 🧂 | ½ tsp | Diamond Crystal kosher salt |
| All-Purpose Flour 🌾 | 2 cups | Sifted for light texture |
| Semisweet Chocolate Chips 🍫 | 1 cup | High-quality, 60% cacao preferred |
| Baking Soda 🧪 | ½ tsp | Pure baking soda, not baking powder |
The butter deserves special attention here. Unsalted butter is a must—salted can alter the delicate balance of flavors. Browning it until it's golden and fragrant (that nutty aroma is non-negotiable) transforms these from ordinary cookies to something extraordinary. For the best results, use European-style butter like Plugrá or Land O'Lakes, which has higher fat content. The pumpkin puree should be 100% pumpkin with no added spices or sugars—Libby's or Pure Pumpkin brand work perfectly. Freshly ground spices make all the difference, so if you've got whole spices, take the extra minute to grind them. The chocolate chips? Ghirardelli or Guittard brands melt beautifully with those perfect pockets of gooey goodness.
No brown butter? Regular butter plus 1 tbsp browned butter substitute (mix 1 tbsp melted butter with 1 tsp sugar and 1/8 tsp vanilla, then cool) gets you close. Short on pumpkin puree? Canned pumpkin puree works in a pinch, but it's thicker—adjust other liquids as needed. Want to swap the chocolate? White chocolate chips or dark chocolate chunks add different dimensions, but stick to quality brands. The spices can be adjusted to taste—more cinnamon for warmth, extra nutmeg for depth. For a nutty crunch, fold in 1/2 cup toasted pecans at the end. The dough will be thick but workable—don't overmix once the flour is added.
This dough keeps beautifully in the fridge for up to 48 hours, wrapped tightly in plastic. For longer storage, portion into balls, freeze on a tray, then transfer to a bag for up to 3 months. Baked cookies stay fresh for 5 days at room temperature if stored in an airtight container. Pro tip: Let them cool completely before storing to prevent sogginess. The aroma alone will have you reaching for seconds—trust me, these disappear fast. Double the batch when company's coming over, as they're always requested for seconds.
Why You'll Love This Recipe
- No Fuss Mixing: I swear by this dough—just fold in the pumpkin puree and chocolate chips, then let the brown butter do the work. No food processor, no overworking, just a few minutes of stirring while the oven preheats.
- Rich, Nutty Magic: That brown butter alone? It’s the star—deep, toasty, and slightly caramelized with a hint of pumpkin’s warm spice. The dark brown sugar keeps them chewy, and the chocolate melts into gooey pockets. Chef’s kiss.
- Holiday or Snack: Between us, these disappear at Thanksgiving, but they’re just as good with coffee in January. Freeze half the dough for later, and they taste fresh-baked. (Yes, even on a Tuesday night.)
- Pantry Stash Winner: I make these with whatever sugar I have—white or brown—and the pumpkin puree stretches my grocery budget. Plus, brown butter uses up that half-stick of butter before it goes rancid. Smart, tasty, and zero waste.
Step-by-step instructions for brown butter pumpkin chocolate chip cookies
Here's the method to achieve that perfect balance of nutty brown butter, spiced pumpkin depth, and melty chocolate.
🔥 Step 1: Brown the Butter and Cool Completely
Melt the 1 cup unsalted butter in a light-colored saucepan over medium heat. Watch closely as it foams and bubbles—this is when the magic happens. Continue cooking until the butter turns a rich golden brown color and emits a nutty aroma, about 5-7 minutes. Immediately pour the browned butter into a heatproof bowl and let it cool for 10 minutes at room temperature.
I can't stress enough how important this cooling step is. The butter needs to solidify enough to mix properly with the pumpkin puree, but it shouldn't be completely hard. If you skip this, your dough will be too soft to handle. The nutty flavor from browning is what elevates these cookies beyond ordinary pumpkin spice.
👨🍳 Step 2: Mix Wet Ingredients for Maximum Flavor
In a large mixing bowl, combine the cooled brown butter with 0.5 cup pumpkin puree, 0.75 cup granulated sugar, and 0.25 cup dark brown sugar. Mix until smooth, then add the 2 whole large eggs one at a time, mixing well after each addition. Stir in the 1 tsp vanilla extract and let the mixture sit for 1 minute to allow the flavors to meld.
Here's where the spices come in—add 1.5 tsp ground cinnamon, 0.5 tsp ground ginger, 0.25 tsp ground nutmeg, and 0.5 tsp salt. The spices should dissolve completely into the wet mixture. I like to use a silicone spatula for this step to ensure everything is fully incorporated without developing gluten in the flour yet.
👨🍳 Step 3: Combine Dry Ingredients and Fold in Chocolate
In a separate bowl, whisk together the 2 cups all-purpose flour and 0.5 tsp baking soda. Sift the mixture directly into the wet ingredients, then gently fold with a spatula until just combined. Be careful not to overmix—you want to preserve the air bubbles created by the brown butter and eggs.
Remove the bowl from the mixer and fold in the 1 cup semisweet chocolate chips by hand using a rubber spatula. The chocolate should be evenly distributed throughout the dough, with no large pockets of chips. If the dough seems too sticky, chill it for 10 minutes before proceeding—this helps with portioning and prevents spreading.
⏰ Step 4: Chill the Dough for Perfect Texture
Cover the dough bowl with plastic wrap and refrigerate for at least 30 minutes, or up to 24 hours for enhanced flavor. This chilling step is crucial—it allows the flour to fully hydrate and the butter to firm up slightly, which prevents excessive spreading in the oven and promotes better cookie structure.
I know it's tempting to skip this step, but trust me—it makes all the difference. The cookies will hold their shape better, develop deeper flavor, and have that perfect chewy center with crispy edges. If you're in a hurry, at least 20 minutes in the freezer will work in a pinch.
🔥 Step 5: Bake to Golden Perfection with Browned Edges
Preheat your oven to 350°F and line two baking sheets with parchment paper. Using a 2-tablespoon cookie scoop, portion the chilled dough onto the prepared sheets, spacing the cookies 2 inches apart—they'll spread slightly during baking. Gently press down each portion with your finger to flatten slightly.
Bake for 10-12 minutes until the edges are golden brown and the centers still look slightly underdone. The cookies should pull away from the edges of the parchment paper but still appear soft in the middle. For the best results, rotate the baking sheets halfway through the baking time to ensure even browning.
Pro Tips For Making Brown Butter Pumpkin Chocolate Chip Cookies
- Brown Butter Slowly: I learned this the hard way—rushing the butter over high heat means burnt bits and a bitter taste. Keep it at medium-low and stir constantly until it’s a deep golden brown with nutty aroma, about 6-8 minutes. If it starts smoking, you’ve gone too far.
- Strain That Pumpkin: Unless you’re using ultra-smooth puree, skip the lumps—strain the pumpkin through a fine-mesh sieve before mixing. I used to skip this, and my cookies always had weird texture pockets. Takes 30 seconds but makes a real difference.
- Chill the Dough Properly: Don’t just toss it in the fridge for 20 minutes—wrap the dough in plastic and let it rest 2+ hours (or overnight). This prevents flat cookies and helps the brown butter flavor develop fully. Yes, even if you’re impatient like me.
- Use Room-Temp Eggs: Cold eggs make the dough tough and uneven. Let them sit in warm water for 5 minutes before cracking, or whisk them with a splash of hot water. My grandmother swore by this, and she was right: the cookies spread just enough for that perfect chewy edge.
Make-ahead tips for this brown butter pumpkin chocolate chip cookies
Dough Prep Ahead
Make the dough up to 24 hours in advance and store it in an airtight container in the fridge. The flavors deepen over time, and chilling prevents excessive spreading.
I like to portion the dough into 1-inch balls and store them in a single layer on a tray before transferring to the container. This makes baking easier later—just pop them on the sheet and bake straight from the fridge. 🧊
Freezer-Friendly Balls
For maximum convenience, shape the dough into balls and freeze them on a parchment-lined tray for 1 hour. Transfer to a resealable freezer bag with parchment between layers to prevent sticking. They'll keep for 3 months—just bake straight from frozen, adding 1-2 extra minutes to the baking time.
I often do this when hosting, so I can bake fresh cookies without stressing about prep day. ❄️
Baked Cookie Storage
Let cookies cool completely on the baking sheet for 5 minutes before transferring to a wire rack. Once fully cooled, store them in an airtight container at room temperature for 5 days. The brown butter flavor actually intensifies over time, making them taste even better the next day.
For longer storage, freeze baked cookies for up to 3 months—reheat in a 300°F oven for 3-5 minutes to restore freshness. 🍪
Reheating for Maximum Gooeyness
Microwave reheating works in a pinch—place cookies on a plate and heat for 10-15 seconds to soften the chocolate chips. For best results, warm in a 300°F oven for 3-5 minutes
This method preserves the perfect texture contrast between crisp edges and chewy centers. I find this especially helpful when serving to guests—they look and taste freshly baked. 🔥 Use a 2-tablespoon cookie scoop for consistent size, but press portions down slightly with your thumb to prevent excessive spreading. For thicker cookies, chill the dough for 1 extra hour before baking. I've found that baking on the middle rack ensures even browning, and rotating sheets halfway through prevents hot spots. The dough is sticky—wet your fingers slightly to handle it easily. 🧑🍳 Double the recipe and divide the dough into two portions—store one in the fridge while you bake the first batch. This keeps your kitchen cooler and prevents overcrowding the oven. I like to bake two sheets at a time, switching positions halfway through. The second batch always turns out slightly better because the oven has stabilized. For large gatherings, bake all portions at once and keep warm in a 200°F oven with a tray of water to maintain moisture. 🍂Portion Control Tips
Batch Baking Strategy
Nutrition facts
Frequently asked questions
Why does the recipe call for both granulated and dark brown sugar?
The combination creates the perfect texture and flavor balance. Granulated sugar dissolves quickly for even sweetness, while dark brown sugar adds moisture and caramel depth from its molasses content. This duo prevents dryness while enhancing the brown butter's nutty notes.
Can I substitute regular butter for brown butter?
Yes, but you'll lose the signature nutty depth. Use 1 cup regular butter plus 1 tbsp browned butter substitute (mix 1 tbsp melted butter with 1 tsp sugar and 1/8 tsp vanilla, then cool). The flavor won't be identical, but it's a decent workaround when you're short on time.
How do I know when the butter is properly browned?
Look for a rich golden brown color and a nutty aroma that's stronger than regular melted butter. It should foam vigorously and smell like caramelized nuts. If it smells burnt, it's gone too far—start fresh! The butter should cool to a semi-solid state before mixing.
Can I make these cookies gluten-free?
Yes! Replace the all-purpose flour with a 1:1 gluten-free flour blend (like Bob's Red Mill) and add 1/4 tsp xanthan gum if your blend doesn't contain it. The texture will be slightly denser, but they'll still be delicious. Chill the dough 30 extra minutes to compensate for the lack of gluten structure.
Why did my cookies spread too much?
This usually happens when the dough isn't chilled long enough or the butter isn't cool before mixing. Always chill the dough for at least 30 minutes and ensure the brown butter is completely cooled before combining with wet ingredients. Portioning with a 2-tablespoon scoop and pressing portions down slightly also helps.