
Desserts
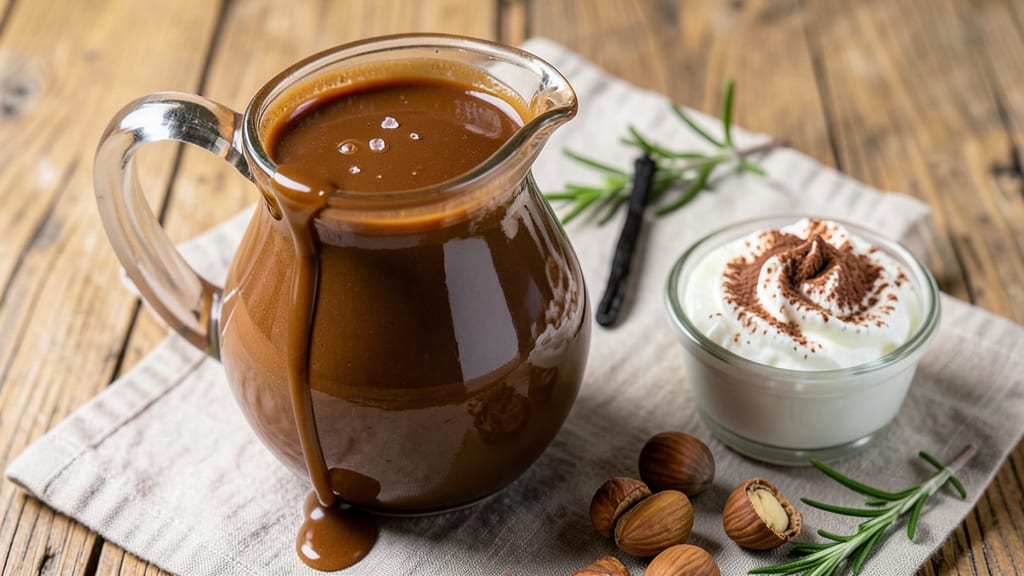
This cacao chocolate syrup recipe transforms simple pantry staples into a velvety, rich pour that elevates everything from desserts to cocktails. The secret lies in simmering cacao powder with liquid sweetener until it achieves that perfect, silky consistency—no refined sugar or dairy required.
I developed this version after craving a plant-based syrup that tasted indulgent without being overly sweet, and it’s become my go-to for drizzling over pancakes, stirring into smoothies, or adding depth to hot chocolate.
The process is straightforward: combine cacao powder, maple syrup, and a pinch of vanilla in a saucepan, then heat gently while stirring until fully dissolved. Straining ensures a smooth texture, and the syrup thickens beautifully as it cools.
What makes this recipe stand out is its versatility—it works as a glaze for cakes, a mixer for coffee, or even a vegan substitute for traditional chocolate sauces. The result is a deep, complex flavor with none of the bitterness that can plague homemade syrups.
Once cooled, this syrup keeps for weeks in an airtight jar, making it a pantry essential for quick desserts or last-minute cocktails. The smooth, glossy finish it adds to dishes is unmatched, and the natural sweetness from maple syrup balances the earthy notes of cacao perfectly.
Whether you're drizzling it over vegan ice cream or using it to sweeten your morning latte, this syrup delivers restaurant-quality richness at home.
For extra depth, a sprinkle of cinnamon or a dash of espresso powder can enhance the flavor profile, but the base recipe is already foolproof. Let’s get started—your taste buds (and your desserts) will thank you.
Ingredients for cacao chocolate syrup
Eight simple pantry staples create this velvety cacao syrup perfect for desserts and drinks.
| Ingredient | Amount | Notes |
|---|---|---|
| Unsweetened Cacao Powder 🍫 | ½ cup | High-quality, Dutch-processed preferred |
| Pure Maple Syrup 🍁 | 1 cup | Grade B for deeper flavor |
| Pure Vanilla Extract 🌿 | 1 tbsp | Bourbon or Madagascar vanilla |
| Filtered Water 💧 | ¼ cup | Room temperature preferred |
| Coconut Oil 🥥 | 2 tbsp | Unrefined for richness |
| Pinch of Salt 🧂 | ⅛ tsp | Fine sea salt |
| Ground Cinnamon 🌶️ | ½ tsp | Optional for warmth |
| Instant Espresso Powder ☕ | ¼ tsp | Optional for depth |
The cacao powder is the heart of this syrup—Navitas or Equal Exchange are my go-tos for that deep, rich flavor. Grade B maple syrup from Vermont adds caramel notes that refined sugar can't match. I always grab mine from Whole Foods or local maple syrup shops during harvest season. The coconut oil isn't just for richness; it helps create that silky texture when the syrup cools. If you're using refined coconut oil, toast it lightly in the saucepan first to bring out its natural flavor. The vanilla extract? Don't skimp—Madagascar bourbon vanilla has that perfect balance of sweetness and complexity.
No cacao powder? Dutch-processed cocoa powder at half the amount works in a pinch, though you'll lose some of that deep chocolate complexity. Running short on maple syrup? Agave nectar or date syrup are great substitutes, though the flavor profile will shift slightly. Swapping the coconut oil for avocado oil keeps it dairy-free but loses some of the natural richness. The cinnamon and espresso powder are completely optional but worth it if you're using this for hot drinks—a pinch of each enhances the syrup's depth without overpowering. For a smoother texture, strain through a fine-mesh sieve after simmering, but don't skip this step if you have seeds or lumps.
This syrup thickens as it cools, so store it in an airtight jar at room temperature for up to 2 weeks. For longer storage, refrigerate for 3 months or freeze in ice cube trays for 6 months. The coconut oil may solidify when cold—just warm gently in a saucepan or microwave for 20 seconds to restore its pour. I always make a double batch because it disappears fast—once it's in your pantry, you'll find reasons to use it everywhere from pancakes to cocktails. The syrup keeps its glossy finish even after reheating, making it perfect for last-minute drizzles.
Why You'll Love This Recipe
- Five-Ingredient Magic: I swear by this combo—just heat, stir, and boom—no fancy gadgets or measuring cups. The cacao powder dissolves like a dream in warm water, and the coconut oil gives it that silky texture without extra effort.
- Rich Without Guilt: That deep, earthy cacao meets the smooth sweetness of maple syrup—it’s decadent but not cloying. A splash of vanilla ties it all together, making every drizzle feel like a little treat, not a calorie bomb.
- Pantry Staple Power: I keep this in my fridge for everything—drizzling over oatmeal, swirling into coffee, or even mixing into smoothies. Honestly, it’s my go-to for when I want flavor without the fuss of store-bought syrups.
- Lasts All Week: A single batch stretches for days, and it only costs pennies per serving. Plus, the coconut oil keeps it from separating, so you’re not scrambling to shake it before use—just grab and go.
Step-by-step instructions for crafting cacao chocolate syrup
This velvety cacao syrup comes together in minutes with just a few simple techniques.
Melt the Coconut Oil and Maple Syrup
In a medium saucepan, combine the 2 tablespoons coconut oil and 1 cup pure maple syrup over low heat. Stir gently until the coconut oil melts completely and the mixture becomes smooth—this usually takes about 2-3 minutes. The syrup should look glossy and homogeneous, with no visible oil streaks.
I like to use low heat here to prevent the maple syrup from burning, which would give the syrup an unpleasant bitter edge. You'll notice the mixture starts to bubble gently—this is normal, but keep the heat low enough that it doesn't boil vigorously. This foundational step creates the base for our rich chocolate flavor profile.
Whisk in the Cacao Powder and Water
Remove the saucepan from heat and let the mixture cool slightly for 1 minute. Then, gradually whisk in the 0.5 cup unsweetened cacao powder and 0.25 cup filtered water until completely dissolved. You'll want to whisk vigorously at first—this prevents clumping and ensures the cacao powder incorporates smoothly.
Return the saucepan to low heat and stir continuously for 3-4 minutes until the mixture thickens slightly. You're looking for a consistency similar to heavy cream—it should coat the back of a spoon but still pour easily. The cacao powder should be fully dissolved with no gritty texture remaining. If you notice any lumps forming, strain the mixture through a fine-mesh sieve for a perfectly smooth finish.
Add Aromatics and Seasonings
With the saucepan still on low heat, stir in the 1 tablespoon pure vanilla extract, 0.125 teaspoon pinch of salt, 0.5 teaspoon ground cinnamon, and 0.25 teaspoon instant espresso powder. The espresso powder and cinnamon might seem unusual, but they add depth that elevates this syrup from basic to extraordinary.
Simmer gently for 2-3 minutes while stirring constantly. You'll notice the aroma becoming more complex—warm vanilla, subtle coffee notes, and a hint of spice. This is where the magic happens. The salt enhances all the flavors, while the cinnamon and espresso powder add layers that make this syrup perfect for both sweet and savory applications. Taste the mixture and adjust seasoning if needed—you might want to add a bit more salt or cinnamon to your preference.
Cool and Store Properly
Remove the saucepan from heat and let the syrup cool to room temperature. This takes about 15-20 minutes. During this time, you'll notice the syrup thickens slightly as it cools—this is normal and actually improves its texture when used later.
Transfer the cooled syrup to a clean, airtight glass jar or bottle. For best results, store it in the refrigerator where it will keep for up to 2 weeks. When ready to use, simply warm the desired amount in a small saucepan over low heat until it reaches a pourable consistency—about 30-60 seconds depending on how much you're using. The syrup should be smooth and glossy when properly warmed, ready to drizzle over desserts, mix into drinks, or use as a glaze.
Pro Tips For Making Cacao Chocolate Syrup
- STIR CONSTANTLY LOW HEAT: Cacao powder burns faster than you’d think—especially when mixed with coconut oil. Keep the heat at a bare simmer and stir every 30 seconds with a silicone spatula. I learned this the hard way after walking away for "just a minute" and coming back to a bitter, charred mess.
- SIFT THE CAACO FIRST: Unsweetened cacao powder clumps like stubborn laundry detergent. Sift it into your saucepan before adding anything else—this guarantees a smooth, lump-free syrup. No sifter? Crumble it between your fingers over the pan, but take your time. Rushing leads to gritty texture.
- SKIP THE BOILING POINT: This isn’t fudge; you don’t need to boil it aggressively. Once the coconut oil melts (about 2–3 minutes on low), the mixture will thicken naturally. Pushing it harder just risks burning the maple syrup’s delicate flavor. Trust the process—it’ll coat your spoon like butter.
- USE VANILLA LAST: Vanilla extract burns off faster than you’d expect when heated. Stir in the vanilla after removing the pan from heat—just before drizzling or storing. This keeps its bright aroma intact. (Yes, even if you’re impatient like me.)
Essential equipment for perfect results
Saucepan Essentials
Start with a medium-sized stainless steel saucepan—I use my All-Clad 3-quart for perfect heat distribution. Stainless steel prevents scorching, which is critical when working with delicate ingredients like maple syrup and cacao. Avoid nonstick pans; they can impart off-flavors and aren’t ideal for simmering thick syrups. 🔥
Whisk for Smoothness
A balloon whisk or French whisk is your best friend here. I prefer the OXO Good Grips because it handles the thick cacao mixture effortlessly. Whisking thoroughly prevents lumps and ensures a silky texture.
If you notice any grit after simmering, strain through a fine-mesh sieve—I use my Heston Blumenthal for a restaurant-quality finish.
Fine-Mesh Sieve
This is non-negotiable for a professional-looking syrup. A stainless steel sieve like the Norpro 10-inch removes any residual cacao grit or coconut oil flecks. If you don’t have one, a cheesecloth works in a pinch, but it’s slower.
The straining step is what transforms this from homemade to chef’s kiss quality.
Glass Storage Jars
Store your finished syrup in amber or cobalt glass jars—I love the Le Parfait 16-ounce jars—to preserve freshness and block light, which can degrade the syrup’s flavor over time.
Avoid clear glass; it lets light in and can cause the syrup to oxidize faster. Label your jars with the date to track freshness.
Measuring Tools
Precision matters here. Use a digital kitchen scale for the cacao powder and coconut oil—I rely on my OXO Good Grips scale—for accuracy. For liquids, a liquid measuring cup with clear markings ensures you hit the exact 1 cup of maple syrup.
A fine-mesh measuring spoon set keeps your spices and extracts like vanilla extract perfectly portioned.
Optional: Immersion Blender
If you prefer blending over whisking, an immersion blender like the Ninja CB101 works wonders for dissolving the cacao powder smoothly. Simply blend the mixture directly in the saucepan for 10-15 seconds until fully incorporated.
This is especially helpful if you’re short on time or dealing with a particularly thick batch.
Nutrition facts
Frequently asked questions
Can I substitute maple syrup with another sweetener?
Yes! For a 1:1 ratio, use agave nectar or date syrup—both work beautifully with cacao. If you prefer a lighter sweetness, try coconut sugar (dissolved first in water) or monk fruit sweetener (reduce by 20% since it's more concentrated). Avoid honey or corn syrup—they can alter the syrup's rich texture and depth.
Why does my cacao syrup get grainy after cooling?
Grittiness usually means the cacao powder didn't fully dissolve. Always whisk vigorously when adding it to the warm syrup, and strain through a fine-mesh sieve if needed. For extra smoothness, let the mixture simmer 1-2 minutes longer to break down any remaining particles. The coconut oil also helps create that silky finish—just warm gently before using if it separates.
How can I use this syrup beyond desserts?
This versatile syrup works in savory dishes too! Drizzle it over roasted vegetables for a sweet-savory glaze, mix into marinades for grilled meats, or stir into coffee or tea for a rich, chocolatey twist. For cocktails, add 1 tablespoon to margaritas or espresso martinis—it balances perfectly with citrus flavors. Even savory sauces benefit from a ½ teaspoon for depth.
Can I make this syrup without coconut oil?
Replace the coconut oil with 2 tablespoons melted vegan butter or avocado oil for a neutral flavor. For extra richness, use 1 tablespoon tahini (strain well) or 1 tablespoon melted dark chocolate (ensure it's dairy-free). Just note that coconut oil gives the syrup its signature velvety texture—other fats may make it slightly lighter.
How do I fix a syrup that's too thick or too thin?
If your syrup is too thick after cooling, gently reheat it over low heat with 1-2 teaspoons of water while stirring until smooth. For a thinner consistency, add 1 teaspoon of hot water at a time while whisking. Pro tip: The syrup thickens as it cools, so adjust while warm if you prefer a pourable texture. Always test consistency on a small plate before storing.