
Desserts
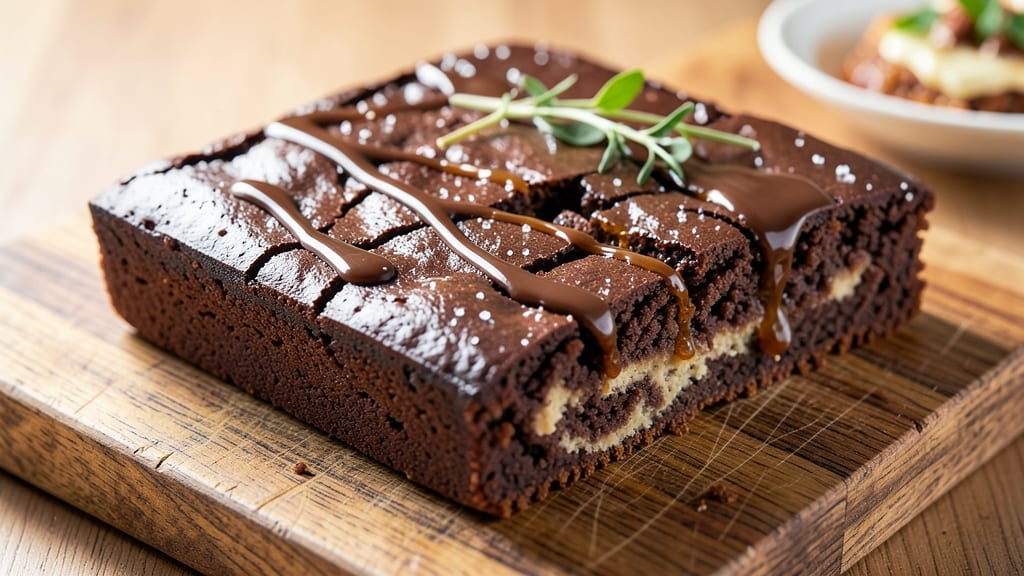
This Callebaut chocolate brownie recipe delivers fudgy depth and crisp edges that rival any bakery—without the guesswork. 🔥 The secret lies in precise chocolate-to-flour ratios and a controlled baking process that ensures a crackly top while keeping the center rich and moist.
Professional bakers know Callebaut's high-quality chocolate makes all the difference, and this recipe maximizes its velvety intensity.
What sets these brownies apart is the two-stage mixing method, where melted chocolate cools slightly before combining with eggs and dry ingredients. This prevents overheating the eggs while ensuring the chocolate remains perfectly smooth.
The result? Brownies with a shatteringly crisp crust that gives way to a dense, fudgy interior—no cakey texture in sight.
Baking at 350°F for exactly 22-25 minutes (no longer!) guarantees a golden, crackly top that's just firm enough to slice cleanly. The key is using an oven thermometer to verify temperature, as home ovens often run hot.
Once cooled, the contrast between the crisp edges and soft center creates the perfect texture balance every time.
For variations, add a swirl of salted caramel or espresso powder to deepen the chocolate flavor. These brownies are foolproof—ideal for beginners or experienced bakers looking to elevate their dessert game. Let's get baking!
Ingredients for callebaut chocolate brownie
Precision ingredients for bakery-quality brownies with shatteringly crisp edges and velvety fudgy centers.
| Ingredient | Amount | Notes |
|---|---|---|
| Callebaut Couverture Chocolate (70% Cacao) 🍫 | 10 oz | High-quality, finely chopped |
| Unsalted Butter 🧈 | 1 cup | Cold, cubed for even melting |
| Granulated Sugar 🍚 | 1 ½ cups | Superfine preferred for smoothness |
| Light Brown Sugar 🍚 | ½ cup | Packed, for moisture balance |
| Large Eggs 🥚 | 4 whole | Room temperature for even mixing |
| All-Purpose Flour 🌾 | ¾ cup | Sifted, for light texture |
| Diamond Crystal Kosher Salt 🧂 | ¾ tsp | Fine grain for even distribution |
| Espresso Powder ☕ | 1 tsp | Enhances chocolate depth |
| Vanilla Extract 🌿 | 1 tsp | Pure, high-quality extract |
| Cornstarch 🌾 | 1 tbsp | For ultra-fudgy texture |
| Flaky Sea Salt 🧂 | 1 tbsp | For finishing crisp edges |
The Callebaut 70% couverture chocolate is non-negotiable—its velvety texture and rich cacao content create the signature depth. Purchase from Callebaut's official US distributor or specialty baking suppliers like Sur La Table for guaranteed quality. Avoid pre-shaved chocolate; chop your own for optimal melting. The butter should be cold and cubed (not melted) to create the perfect fat-to-chocolate ratio, ensuring that signature crackly crust. Land O'Lakes unsalted or Plugrá are excellent choices for their high-fat content, which directly impacts brownie density.
No Callebaut? Valrhona or Guittard couvertures work as premium substitutes, but avoid baking chocolate—it contains more sugar and less cocoa butter. The espresso powder can be omitted if unavailable, though it deepens the chocolate flavor significantly. For a gluten-free version, substitute the all-purpose flour with a 1:1 gluten-free baking flour blend (like King Arthur Measure for Measure), though texture may vary slightly. The cornstarch is crucial for that signature fudgy texture—don't skip it. If you prefer a sweeter brownie, increase the granulated sugar by 2 tbsp, but be warned: this will slightly soften the edges.
Store brownies in an airtight container at room temperature for up to 5 days—they'll continue to develop flavor. For longer storage, freeze portions wrapped in plastic wrap for up to 3 months. The flaky sea salt should be sprinkled immediately after baking while the edges are still warm for maximum crispness. These brownies reheat beautifully: wrap individual slices in foil and warm in a 350°F oven for 3-4 minutes to restore that crackly texture. Portion into squares before baking for perfect, restaurant-style presentation.
Why You'll Love This Recipe
- Here’s what sold me: the balance. The 70% cacao has that deep, complex flavor, but the butter and sugars soften it just enough to be accessible—not harsh or overpowering. It’s the kind of brownie that tastes like a treat, not a lesson in chocolate studies.
- I’ll be real: Callebaut isn’t cheap, but a single block stretches far when you’re making brownies. The butter and sugars are pantry staples, and the eggs? Always on hand. It’s the kind of recipe where you get restaurant-quality flavor without the markup—leftovers last days, and I’ve never regretted baking a whole pan.
Step-by-step instructions for Callebaut chocolate brownies
Mastering these brownies requires precision and patience—every step builds that signature fudgy depth.
🔥 Step 1: Melt Chocolate and Butter for Perfect Texture
Place the 10 oz Callebaut Couverture Chocolate (70% Cacao) and 1 cup Unsalted Butter in a heavy-bottomed saucepan over low heat. Stir gently until the butter melts completely, then increase heat to medium-low and continue stirring until the chocolate melts smoothly. You'll know it's ready when the mixture reaches 115°F—this temperature ensures proper emulsification without burning the delicate chocolate compounds.
Here's the thing—I use a candy thermometer for accuracy. Without it, you risk overheating, which can make the brownies bitter or grainy. Once melted, remove from heat and let cool for 5 minutes while you prepare the remaining ingredients. The mixture should thicken slightly as it cools, creating a stable base for the batter.
👨🍳 Step 2: Whisk Dry Ingredients for Ultra-Fudgy Structure
In a separate bowl, combine the 1.5 cups Granulated Sugar, 0.5 cup Light Brown Sugar, 0.75 cup All-Purpose Flour, 0.75 tsp Diamond Crystal Kosher Salt, 1 tsp Espresso Powder, 1 tsp Vanilla Extract, and 1 tbsp Cornstarch. Whisk vigorously for 30 seconds to aerate the dry ingredients—this prevents dense brownies. I sift the flour first to eliminate lumps, which ensures a silky texture.
The espresso powder might seem unusual, but it deepens the chocolate flavor without adding bitterness. The cornstarch is the secret to that signature fudgy texture—it creates a tender crumb while maintaining moisture. Keep this dry mixture ready as you'll add it to the melted chocolate in the next step.
🍳 Step 3: Combine Wet and Dry Ingredients Gently
Add the 4 whole Large Eggs to the cooled chocolate mixture one at a time, whisking vigorously after each addition. The eggs should be at room temperature—this prevents the batter from curdling. Then, gradually pour in the dry ingredients while whisking continuously for 2-3 minutes until completely smooth. The batter should be thick but pourable, with a glossy sheen that indicates proper emulsification.
Don't overmix at this stage—just until the flour disappears. Overworking develops gluten, which leads to cakey brownies instead of the fudgy texture we're after. The batter should coat the back of a spoon but still move slowly, like thick pudding.
🔥 Step 4: Bake at High Heat for Crisp Edges
Preheat your oven to 350°F and line a 9x13-inch baking pan with parchment paper, leaving an overhang on the sides for easy removal. Pour the batter into the pan and spread it evenly—tap the pan gently on the counter to eliminate air bubbles. Sprinkle the 1 tbsp Flaky Sea Salt evenly over the top before baking.
Bake for 25-30 minutes until a toothpick inserted in the center comes out with moist crumbs but no wet batter. The edges should be set with a crisp texture while the center remains fudgy. Here's where it gets tricky—don't overbake. The brownies will continue cooking as they cool, and they should pull away slightly from the edges of the pan when done.
⏰ Step 5: Cool and Cut for Perfect Texture
Remove the brownies from the oven and let them cool in the pan for 15 minutes before transferring to a wire rack to cool completely. This gradual cooling prevents cracking. Once fully cooled, use a sharp knife to cut into 16 equal squares—wipe the knife between cuts to ensure clean edges.
The brownies should have a crackly top crust with a dense, moist center. Each bite should deliver rich chocolate flavor enhanced by the espresso powder, with a perfect balance of sweetness from the sugars. The flaky sea salt on top adds a surprising contrast that elevates every bite.
Pro Tips For Making Callebaut Chocolate Brownie
- MELT CHOCOLATE SLOWLY: I learned this the hard way—dumping chopped Callebaut 70% into hot butter is a fast track to seizing. Instead, melt the butter first, then temper the chocolate by adding it in small batches while stirring constantly. The goal is to keep the temperature between 45-50°C (113-122°F)—any hotter and you’ll get grainy brownies.
- WHISK EGGS ROOM TEMP: Cold eggs from the fridge won’t blend properly, and you’ll end up with streaks in your batter. Pop those eggs out 15 minutes before mixing and let them sit in a warm spot—your hands work fine. Smooth batter = even texture, no matter how dense the chocolate is.
- STOP WHEN EDGES CRACK: The second the edges of your brownie pull away from the pan, that’s your cue to pull it. Overbaking turns fudgy into dry, and with Callebaut’s high cocoa content, the center will still be gooey. A toothpick with moist crumbs is better than one that comes out clean.
- USE A LIGHT TOUCH: Skip the extra flour or cocoa powder unless you’re adjusting for altitude—this recipe is balanced for rich, dense texture. Overmixing or adding extra dry ingredients will make your brownies cakey instead of fudgy. Trust the recipe’s structure; it’s already built for maximum chocolate impact.
Essential equipment for great callebaut chocolate brownie
Precision Tools
Start with a high-quality candy thermometer—I recommend the Thermoworks Thermapen ONE—to monitor chocolate temperature at 115°F. This ensures perfect emulsification without overheating. A heavy-bottomed saucepan (like All-Clad) prevents scorching during melting. For whisking, use a balloon whisk to incorporate air into dry ingredients efficiently.
Mixing Essentials
Your mixing station needs two bowls: a heatproof glass bowl for melting chocolate (like Pyrex) and a stainless steel mixing bowl for dry ingredients. A microplane comes in handy for zesting chocolate or grating citrus if you add variations.
For measuring, invest in a digital kitchen scale—I use the OXO Good Grips—to weigh chocolate precisely by ounces.
Baking Setup
Use a 9x13-inch baking pan with non-stick coating (I prefer Wilton Perfect Results) for even brownie release. Line it with parchment paper from If You Care for easy removal.
A wire rack (like OXO Good Grips) is essential for cooling brownies properly. Don't forget an oven thermometer—I use Thermoworks Oven Thermometer—to verify your oven's accuracy.
Cutting Tools
For clean slices, use a sharp chef's knife (I recommend Wüsthof Classic) and a bench scraper to wipe between cuts. A baking stone (like Lodge Baking Steel) helps achieve that signature crispy edge if your oven runs hot. For portioning, a pastry wheel ensures professional-looking squares every time.
Finishing Touches
Flaky sea salt like Maldon elevates the final product. Store leftovers in an airtight container (I use Glasslock) to maintain freshness. For serving, a wooden cutting board adds rustic charm. A digital timer (like KitchenAid) prevents overbaking—set it for 25 minutes and check at 22 minutes for doneness.
Nutrition facts
Frequently asked questions
Can I substitute Callebaut chocolate with regular baking chocolate?
No, regular baking chocolate won't give the same rich, velvety texture. Callebaut's high cocoa butter content creates that signature fudgy depth. For a substitute, use Valrhona or Guittard couverture chocolate—they have similar professional-grade quality. Avoid chips or bars with added sugar or vegetable oils, as they'll make your brownies denser and less flavorful.
Why do my brownies turn out cakey instead of fudgy?
Overmixing develops gluten, which creates a cakey texture. The key is to whisk dry ingredients for just 30 seconds and combine wet/dry ingredients gently for 2-3 minutes total. Also, ensure your chocolate cools slightly (115°F) before adding eggs—overheated chocolate can scramble them, leading to a lighter texture.
How do I get that perfect crackly top crust?
Bake at 350°F for exactly 25-30 minutes until edges are set but center is still soft. The secret is using an oven thermometer—home ovens often run hot. For extra crispness, sprinkle flaky sea salt on top before baking and let brownies cool completely before cutting. The salt enhances the crackly texture while adding flavor contrast.
Can I make these brownies gluten-free?
Yes, but texture may vary slightly. Replace all-purpose flour with a 1:1 gluten-free baking flour blend (like King Arthur Measure for Measure). For best results, add 1 extra tbsp cornstarch to compensate for the lack of gluten structure. The brownies will still be fudgy but may be slightly less crisp on top.
How long can I store these brownies?
At room temperature in an airtight container, they stay fresh for 5 days. For longer storage, freeze portions wrapped in plastic for up to 3 months. To reheat, wrap individual slices in foil and warm at 350°F for 3-4 minutes—this restores that perfect crackly texture while keeping the center moist.