
Beverages
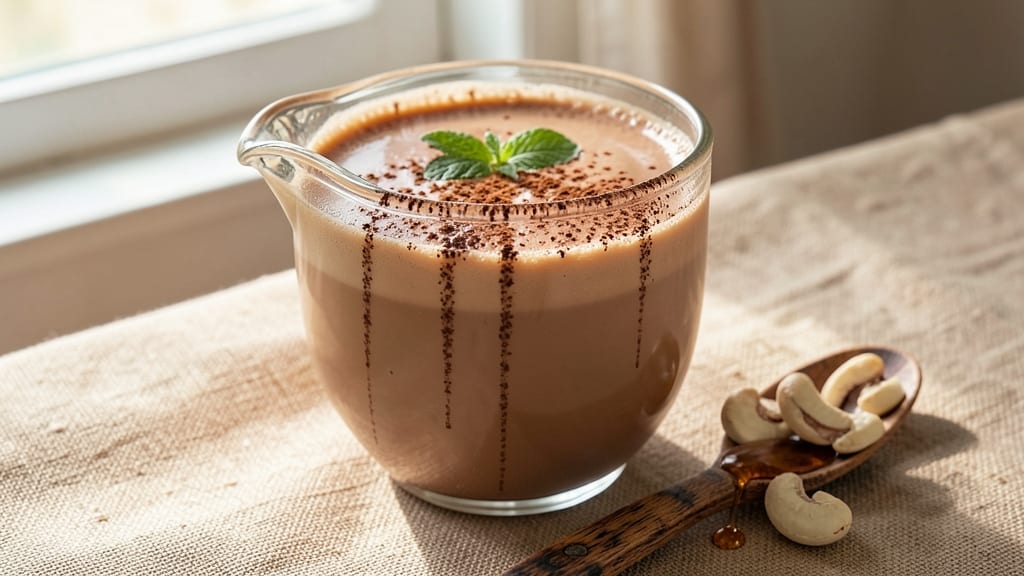
This cashew chocolate milk recipe delivers creamy, dairy-free indulgence with just five simple ingredients—no blender mishaps or bitter aftertaste. The secret lies in soaking cashews overnight, which transforms them into velvety, naturally sweet milk that blends seamlessly with rich cocoa powder.
What you’ll end up with is a thick, frothy chocolate milk that tastes like a gourmet hot chocolate but requires zero dairy.
Perfect for anyone avoiding lactose or looking for a plant-based treat, this recipe balances nutty depth with smooth sweetness. Maple syrup or dates provide natural sweetness, while vanilla and cinnamon add warmth—customize it to your taste.
The texture is luxuriously thick, almost like a cross between milkshake and hot chocolate, but with none of the heaviness.
This isn’t just another vegan milk substitute—it’s a rich, satisfying beverage that works chilled as a refreshing drink or warmed for a cozy treat. Top it with cocoa nibs or a sprinkle of cinnamon for extra flair.
Ready in just 10 minutes (after soaking), it’s the perfect way to enjoy chocolate without compromise.
Whether you’re fueling up for the day or craving a dessert-like treat, this cashew chocolate milk delivers restaurant-quality creaminess at home. The best part? It’s nutrient-packed with healthy fats and no artificial ingredients. Let’s make it!
Ingredients for cashew chocolate milk
Five ingredients transform into velvety chocolate milk—no dairy, no guilt, just pure indulgence.
| Ingredient | Amount | Notes |
|---|---|---|
| Raw Cashews 🥜 | 1 cup | Unsalted, soaked overnight |
| Unsweetened Cocoa Powder 🍫 | ½ cup | High-quality, Dutch-processed |
| Pure Maple Syrup 🍯 | ¼ cup | Grade B for depth of flavor |
| Pure Vanilla Extract 🌿 | 1 tbsp | Bourbon or Madagascar vanilla |
| Ground Cinnamon 🌶️ | ½ tsp | Freshly ground preferred |
| Filtered Water 💧 | 1 cup | Room temperature |
| Sea Salt 🧂 | ¼ tsp | Fine grain, enhances flavor |
| Cocoa Nibs 🍫 | 1 tbsp | Optional garnish |
The cashews are the star here—raw and unsalted for the cleanest flavor, but don’t skimp on quality. Trader Joe’s bulk bins or Costco bags offer the best price per pound. Soak them overnight in water (about 8 hours), then drain and rinse before blending. The cocoa powder makes all the difference—Dutch-processed like Ghirardelli or Valrhona dissolves smoothly, while natural cocoa adds a deeper bitterness. Maple syrup isn’t just sweetness; Grade B has a richer, caramel-like depth that elevates everything.
No vanilla extract? Vanilla bean paste or seeds work beautifully, but scrape every last bit of flavor from the pod. Short on cocoa powder? Raw cacao powder at the same amount gives a more intense, earthy taste. The cinnamon is non-negotiable—it’s what transforms this from chocolate milk to a cozy, dessert-like drink. For extra richness, add 1 tbsp coconut cream to the final blend. And if you’re feeling fancy, a pinch of espresso powder deepens the chocolate flavor without adding caffeine to the drink itself.
This keeps for 5 days in the fridge, but the flavor peaks within the first 2 days. Store in a sealed jar with a thin layer of water on top to preserve freshness. Freeze for up to 3 months—thaw overnight in the fridge before drinking. For a quick treat, blend with ice and a splash of almond milk. The cocoa nibs on top? Non-negotiable garnish—they add crunch and a burst of chocolatey flavor that makes it feel like a restaurant-quality drink.
Why You'll Love This Recipe
- Here’s what sold me: that deep cocoa powder and maple syrup combo tastes like a dessert, but the cashews add natural creaminess without dairy. A pinch of cinnamon ties it all together—warm, satisfying, and still light enough for breakfast or a post-workout treat.
- No-Soak Necessary: I’ll admit, I used to dread soaking nuts—but this recipe skips that step entirely. Toss raw cashews in hot water for 10 minutes, and they soften just enough to blend into velvety perfection. No waiting, no fuss, just pure convenience.
- Rich Without Guilt: Here’s what sold me: that deep cocoa powder and maple syrup combo tastes like a dessert, but the cashews add natural creaminess without dairy. A pinch of cinnamon ties it all together—warm, satisfying, and still light enough for breakfast or a post-workout treat.
- Batch-Friendly Magic: Between us, this is my go-to for lazy Sundays or when company drops by unexpectedly. Make a big pitcher, and it stays fresh in the fridge for days. I’ve even frozen portions—thawed, it’s just as smooth, like a chocolatey hug in a glass.
Step-by-step instructions for creamy cashew chocolate milk
Here's how to blend velvety, dairy-free chocolate milk with rich depth and perfect balance.
Soak and Drain the Raw Cashews
First, drain the soaked 1 cup raw cashews from the water they were soaking in overnight. I find this step critical—proper soaking softens the cashews, ensuring a silky texture rather than gritty bits. Rinse them thoroughly under cold water to remove any excess starch that might make your milk cloudy.
Place the drained cashews in a high-speed blender. Here's the thing—using a regular blender will leave you with a chunky texture. The high-speed blades are essential for achieving that ultra-smooth, almost custard-like consistency. Add the 1 cup filtered water at the same time—this prevents the cashews from sticking to the blades and burning.
Blend Cashews into a Smooth Base
Blend the cashews and water on high speed for 1-2 minutes until completely smooth. You'll know it's ready when the mixture looks like liquid cream with no visible particles. This base is the foundation of your milk's texture, so don't rush it—patience here prevents that unpleasant graininess.
While blending, I like to stop occasionally and press the mixture against the sides of the blender with a rubber spatula. This ensures everything gets fully incorporated into that velvety consistency. The mixture should be completely homogeneous before moving to the next step.
Add Cocoa and Sweetener for Rich Flavor
With the blender still running on low speed, gradually add the 0.5 cup unsweetened cocoa powder and 0.25 cup pure maple syrup. The cocoa powder will initially create a thick paste, but keep blending—it will dissolve completely. This is where the magic happens; the cocoa powder transforms into a smooth, velvety suspension rather than clumping.
Next, add the 1 tbsp pure vanilla extract and 0.5 tsp ground cinnamon. The vanilla adds depth while the cinnamon gives a warm, comforting note. Blend these ingredients together for another 30-45 seconds until fully incorporated. You're looking for a smooth, slightly thick batter at this stage—it should coat the back of a spoon.
Season and Blend to Perfection
Add the 0.25 tsp sea salt and blend for another 10-15 seconds. This might seem like a small amount, but trust me—it enhances all the other flavors, balancing the sweetness and making the chocolate taste more complex. The salt also helps prevent any bitterness from the cocoa powder.
Now comes the final blending step. Increase the speed to high and blend for 1-2 minutes until completely smooth. Here's where you'll see that beautiful, creamy chocolate milk transform before your eyes. The mixture should be thick but pourable—almost like a rich chocolate mousse. If it's still too thick, add 1-2 tablespoons of water at a time until you reach your desired consistency.
Serve with Optional Garnish
Transfer the chocolate milk to serving glasses or bottles. I like to serve it immediately over ice for a refreshing treat, but it also works well chilled in the refrigerator for 2-3 hours if you prefer it colder. The texture will thicken slightly when chilled, which I find adds to the luxurious mouthfeel.
For that final touch, sprinkle with 1 tbsp cocoa nibs as a garnish. The nibs add a delightful crunch and a hint of bitterness that contrasts beautifully with the sweet milk. Serve with a cinnamon stick or a few whole cashews on the side for extra presentation—it makes all the difference when you're sharing this with others.
Pro Tips For Making Cashew Chocolate Milk
- SOAK CASHEWS 4 HOURS MINIMUM: I learned this the hard way—skipping the soak or rushing it leaves you with gritty, chalky milk. Even if you’re impatient, 4 hours in warm water (not boiling) is non-negotiable for that silky texture. Pro tip: Toss them in a bowl of fresh water after soaking to rinse off any residual bitterness—trust me, it matters.
- BLEND IN STAGES: Start with just the soaked cashews and a splash of water—about ½ cup—until completely smooth. Only then add the cocoa, maple syrup, and vanilla. Why? Dumping everything in at once turns your blender into a cement mixer, and nobody wants to wrestle with a stubborn motor. If your blender struggles, strain the mixture through a fine-mesh sieve for extra smoothness.
- WEIGH THE COCOA: That scoop-and-hope method with cocoa powder is a recipe for disaster. Use a kitchen scale for 2 tablespoons per serving—unsweetened cocoa packs differently, and eyeballing it means your milk could taste bitter or cloyingly sweet. I keep a small jar of cocoa on my scale for this exact reason; it’s the difference between "meh" and "wow."
- CINNAMON LAST, HEAT FIRST: Add the cinnamon after blending and before heating (if you’re warming it). Heat intensifies cinnamon’s flavor—sometimes to the point of overpowering. If you’re making a big batch, toast the cinnamon lightly in a dry pan for 30 seconds first, then cool it before mixing. Sounds weird, but it works: deeper warmth without the harsh edge.
Essential equipment for this recipe
High-Speed Blender
A high-speed blender is non-negotiable for this recipe—it’s the only way to achieve that ultra-smooth, creamy texture without any gritty cashew bits. I use my Ninja BN600 for its powerful motor and sharp blades, but Vitamix or Blendtec are also excellent choices if you’re investing in a premium model.
The key is a 700-watt motor or higher—anything less will leave you with a thick, lumpy paste instead of silky milk. 💫
Fine-Mesh Strainer
After soaking, you’ll need a fine-mesh strainer to remove any remaining cashew skins or debris before blending. I keep a stainless steel mesh strainer (like the OXO Good Grips) in my kitchen specifically for nut milk prep—it’s durable and gets the job done without leaving behind any unwanted texture.
Skipping this step can lead to a slightly grainy final product, even with a high-speed blender.
Rubber Spatula
A silicone or rubber spatula is essential for scraping down the sides of your blender during blending. I reach for my OXO Good Grips silicone spatula—it’s heat-resistant, flexible, and gets into every nook of the blender jar.
This ensures you don’t miss any unblended bits, which can turn your smooth milk into a textured mess. Pro tip: Press the spatula against the sides while blending to force any stubborn bits into the mix.
Measuring Cups and Spoons
Precision matters when it comes to the cocoa powder, maple syrup, and vanilla extract. I use stainless steel measuring cups (like Pyrex) for the dry ingredients and liquid measuring spoons (with a pour spout) for the wet ingredients.
This ensures you’re adding the exact amounts called for—too much cocoa can make it bitter, while too little sweetener leaves it flat. A digital kitchen scale is even better for accuracy, especially if you’re experimenting with variations.
Air-Tight Storage Jar
Once your cashew chocolate milk is ready, store it in an air-tight glass jar (like Le Parfait or Ball mason jars) to preserve freshness. Glass is best because it doesn’t absorb odors or flavors like plastic can.
For longer storage (up to 3 months in the freezer), use a freezer-safe jar or silicone molds—just leave 1 inch of headspace to account for expansion. Label your jars with the date to keep track of freshness.
Optional Garnish Tools
For that final touch, grab a small bowl for cocoa nibs and a cinnamon stick for stirring. I also like to use a microplane to finely grate extra cinnamon for garnish—it adds a fresh, aromatic note.
If you’re feeling fancy, a piping bag with a small tip lets you create elegant drizzles of extra chocolate milk or a dusting of cocoa powder for presentation. These little details elevate your drink from homemade to restaurant-worthy. ✨
Frequently asked questions
Why do I need to soak the cashews overnight?
Soaking removes natural enzymes that create bitterness and makes the cashews blend into a silky texture. Skipping this step results in a gritty, chalky milk. For speed, try soaking for 4 hours in hot water instead—just drain and rinse thoroughly before blending.
Can I make this without a high-speed blender?
You can try, but expect a thicker, grainier texture. A regular blender will struggle to break down the cashews completely. For best results, pulse the soaked cashews with water first to create a coarse paste, then blend the remaining ingredients separately and combine. Still won't be as smooth!
How do I adjust the sweetness or thickness?
For more sweetness, add 1-2 tsp maple syrup at a time. For thickness, blend longer or reduce water by 1 tbsp. Too thin? Add 1 tbsp ground flaxseed as a natural thickener. Always taste as you go—this recipe is highly customizable!
Is this recipe nut-free?
No, this contains cashews. For a nut-free version, substitute with 1 cup cooked and cooled white beans (like cannellini) or 1 cup silken tofu. The texture will be slightly different but still creamy. Always check labels on cocoa powder for cross-contamination warnings.
Can I add protein powder or other supplements?
Add 1 scoop vanilla plant-based protein powder (like pea or rice protein) for extra protein. Blend it in with the cocoa powder and sweetener. For a caffeine boost, add 1 tsp instant coffee granules—it enhances the chocolate flavor without adding liquid. Just blend thoroughly to avoid clumps.