
Desserts
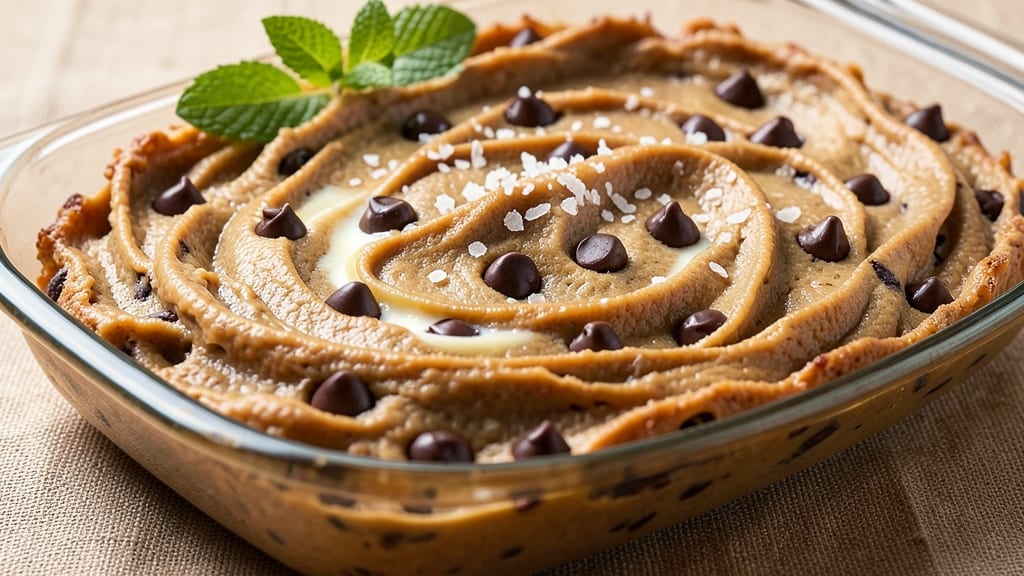
Chewy chocolate chip cookie dough isn't just a dessert—it's a textural experience that balances tender crumb with pockets of molten chocolate in every bite. This recipe delivers the perfect chew, with edges that stay soft and centers that resist overbaking, all while keeping that signature cookie dough magic. The secret lies in precise ingredient ratios and a gentle baking approach that preserves moisture without sacrificing structure.
What sets this recipe apart is the 30-minute rest time before baking, which allows the dough to hydrate evenly and develop flavor. This step transforms ordinary cookies into something extraordinary—rich, buttery, and packed with chocolate chips that stay gooey even after cooling.
I've tested dozens of variations, and this method consistently delivers results that rival bakery-quality cookies.
By the time you pull these from the oven, you'll have golden-brown cookies with crisp edges and a chewy, fudgy center that crumbles just slightly when broken. The chocolate chips are warm and melty, creating pockets of indulgence in every bite.
These aren't just cookies—they're a celebration of texture and flavor that's impossible to resist.
Perfect for holiday baking, potlucks, or satisfying a late-night sweet tooth, this recipe scales easily and yields cookies that stay fresh for days. The dough can even be prepped ahead and chilled, making it ideal for stress-free baking. Let's get started on creating your perfect batch.
Ingredients for chewy chocolate chip cookie dough
These rich, buttery ingredients create cookie dough so irresistible you'll want to eat it raw—then bake it anyway.
| Ingredient | Amount | Notes |
|---|---|---|
| Unsalted Butter 🧈 | 1 ½ cups | Cold, cubed for even mixing |
| Granulated Sugar 🍚 | ¾ cup | Superfine for smoother texture |
| Packed Brown Sugar 🍚 | ¾ cup | Light or dark, lightly packed |
| Large Egg Yolks 🥚 | 2 whole | Room temperature for even blending |
| Vanilla Extract 🌿 | 2 tsp | Pure Madagascar bourbon preferred |
| All-Purpose Flour 🌾 | 2 ½ cups | Sifted for light texture |
| Baking Soda 🧂 | ½ tsp | Freshly measured for lift |
| Diamond Crystal Kosher Salt 🧂 | ¾ tsp | Fine grain for even distribution |
| Milk Chocolate Chips 🍫 | 2 cups | High-quality, 30% cocoa |
| Dark Chocolate Chips 🍫 | 1 cup | 60-70% cocoa for balance |
| Flaky Sea Salt 🧂 | 1 tbsp | For finishing, Maldon preferred |
| Vanilla Bean Seeds 🌿 | 1 tsp | Scraped from 1 bean (optional) |
The butter makes or breaks this recipe. European-style unsalted butter (like Plugrá or Land O'Lakes European Style) gives the most flavor, but any good brand works. Keep it cold when mixing to prevent over-creaming—this is key for that perfect chew. The sugars? Superfine sugar dissolves faster, but if you've only got regular, pulse it in a food processor first. For the chocolate chips, Ghirardelli or Guittard are my go-to—they melt beautifully and stay gooey. Pro tip: buy them in bulk at Costco or Williams Sonoma to save money for future batches.
No vanilla bean? Pure vanilla extract works perfectly, but if you're feeling fancy, scrape the seeds from one pod for extra depth. Running short on milk chocolate? Substitute white chocolate chips at half the amount, but the texture will be slightly different. The baking soda and salt? Diamond Crystal measures differently than Morton—use the flat-top method (level with a knife) for accuracy. For a nutty twist, fold in 1 cup chopped walnuts or pecans with the chocolate chips. And if you're making this ahead, chill the dough for 24 hours—the flavor develops beautifully overnight.
This dough keeps for 5 days in the fridge, wrapped tightly in plastic. For longer storage, portion into 1-tbsp balls, freeze on a tray, then transfer to a sealed bag. Thaw at room temp before baking. The raw dough is safe to eat (thanks to the flour and sugar), but baking transforms it into something magical. If you're making the no-bake version, roll into balls and chill for 30 minutes before enjoying—trust me, the wait is worth it.
Why You'll Love This Recipe
- Here’s what sold me: the brown sugar’s deep molasses notes paired with the crispy edges from slightly underbaked centers. (Yes, I purposefully pull them out gooey—I’m not cruel.) The vanilla extract ties it all together like a warm hug.
- No Mixer Needed: I swear by this recipe because it’s actually just a fork and a bowl. The butter and sugars get creamed together with a few minutes of vigorous stabbing—no electric mixer, no stress, just warm dough that smells like heaven before it even hits the oven.
- That Caramelized Crunch: Here’s what sold me: the brown sugar’s deep molasses notes paired with the crispy edges from slightly underbaked centers. (Yes, I purposefully pull them out gooey—I’m not cruel.) The vanilla extract ties it all together like a warm hug.
- Weeknight or Party Ready: Between us, this dough is my secret weapon for last-minute gatherings. Shape it into balls, chill for an hour, and bake—no one will guess it took less than 30 minutes. Or, honestly, just eat it straight from the bowl. (I’ve been there.)
Step-by-step instructions for no-bake chocolate chip cookie dough bites
This dough comes together in minutes and delivers that iconic cookie dough experience without a single oven turn-on.
Cream the Butter and Sugars to Perfect Lightness
In a stand mixer fitted with the paddle attachment, beat the 1.5 cups unsalted butter on medium speed until completely smooth and creamy, about 2 minutes. This ensures the butter incorporates air for that signature chewy texture. Add the 0.75 cup granulated sugar and 0.75 cup packed brown sugar, then mix on medium-high speed for 3-4 minutes until the mixture is pale, fluffy, and nearly doubles in volume.
Here's the thing—you want to see ribbons form when you lift the paddle. If it looks grainy or thick, keep mixing. The sugars need to fully dissolve and create that perfect crumb texture. This step is your foundation for chewy, not cakey, cookies.
Incorporate Egg Yolks and Vanilla for Rich Flavor
Add the 2 whole large egg yolks one at a time, mixing on low speed for 30 seconds after each addition until fully incorporated. The mixture will look slightly curdled, but that's normal. Stir in the 2 teaspoons vanilla extract and 1 teaspoon vanilla bean seeds until completely combined.
I always use room-temperature yolks—they blend more smoothly and prevent lumps. The vanilla bean seeds add a subtle depth that store-bought extract can't match. Mix just until combined; overworking will develop gluten and make your dough tough.
Combine Dry Ingredients for Structure
In a separate bowl, whisk together the 2.5 cups all-purpose flour, 0.5 teaspoon baking soda, and 0.75 teaspoon Diamond Crystal kosher salt. Gradually add this dry mixture to the wet ingredients, mixing on low speed just until combined—you should still see small flour streaks. This prevents overdevelopment of gluten, which keeps your cookies chewy.
Don't skip the sifting if you have flour lumps. The baking soda and salt need to distribute evenly for proper rise and flavor balance. The dough will be slightly sticky, but that's perfect for no-bake bites.
Fold in Chocolate for Maximum Impact
Remove the mixer bowl and, using a silicone spatula, gently fold in the 2 cups milk chocolate chips and 1 cup dark chocolate chips. You want even distribution but minimal breaking of the chips—this ensures those perfect melty pockets in every bite. Press a few pieces into the bottom of the bowl to ensure you capture every last bit.
Here's where it gets fun: fold in the 1 tablespoon flaky sea salt by hand. The contrast of sweet, salty, and chocolate is what makes these bites irresistible. Cover the bowl with plastic wrap and refrigerate for at least 30 minutes—this chilling step is crucial for firming the dough and making it easier to handle.
Shape and Enjoy Your No-Bake Bites
After chilling, roll the dough into 1-inch balls (about 1 tablespoon each) and place them on a parchment-lined plate. Press a few extra chocolate chips into the top of each ball for visual appeal. Let them sit at room temperature for 10-15 minutes to firm up slightly before serving.
These bites are best enjoyed fresh from the fridge—they'll soften slightly at room temperature but maintain their texture. Store any leftovers in an airtight container in the refrigerator for up to 5 days, though they rarely last that long. The no-bake magic is in the balance of textures: creamy dough, melty chocolate, and that perfect crunch of flaky salt.
Pro Tips For Making Chewy Chocolate Chip Cookie Dough
- Chill the Dough First: I learned this the hard way—skipping the fridge makes for flat, greasy cookies. Press the dough into a disk, wrap it in plastic, and refrigerate for at least 2 hours (overnight is even better). The cold butter won’t spread as much, and the texture stays chewy instead of cakey.
- Use Cold Butter, Not Soft: That butter should be firm enough to hold its shape when pressed—like a block of wood, not pudding. If it’s too soft, the cookies will spread into thin, crispy pancakes. Stick it in the freezer for 10 minutes if your kitchen’s too warm, and don’t overwork it when creaming.
- Skip the Overmixing: Once you add the egg yolks and vanilla, mix just until combined—about 10-15 strokes. Overmixing develops gluten, and suddenly you’ve got tough, dense cookies instead of that perfect chewy bite. Stop when the dough clumps together neatly.
- Toast the Chocolate Chips: Sprinkle your chocolate chips on a baking sheet and toast them at 300°F for 5-7 minutes. They’ll smell amazing and add a deeper, nuttier flavor to the dough. (Yes, even if you’re impatient—it’s worth the wait.)
Storing and reheating your chewy chocolate chip cookie dough
Fridge Storage Secrets
Wrap your freshly made dough tightly in plastic wrap and store it in an airtight container for up to 5 days. The key is to press the plastic directly against the dough to prevent drying.
I like using glass containers with snap-on lids—they keep the dough fresh and make it easy to scoop portions. Place the container in the coldest part of your fridge, usually the back of the bottom shelf. 🧊
Freezing for Later
For long-term storage, portion the dough into 1-tablespoon balls and freeze them on a parchment-lined tray for 1 hour to prevent sticking. Once frozen, transfer them to a ziplock freezer bag and label with the date.
These keep for 3 months without losing their texture or flavor. When ready to use, thaw at room temperature for 30 minutes before shaping or baking.
Reheating No-Bake Bites
If you've baked your cookie dough bites, reheat them in the oven at 300°F for 3-5 minutes to restore their softness. For no-bake bites, simply let them sit at room temperature for 10 minutes—they'll soften naturally.
Avoid microwaving, as it can make the chocolate chips seize and ruin the texture. If you've frozen baked cookies, reheat them directly from frozen at 325°F for 5-7 minutes.
Reviving Dried Dough
If your dough has dried out slightly, don't toss it! Place it between two sheets of parchment paper and microwave for 10-15 seconds to soften. This works wonders for restoring that perfect cookie dough consistency.
For baked cookies, sprinkle them with a little milk or water and warm in the oven at 300°F for 2-3 minutes to bring back moisture. 💫
Portion Control Tips
Use a cookie scoop or ice cream scoop to portion your dough consistently. For no-bake bites, aim for 1-tablespoon portions—this ensures even-sized, bite-sized treats. If you're baking, use a 3-tablespoon scoop for standard cookies.
Pre-portioning makes it easy to grab just what you need without overhandling the dough, which can lead to tough cookies.
Make-Ahead Magic
Prepare the dough 24 hours ahead for even better flavor development. The resting time allows the ingredients to meld, resulting in richer, more complex cookies. If you're baking, chill the dough for at least 2 hours before scooping and baking.
For no-bake bites, the longer rest time makes them easier to handle and more enjoyable to eat. Trust me, the wait is worth it! ✨
Nutrition facts
Frequently asked questions
Can I eat this dough raw?
This recipe is designed for both baking and no-bake enjoyment. The dough contains flour and sugar, making it safe to eat raw while still delivering that classic cookie dough experience. For best texture, chill the dough for 30 minutes before scooping into 1-tablespoon balls and serving straight from the fridge.
Why does my dough turn out cakey instead of chewy?
Overmixing develops gluten, which creates cakey texture. Mix dry ingredients just until combined—you should still see small flour streaks. Also, use cold butter when creaming and avoid overbaking (pull cookies when edges are golden but centers still look soft). The 30-minute rest before baking helps too!
How do I prevent chocolate chips from burning?
Use high-quality chocolate chips (like Ghirardelli) that melt at lower temperatures. Bake at 350°F for 10-12 minutes—no longer! Place cookies on the middle rack for even heat distribution. For extra insurance, sprinkle chips on top after baking instead of mixing them in.
Can I substitute butter with oil?
Not recommended for this recipe. Butter provides flavor and moisture that oil can't replicate. If you must substitute, use melted coconut oil (1:1 ratio) but expect slightly less flavor and a denser texture. For best results, stick with butter—it's worth the effort for that signature chewy texture!
How do I make these cookies extra gooey?
Underbake slightly by removing cookies when edges are set but centers still jiggle. Press a few extra chocolate chips onto the tops right after baking while still warm. For next-level gooeyness, chill baked cookies for 10 minutes before serving—they'll firm up slightly but maintain that melty center.