
Desserts
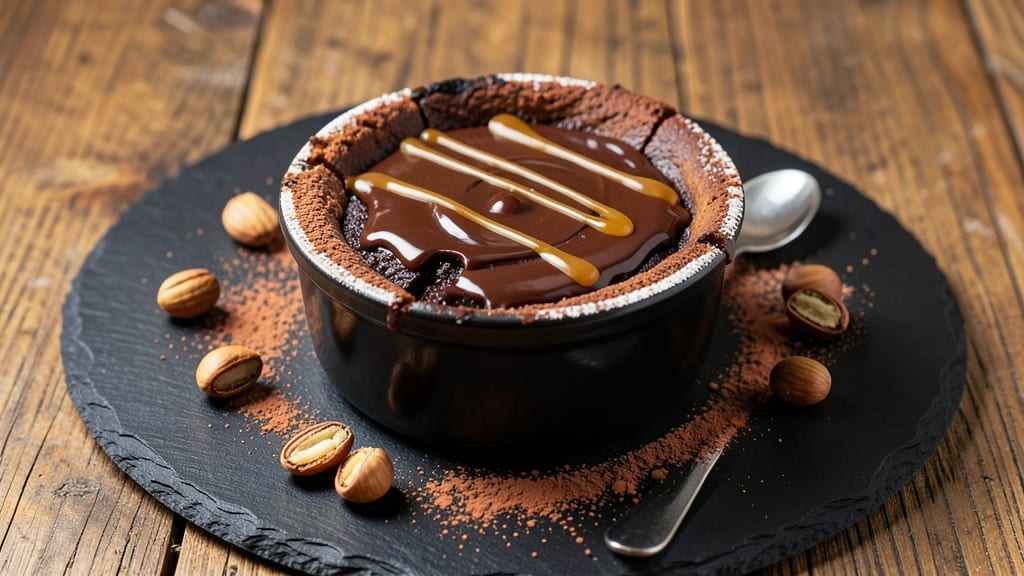
This bakers chocolate molten lava cake recipe delivers the ultimate decadent dessert experience with its signature warm chocolate rivers and perfectly crisp edges. 🌟 The secret lies in a precise balance of rich chocolate, velvety butter, and carefully tempered eggs that create that magical molten center you crave in every bite.
What sets this recipe apart is the professional technique that ensures the cake bakes just enough to create those coveted crisp edges while keeping the center gloriously gooey.
Baker's chocolate provides that deep, intense flavor that amateur chocolate often lacks, while a touch of espresso powder enhances the chocolate notes without overpowering them.
By the time it emerges from the oven, your molten lava cake will have golden, crackly edges that give way to a warm, liquid chocolate center that flows like rivers when sliced.
The aroma alone will have everyone gathering in the kitchen, and each bite delivers that perfect contrast of crispy exterior and molten interior.
Serve immediately with vanilla ice cream or fresh berries for the full indulgent experience. This recipe is perfect for special occasions or when you want to impress guests with a restaurant-quality dessert that's surprisingly simple to make at home.
Ingredients for bakers chocolate molten lava cake
Rich chocolate, velvety butter, and tempered eggs create the perfect molten lava cake experience.
| Ingredient | Amount | Notes |
|---|---|---|
| Baker's Chocolate 🍫 | 8 oz | High-quality, unsweetened baking chocolate |
| Unsalted Butter 🧈 | ½ cup | Room temperature, full-fat preferred |
| Large Eggs 🥚 | 2 whole | Room temperature, separated yolks |
| Granulated Sugar 🍚 | ½ cup | Superfine for best texture |
| All-Purpose Flour 🌾 | ¼ cup | Sifted for smooth batter |
| Instant Espresso Powder ☕ | 1 tsp | Enhances chocolate flavor |
| Vanilla Extract 🌸 | ½ tsp | Pure vanilla for depth |
| Salt 🧂 | ¼ tsp | Fine sea salt preferred |
| Vanilla Ice Cream 🍦 | 1 cup | For serving, optional |
| Fresh Berries 🍓 | ½ cup | Raspberries or strawberries |
| Dark Chocolate Chips 🍫 | ¼ cup | For garnish, optional |
The baker's chocolate makes all the difference here—Ghirardelli or Guittard are my go-tos, but any high-quality unsweetened baking chocolate works. Look for bars with a vibrant, deep color and minimal additives. Ghirardelli's 100% Cocoa Baker's Chocolate is my absolute favorite for its intense flavor. Butter should be room temperature but not melted—Plugrá or Land O'Lakes work perfectly. For the eggs, room temperature ensures even mixing, so take them out 30 minutes before baking. The espresso powder? Starbucks or Nescafé instant works great—just a pinch to deepen that chocolate flavor without overpowering it.
No vanilla extract? Vanilla bean paste or even a scraped vanilla bean will do. Short on berries? Mixed frozen berries thawed and drained work just as well. The chocolate chips for garnish are totally optional, but they add that restaurant-quality touch. If you're feeling fancy, toast them in the oven for 5 minutes at 350°F (175°C) before sprinkling—Ghirardelli or Enjoy Life brands melt beautifully. And if you're making this ahead, store the batter in the fridge for up to 24 hours—just let it sit at room temp for 30 minutes before baking.
This cake is best served immediately, but if you must reheat, pop it in the oven at 350°F (175°C) for 5-10 minutes—just until the center is molten again. Store leftovers in an airtight container for up to 3 days, but honestly, it’s rare to have any left. The ice cream and berries should be added right before serving to keep them fresh. For a crowd, double the recipe and use ramekins or oven-safe mugs—they’re perfect for individual portions and easy to serve. Trust me, the aroma alone will have everyone rushing to the table!
Why You'll Love This Recipe
- No Fuss Setup: I swear by this recipe because it’s three bowls and a microwave—no fancy equipment, no waiting for water to boil. Just melt butter and chocolate together, whisk eggs and sugar, fold in flour, and pop it in the oven. Even my college apartment kitchen could handle it.
- Rich Without Effort: That first bite? Pure chocolatey magic—the outside sets just enough to hold the lava center, which is still warm when you cut in. The bitterness of baker’s chocolate balances the buttery richness, and the eggs make it impossibly tender. It’s the kind of dessert that makes you close your eyes.
- Weeknight Date Night: Between us, this is my go-to for impressing someone with minimal stress. Serve it warm with a scoop of vanilla ice cream or whipped cream, and suddenly you’re the host who actually put in effort. (Spoiler: It’s foolproof.)
- Budget Luxury: Here’s what sold me—it costs pennies per serving but tastes like a $12 dessert. Baker’s chocolate and butter are the stars, but they stretch far. Make two cakes, freeze one, and you’ve got a backup for when cravings hit. No waste, all win.
Step-by-step instructions for bakers chocolate molten lava cake
Here's how to create decadent chocolate cakes with molten centers that ooze warm chocolate rivers.
🍳 Step 1: Melt Chocolate and Butter Together
Place the 8 oz Baker's Chocolate and 0.5 cup Unsalted Butter in a heatproof bowl set over a pot of simmering water. Keep the heat at medium-low and stir gently until both are completely melted and smooth. You'll know it's ready when the mixture reaches 110°F—it should look glossy and silky, not grainy.
Here's the thing—don't let the temperature exceed 115°F or the chocolate will seize. If you see any graininess, immediately remove from heat and stir vigorously until smooth. This step is your foundation, so take your time to get it perfect.
👨🍳 Step 2: Whisk Eggs and Sugar to Ribbon Stage
In a separate bowl, whisk together the 2 whole Large Eggs and 0.5 cup Granulated Sugar over a double boiler (or with the bowl over simmering water) until the mixture reaches 160°F. You'll notice it thickens and becomes pale—this is called ribbon stage. To test, lift the whisk and the ribbon should hold its shape for a few seconds.
This temperature is crucial for creating that perfect lava effect. If it gets too hot, the eggs will scramble. If it doesn't reach this temperature, your cake won't set properly and the center won't stay molten. Trust the thermometer here—it makes all the difference!
🥘 Step 3: Combine Wet Ingredients and Sift Dry Ingredients
Remove both mixtures from heat and let cool slightly for 2 minutes. Then, whisk the chocolate mixture into the egg mixture until completely smooth. In a small bowl, sift together the 0.25 cup All-Purpose Flour, 1 tsp Instant Espresso Powder, 0.5 tsp Vanilla Extract, and 0.25 tsp Salt. Gently fold these dry ingredients into the wet mixture using a spatula, being careful not to overmix.
Here's where it gets fun—the batter should be thick and glossy, almost like pudding. If it looks too thin, you might have undercooked the eggs. If it's too thick, you might have overmixed. The perfect consistency is when it coats the back of a spoon but still moves slowly.
🔥 Step 4: Bake to Golden Perfection
Divide the batter evenly among 4 (6-ounce) ramekins lined with parchment cups. Place them on a baking sheet and bake at 425°F for 12-14 minutes. You're looking for edges that are set and golden brown while the centers still jiggle slightly when shaken—this ensures that molten lava effect.
Don't open the oven during baking or the cakes will sink. The moment they're done, transfer them to a wire rack and let cool for 1 minute. Then, run a knife around the edges to loosen them from the ramekins. Invert onto plates immediately for that perfect presentation.
🍽️ Step 5: Serve with Ice Cream and Berries
Top each cake with 1 cup Vanilla Ice Cream and 0.5 cup Fresh Berries, plus a sprinkle of 0.25 cup Dark Chocolate Chips for garnish. Serve immediately while the centers are still molten and warm chocolate rivers are flowing. The contrast of the cool ice cream against the warm cake is what makes this dessert truly magical.
Don't skip the ice cream—it balances the richness of the chocolate. And those berries add a bright, fresh contrast that cuts through the decadence. This is the moment you've been waiting for—each bite should deliver warm chocolate lava with every forkful!
Pro Tips For Making Bakers Chocolate Molten Lava Cake
- Melt the Chocolate Slowly: I learned this the hard way—dumping chopped baker’s chocolate into hot butter makes it seize up like a stubborn child. Instead, melt the butter first, then whisk in the chocolate one piece at a time, letting each dissolve completely before adding the next. The goal is a smooth, glossy paste, not a lumpy mess that’ll ruin your lava effect.
- Whisk Eggs Until Ribbon-Stage: The eggs are where the magic happens, but most people stop whisking too soon. Beat them until the mixture forms a thick ribbon when the whisk is lifted—about 2-3 minutes by hand, or 30 seconds with an electric mixer. This ensures the cake’s structure holds while the center stays molten. (Yes, even if you’re impatient like me.)
- Skip the Overmixing Flour: Once you fold in the flour, stop as soon as it’s just combined. Overmixing develops gluten, which turns your lava cake into a dense brick instead of a silky, gooey delight. Think "dust it in, fold it out"—no need to get aggressive. Your future self will thank you when the center stays liquid.
- Use Room-Temp Eggs and Butter: Cold ingredients are the silent saboteurs of molten lava cakes. Let the eggs sit in warm water for 5 minutes and soften the butter slightly before melting—this guarantees a smoother batter and a more reliable lava flow. (I know, it’s an extra step, but the difference is noticeable.)
Storing and reheating this bakers chocolate molten lava cake
Refrigerator Storage
If you have leftover molten lava cake (though I rarely do!), store it in an airtight container at 40°F or below for up to 3 days. The texture will firm up completely, so plan to reheat before serving.
I always wrap individual portions in parchment paper to preserve that delicate crust—just like a professional bakery would. 🌟
Freezer Storage
For longer storage, freeze the baked cakes (without ice cream or berries) in single-serving portions wrapped tightly in plastic wrap and aluminum foil. They’ll keep for up to 2 months in the freezer.
When ready to enjoy, thaw overnight in the fridge before reheating. Pro tip: Use ramekins for freezing—they’re microwave-safe and maintain shape perfectly.
Reheating for Lava Perfection
Reheat individual cakes in a 350°F (175°C) oven for 5-10 minutes until the center is just warm and the chocolate starts to soften again. For a quick fix, microwave on 50% power for 15-20 seconds, then let sit for 30 seconds—this prevents drying out.
The goal is to restore that molten center without overcooking the edges.
Serving Leftovers
When reheating, add a fresh dollop of vanilla ice cream and a handful of berries right before serving. The contrast of warm chocolate against cool ice cream is what makes this dessert unforgettable.
If you’re serving a crowd, reheat all portions at once and keep them warm in a 200°F (95°C) oven while plating. Trust me, the aroma alone will bring everyone to the table! 🍓
Make-Ahead Batter
You can prep the batter up to 24 hours ahead and store it in the fridge. Let it sit at room temperature for 30 minutes before baking—this ensures even cooking. I often do this when hosting, so the batter is ready while I focus on other dishes.
Just remember: bake immediately after bringing to room temp for that perfect lava effect.
Portion Control Tips
For individual servings, use 4-6 oz ramekins—this ensures each cake has that signature molten center. If you’re making a larger batch, scale up the recipe but keep portions consistent. Store extra batter in small jars (like mason jars) for easy baking later.
The key is never overfill—leave at least ½ inch of space at the top to prevent overflow during baking. 💫
Nutrition facts
Frequently asked questions
Why does my molten lava cake come out dry instead of gooey?
This usually happens when the eggs aren't heated to the proper 160°F ribbon stage or the batter is overmixed. The key is gentle folding and precise egg temperature—both create that perfect lava effect. Also, check your oven temp with an oven thermometer to ensure it's actually 425°F.
Can I use semi-sweet chocolate instead of baker's chocolate?
While you can substitute, baker's chocolate delivers that intense, professional flavor this recipe needs. Semi-sweet will work in a pinch, but you'll lose depth—baker's chocolate has a higher cocoa content (about 70-80% cocoa) compared to semi-sweet (35-45%). For best results, stick with the original recipe.
How do I fix a sunken molten lava cake?
Sunken cakes usually happen from opening the oven too soon or overfilling ramekins. For next time, leave ½ inch headspace and don't peek! If it happens, try reheating at 350°F (175°C) for 3-5 minutes—the heat will help restore some structure before serving.
What's the best way to make this recipe gluten-free?
Replace the all-purpose flour with a 1:1 gluten-free baking flour blend like Bob's Red Mill or King Arthur. For best results, add ½ tsp xanthan gum to help with structure. Also, let the batter rest for 10 minutes before baking to improve texture.
Can I make these ahead for a dinner party?
Prepare the batter up to 24 hours ahead and store in the fridge. When ready to bake, let it sit at room temperature for 30 minutes before baking. For make-ahead cakes, bake them 10 minutes less than directed, then reheat at 350°F (175°C) for 5 minutes before serving.