
Desserts
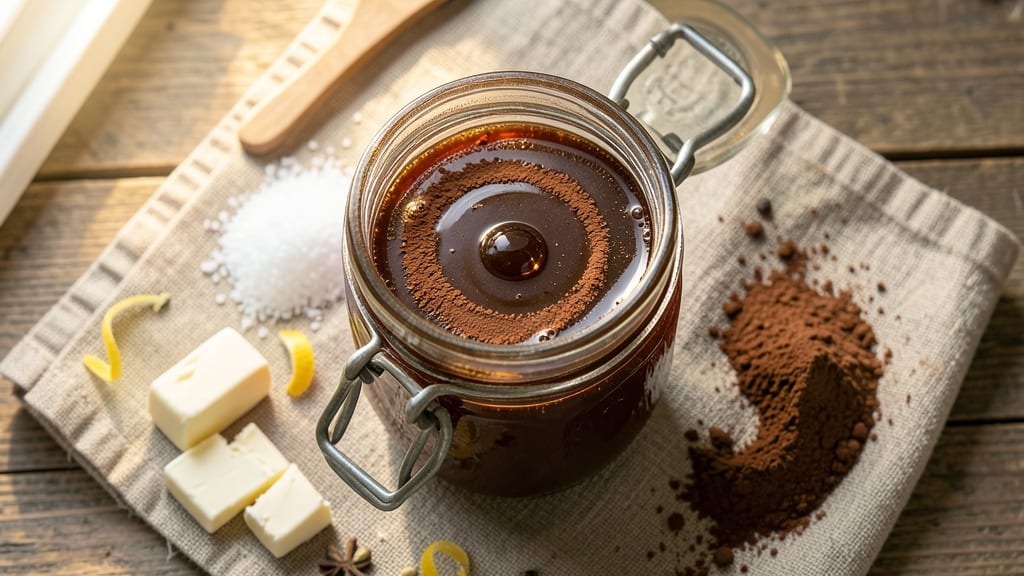
This canned chocolate syrup recipe delivers the same rich, thick pour as store-bought cans—but with better flavor and no artificial ingredients. The secret lies in simmering corn syrup, sugar, and cocoa powder until perfectly smooth, then cooling it to achieve that signature thick, pourable consistency.
I developed this version after realizing how much better homemade tastes on pancakes, ice cream, and even coffee compared to anything from a can. The process is simpler than you might think: just combine the ingredients in a saucepan, bring to a gentle simmer, and stir until fully dissolved.
The key is patience—letting the mixture cool completely before storing ensures it reaches that ideal thick pour without being too stiff. This recipe makes about 1½ cups, enough to fill a standard syrup bottle or jar for easy pouring.
What sets this apart is the depth of flavor—real cocoa powder and vanilla extract create a richer, more complex taste than store-bought versions. The corn syrup keeps it smooth and pourable, while the sugar balances the bitterness for a syrup that’s perfect for dipping, drizzling, or baking.
Plus, it keeps for months in the pantry, making it a versatile addition to any kitchen. For a vegan version, simply swap the butter for coconut oil or omit it entirely—no other adjustments needed. The result is just as thick and delicious, proving this recipe works for everyone.
Ready to make your own? Let’s get started.
Ingredients for canned chocolate syrup
Eight simple ingredients transform into rich, velvety chocolate syrup with restaurant-quality depth.
| Ingredient | Amount | Notes |
|---|---|---|
| Light Corn Syrup 🍯 | 1 cup | For smooth, pourable consistency |
| Granulated Sugar 🍚 | ¾ cup | Balances cocoa bitterness |
| Unsweetened Cocoa Powder 🍫 | ½ cup | High-quality for rich flavor |
| Pure Vanilla Extract 🌿 | 1 tbsp | For depth of flavor |
| Salted Butter 🧈 | 2 tbsp | Adds richness (omit for vegan) |
| Water 💧 | ¼ cup | For thinning if needed |
| Vanilla Bean Seeds (optional) 🌿 | 1 tsp | Extra vanilla flavor boost |
| Heavy Cream (optional) 🥛 | ¼ cup | For ultra-smooth texture |
The cocoa powder makes all the difference—Hershey’s Special Dark or Ghirardelli deliver the best flavor. Corn syrup is non-negotiable for that signature pour; Karo is the gold standard. Butter adds richness, but if you're vegan, coconut oil works perfectly. For vanilla, Madagascar bourbon extract has the most complex flavor, but any pure extract will do. I always grab a small jar of vanilla bean seeds from Williams Sonoma—they’re worth the splurge for that extra depth.
No corn syrup? Honey or maple syrup can substitute at the same amount, though texture may vary slightly. Short on cocoa? Melted dark chocolate (2 oz) works in a pinch, but reduce sugar by 1 tbsp. The butter can be swapped for vegan butter or coconut oil—just use the same amount. For a lighter syrup, increase water by 1 tbsp. And if you’re feeling fancy, a splash of espresso powder (1/4 tsp) adds a mocha twist that pairs perfectly with ice cream.
This syrup thickens as it cools, so be patient—it’ll reach that ideal pour consistency within 24 hours. Store in a clean, airtight jar in the pantry for up to 6 months. For a smoother finish, strain through a fine-mesh sieve before bottling. The optional heavy cream creates a silkier texture, but it’s not necessary if you’re in a hurry. Once opened, it’ll keep for about 2 weeks in the fridge, though it’s best used fresh.
Why You'll Love This Recipe
- Pantry Magic: I swear, this syrup comes together with ingredients you already own—no special shopping trips. Just corn syrup, sugar, cocoa, and a pat of butter, simmered until it’s thick and glossy. That’s it. No fuss, no stress.
- Rich Without Guilt: The butter and vanilla transform basic cocoa into something decadent—smooth, velvety, and way more satisfying than store-bought. Honestly, the first time I drizzled it over pancakes, my kids paused mid-bite like, “Wait… is this real?” (Yes. It’s real.)
- Endless Drizzle: This isn’t just for ice cream. I’ve used it to glaze donuts, swirl into oatmeal, and even deglaze a pan for a quick chocolatey sauce. The versatility? It’s my secret weapon for turning boring breakfasts into something special—even on a Tuesday.
- Stores Like Gold: A single batch lasts weeks in the fridge, and it’s cheaper than buying fancy syrups by the bottle. Plus, the leftovers? They’re perfect for last-minute dessert fixes—no wasted ingredients, just pure chocolatey payoff. (Pro tip: Freeze extras in ice cube trays for single-serving portions.)
Step-by-step instructions for homemade canned chocolate syrup
Here's how to create a rich, velvety chocolate syrup that rivals store-bought versions.
Combine Dry Ingredients and Wet Ingredients Separately
In a medium saucepan, whisk together the 1 cup light corn syrup and 0.75 cup granulated sugar until fully dissolved. This creates a smooth base for your syrup. In a separate bowl, sift the 0.5 cup unsweetened cocoa powder to eliminate any lumps, then add the 2 tablespoons salted butter and mix until melted and incorporated. The butter adds richness that makes this syrup truly special.
For the optional vanilla boost, scrape the seeds from 1 vanilla bean into the dry mixture and add the 1 tablespoon pure vanilla extract. Stir well to distribute the flavors evenly. If you're using the 0.25 cup heavy cream, whisk it into this mixture now for an ultra-smooth texture. The cream should be at room temperature to blend seamlessly.
Cook the Mixture on Low Heat
Return the dry mixture to the saucepan with the wet ingredients and add the 0.25 cup water. Stir continuously over medium-low heat for 10-12 minutes until the mixture reaches a gentle simmer. You'll see small bubbles forming at the edges, but don't let it boil vigorously—this prevents graininess in your final product.
Watch for the mixture to thicken slightly, but it should still be pourable. The syrup should coat the back of a spoon but not be glue-like. If it starts to thicken too much before reaching this stage, add 1 tablespoon water at a time until you achieve the right consistency. This step is crucial for achieving that perfect pour you'll love on pancakes or ice cream.
Strain and Bottle the Syrup
Remove the saucepan from heat and let the syrup cool for 5 minutes. Then, strain it through a fine-mesh sieve into a clean pitcher or bowl to remove any potential lumps. This ensures your final product is silky smooth. For extra refinement, you can press the mixture through a cheesecloth-lined strainer if you have any stubborn particles.
Once strained, pour the syrup into sterilized 8-ounce canning jars, leaving about ½-inch headspace at the top. The jars should be clean and free of any residue to prevent contamination. Use a funnel if needed to avoid spills, and wipe the jar rims clean before sealing.
Process and Store the Syrup
Place the sealed jars in a boiling water bath canner and process for 10 minutes to ensure proper sterilization. This step is essential for safe storage. After processing, remove the jars and let them cool completely on a wire rack. The syrup will thicken slightly as it cools, but it should remain pourable.
Store the sealed jars in a cool, dark place for up to 1 year. Once opened, transfer the syrup to a clean, airtight container and refrigerate. It will keep for about 3 months in the fridge. This homemade syrup is perfect for drizzling over pancakes, waffles, or even as a sauce for ice cream—it's so rich and flavorful, you'll never go back to store-bought.
Pro Tips For Making Canned Chocolate Syrup
- STIR CONSTANTLY AT FIRST: The first 3 minutes are where lumps form if you blink. Use a wooden spoon and keep it moving—especially when the butter hits the heat. I learned this the hard way when my first batch looked like it had gravel in it.
- SIFT THE COCOA: Unsweetened cocoa powder is a powdery menace. Sift it directly into the pot before adding liquid to avoid clumps that turn into dry spots. Yes, it’s extra work, but your syrup will be silky, not gritty.
- DON’T BOIL DRY: Once the mixture reaches a gentle simmer, lower the heat to a whisper and let it bubble softly for 10 minutes. Boiling too hard evaporates the vanilla’s aroma and can scorch the sugar—your syrup will taste flat and bitter.
- WHISK IN THE BUTTER: Cut the butter into tiny cubes and whisk it into the warm (not hot) syrup in stages. This keeps it from seizing up into a greasy mess. If it looks curdled, strain it—no one wants butter chunks in their syrup.
Flavor customization for canned chocolate syrup
Rich Chocolate Variations
For a deeper chocolate flavor, replace half the cocoa powder with 1/4 cup melted dark chocolate (like Ghirardelli 70% cocoa). This adds a velvety richness that mimics premium store-bought syrups.
I’ve found that chocolate chips (like Hershey’s Special Dark) work too—just melt them with the butter for a smoother texture. 🍫
Want a mocha twist? Add 1/4 teaspoon instant espresso powder to the dry ingredients before simmering. The coffee notes enhance the chocolate’s depth, making it perfect for drizzling over lattes or tiramisu.
For a spiced version, stir in 1/4 teaspoon cinnamon or a pinch of cayenne after cooking—trust me, it’s a game-changer for chocolate chip cookies or ice cream sundaes.
Sweetness Adjustments
If you prefer a less sweet syrup, reduce the sugar by 1-2 tablespoons and add 1 tablespoon honey or maple syrup for natural sweetness. This works especially well if you’re using high-quality cocoa powder (like Valrhona) that has a more intense flavor.
For a caramelized touch, cook the syrup for an extra 2-3 minutes until it darkens slightly—this adds a subtle buttery note. 🍯
Craving extra sweetness? Boost the sugar to 1 cup and reduce the corn syrup to 3/4 cup. This creates a thicker, fudgier syrup that’s ideal for dipping strawberries or stuffing donuts. Just remember: the syrup will thicken more as it cools, so adjust while warm.
Texture Tweaks
For a thicker, fudge-like syrup, omit the water and add 2 tablespoons extra butter or 1 tablespoon coconut oil. This version is perfect for drizzling over brownies or folding into whipped cream.
To test consistency, dip a spoon in the warm syrup—if it holds its shape but still drizzles, it’s ready. 🥄
Need a lighter, runnier syrup? Increase the water to 1/3 cup and reduce the sugar by 1 tablespoon. This works great for pancake toppings or cocktails where you want a smoother pour. If it’s too thin after cooling, reheat gently and stir until it thickens slightly.
Flavor Layering
Add 1/2 teaspoon almond extract or 1/4 teaspoon orange zest for a gourmet twist. The almond complements the chocolate beautifully, while citrus brightens the flavor—perfect for summer desserts or fruit salads.
For a peppery kick, mix in 1/8 teaspoon ground cardamom or a dash of smoked paprika after cooking. 🌶️
For a nutty depth, stir in 1 tablespoon peanut butter (or almond butter) while the syrup is warm. Let it cool completely before using—this creates a creamy, spreadable syrup that’s amazing on toast or waffles.
If you’re feeling adventurous, fold in 1/4 cup crushed hazelnuts for a Nutella-inspired treat.
Nutrition facts
Frequently asked questions
Why does my homemade chocolate syrup get grainy?
Graininess happens when cocoa powder isn't fully dissolved or the mixture boils too vigorously. To prevent it, always sift the cocoa powder first and stir constantly over medium-low heat—never let it boil hard. If it happens, strain the syrup through a fine-mesh sieve before bottling.
Can I make this syrup without corn syrup?
Yes! For a healthier version, substitute honey or maple syrup (same amount), though the texture may be slightly thinner. If you prefer, use agave nectar—just reduce other liquids by 1 tablespoon since it's thicker. The flavor will be more natural but less stable when heated.
How do I know when the syrup is thick enough?
The perfect consistency coats the back of a spoon but still drizzles smoothly. Test by dipping a clean spoon in the warm syrup—it should hold its shape for a moment before flowing. If it's too thin, simmer 1-2 more minutes; if too thick, add 1 tablespoon water and stir. Let it cool completely before judging final thickness.
Will this syrup work for baking?
This syrup works great in recipes like chocolate chip cookies, brownies, or cakes—just reduce other liquids in the recipe by 2 tablespoons per 1/2 cup of syrup used. For frostings or glazes, thin with 1-2 tablespoons milk as needed. The rich flavor enhances baked goods beautifully.
Can I make a smaller batch for testing?
Yes! Halve all ingredients to make about 3/4 cup of syrup. Use a small saucepan and reduce cooking time to 5-7 minutes. Store in a clean jar in the fridge for up to 2 weeks. This is perfect for experimenting with flavor variations before committing to a full batch.