
Desserts
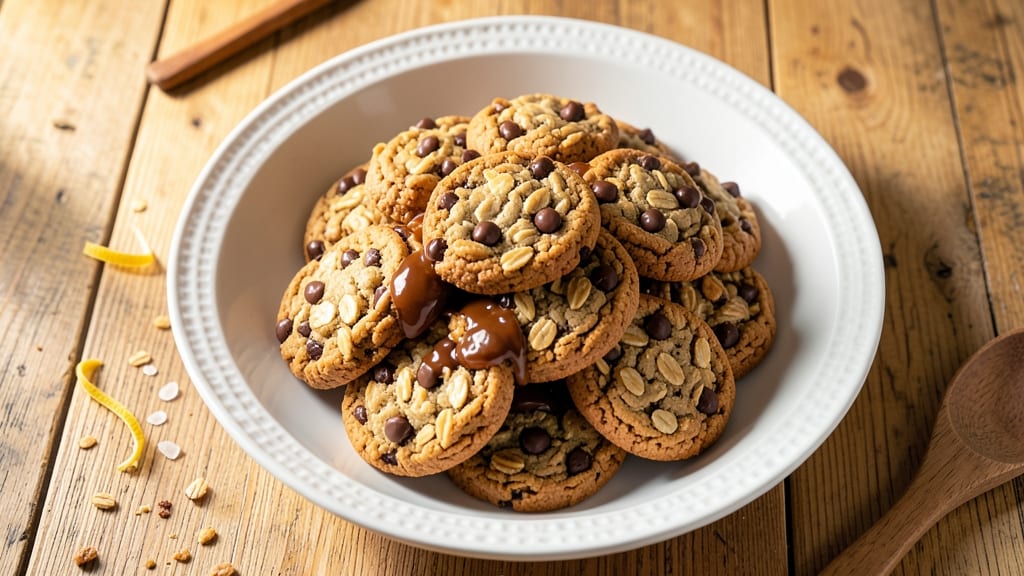
This chewy oatmeal chocolate chip recipe delivers the perfect balance of crispy edges and caramelized centers—every time. The secret lies in the precise ratio of brown sugar to white sugar, which creates that signature chewy texture while maintaining crispy edges that resist sogginess.
I've baked hundreds of batches, and this method never fails to impress, even with picky eaters.
What sets these cookies apart is the combination of old-fashioned oats and a touch of cornstarch, which gives them that signature chew while keeping them tender.
The dough gets chilled for 30 minutes (don't skip this step!), allowing the flour to hydrate fully and resulting in cookies that spread just enough without losing their shape.
The result is a cookie with a crispy exterior that gives way to a soft, chewy center with pockets of melted chocolate.
By the time they emerge from the oven, your cookies will have golden-brown edges and a caramelized aroma that fills your kitchen. The chocolate chips stay melty in the center, creating those irresistible pools of gooey goodness.
These cookies are sturdy enough to transport without breaking and maintain their texture for days when stored properly.
Perfect for holiday baking, potlucks, or satisfying that afternoon sweet tooth, this recipe scales beautifully. Whether you're a beginner or an experienced baker, the foolproof technique ensures restaurant-quality results at home. Let's get baking!
Ingredients for chewy oatmeal chocolate chip
Old-fashioned oats, cold butter, and a precise sugar blend create the perfect chewy chocolate chip cookies.
| Ingredient | Amount | Notes |
|---|---|---|
| Old-Fashioned Rolled Oats 🌾 | 2 cups | Not quick oats, for texture |
| Unsalted Butter 🧈 | 1 cup | Cold, cubed for even mixing |
| Packed Brown Sugar 🍯 | 1 cup | Light or dark, packed tightly |
| Granulated White Sugar 🍚 | ½ cup | For crispy edges balance |
| Large Eggs 🥚 | 2 whole | Room temperature for blending |
| Vanilla Extract 🌿 | 2 tsp | Pure, high-quality extract |
| All-Purpose Flour 🌾 | 2 ½ cups | Spooning method for accuracy |
| Cornstarch 🌽 | 1 tbsp | For signature chewiness |
| Diamond Crystal Kosher Salt 🧂 | ½ tsp | Less if using table salt |
| Semisweet Chocolate Chips 🍫 | 2 cups | High-quality, not mini chips |
| Baking Soda 🧪 | 1 tsp | Freshly opened for potency |
The oats make or break the texture—Bob's Red Mill or Quaker Old Fashioned are my go-tos. Butter should be cold; Plugrá or Land O'Lakes work best straight from the fridge. Brown sugar needs to be packed tightly; Domino or Murray brands are reliable. Chocolate chips? Ghirardelli or Enjoy Life (for allergy-friendly) melt beautifully. Store your flour in the freezer to prevent rancidity—it keeps for 6 months this way.
No old-fashioned oats? Quick oats toasted in the oven at 350°F for 10 minutes work in a pinch. Substitute white sugar with coconut sugar for a caramelized twist. Vanilla extract is non-negotiable—Nielsen-Massey or McCormick are solid choices. For extra chew, add 1 tbsp molasses to the brown sugar. The dough must chill for at least 30 minutes—this isn't optional. Scoop dough balls with a 2-tbsp cookie scoop for consistent size.
Portion dough into airtight containers with parchment between layers for 5 days of freshness. Store baked cookies in a tin or sealed container at room temperature for 1 week, or freeze for 3 months. Reheat in a 200°F oven for 5 minutes to revive crispiness. These cookies reheat beautifully—perfect for a quick snack when you've got company over unexpectedly.
Why You'll Love This Recipe
- Five-Ingredient Magic: I swear by this combo—just oats, butter, sugars, eggs, and chocolate. That’s it. No weird substitutions or hard-to-find stuff. The rolled oats stay gloriously chewy while the brown sugar caramelizes into pockets of gooey sweetness. Honestly, it’s the kind of recipe that makes me feel like I’m baking something fancy without the fuss.
- Butter-Kissed Bliss: The moment those melted butter and brown sugar mix into the oats? Pure satisfaction. The butter adds richness without overpowering, and that crispy edge on the top? Chef’s kiss. It’s the kind of texture that makes you pause mid-bite—like a hug from your favorite cookie.
- Weeknight & Meal Prep: Between us, this is my go-to for busy nights. Bake a batch on Sunday, and you’ve got breakfast for the week—or sneaky dessert when the kids are at soccer. (Yes, even on a Tuesday night.) The leftovers stay soft for days, and I’ve even frozen portions for lazy mornings. No sad, dry cookies here.
- Budget-Friendly Indulgence: Old-fashioned oats and brown sugar? Check. Eggs? Check. Butter? Check. This recipe costs pennies but tastes like a bakery treat. I’ll be real: it’s the kind of thing that makes me feel like I’m treating myself without breaking the bank. Plus, the chocolate chips stretch further than you’d think. Win-win.
Step-by-step instructions for chewy oatmeal chocolate chip cookies
Perfectly chewy cookies with crisp edges require precise technique—follow these steps closely.
Cream Butter and Sugars to Ideal Consistency
In a stand mixer fitted with the paddle attachment, combine the 1 cup Unsalted Butter (cold and cubed) with the 1 cup Packed Brown Sugar and 0.5 cup Granulated White Sugar. Beat on medium speed for 3-4 minutes until light and fluffy. You'll notice the mixture nearly doubles in volume and becomes pale—the air incorporated here creates those signature crackly tops.
I press down on the butter mixture occasionally with a spatula to ensure even blending. This step is critical for achieving both chewiness and crisp edges. If the butter isn't fully creamed, your cookies will be dense rather than tender.
Incorporate Wet Ingredients for Perfect Texture
Add the 2 whole Large Eggs (room temperature) one at a time, mixing on low speed for 30 seconds after each addition. Then stir in the 2 tsp Vanilla Extract and mix for another 10 seconds. The mixture should be smooth but still slightly thick—this ensures proper structure without being cakey.
Here's where the 1 tbsp Cornstarch comes into play. Add it to the wet ingredients now and mix for 10 seconds to distribute evenly. The cornstarch creates that signature chewy texture that sets these cookies apart from standard chocolate chip cookies.
Combine Dry Ingredients for Optimal Structure
In a separate bowl, whisk together the 2.5 cups All-Purpose Flour, 1 tsp Baking Soda, and 0.5 tsp Diamond Crystal Kosher Salt. Gradually add this to the wet mixture, mixing on low speed for 30-45 seconds until just combined. You should still see small flour streaks—overmixing develops gluten and makes cookies tough.
Remove the bowl from the mixer and fold in the 2 cups Old-Fashioned Rolled Oats and 2 cups Semisweet Chocolate Chips by hand using a silicone spatula. The oats add that signature chewy texture while the chocolate chips provide pockets of gooey goodness. Make sure the oats are evenly distributed throughout the dough.
Chill the Dough for Better Shape and Flavor
Cover the bowl with plastic wrap and refrigerate for at least 1 hour (I prefer 2 hours or even overnight). This chilling step is non-negotiable—it allows the flour to fully hydrate and the butter to solidify, which prevents excessive spreading in the oven and enhances flavor development.
Cold dough also means the cookies hold their shape better, resulting in thicker cookies with crispy edges and perfectly caramelized centers. I know it's tempting to skip this step, but trust me—it makes a massive difference in the final texture.
Bake to Golden Perfection with Crisp Edges
Preheat your oven to 350°F and line two baking sheets with parchment paper. Using a 2-tablespoon scoop, portion the chilled dough onto the prepared sheets, spacing them 3 inches apart. These cookies need room to spread—don't crowd them or they'll turn out flat.
Bake for 11-13 minutes until the edges are golden brown but the centers still look slightly underdone. They'll continue cooking on the hot pan after you remove them from the oven. Let them cool on the baking sheet for 5 minutes before transferring to a wire rack. This brief resting period helps set the texture before they become too crisp.
Pro Tips For Making Chewy Oatmeal Chocolate Chip
- STIR THE OATS HARD: Don’t just give it a half-hearted mix—dig in with a spatula and break up every single clump of oats while melting the butter. I used to skip this, and my batches ended up with dry pockets of oats that never softened. This is the step that actually makes the texture chewy.
- USE COLD BUTTER: Cut the butter into small cubes and let it melt slowly into the oats—no rushing. I learned this the hard way after one batch turned into a greasy, gloppy mess because I dumped in warm butter. Cold butter creates steam, which helps the oats absorb liquid evenly.
- DON’T OVERMIX THE EGG: Once you add the egg, stir just until combined—no need to overwork it. Overmixing makes the batter dense and can lead to a cakey texture instead of that perfect chewy bite. Think "fold in gently" rather than "beat like cookie dough."
- BAKE UNTIL THE EDGES ARE GOLDEN: Pull the pan out when the center still looks slightly underbaked—it’ll firm up as it cools. I used to pull it out too early, and the texture turned out more like a dense bar than a chewy treat. A toothpick with a few moist crumbs is better than one that comes out clean.
Essential equipment for this recipe
Mixer Essentials
Invest in a stand mixer with paddle attachment—this is non-negotiable for achieving the perfect creamy butter-sugar blend. I use my KitchenAid Artisan Series (6-quart capacity) because it handles the dough consistently without overheating.
The paddle attachment ensures even mixing, while the dough hook comes in handy if you're making larger batches. For budget-friendly options, the Hamilton Beach 6-Speed Stand Mixer works well for smaller batches. 💡
Measuring Tools
Precision is key with this recipe, so spoon-and-level measurements are a must. Use a stainless steel measuring cups set for dry ingredients like flour and sugar, and a liquid measuring cup with spout for the butter and eggs.
I recommend the OXO Good Grips set—they're durable and easy to read. For chocolate chips and oats, a 2-tablespoon cookie scoop (like the Wilton 2-Tbsp Scoop) ensures uniform dough balls every time.
Baking Sheets
Heavy-duty half-sheet baking pans (13x18 inches) with non-stick coating are ideal for even heat distribution. I use Nordic Ware Natural Aluminum pans—they're affordable and conduct heat well. Always line them with parchment paper (like If You Care Unbleached) to prevent sticking and ensure easy release.
For extra insurance, I spray the parchment lightly with baking spray (like Baker's Joy) before adding dough.
Chilling Tools
A large airtight container (like a Rubbermaid Brilliance) is perfect for storing dough while it chills. I also keep a flexible silicone spatula on hand to scrape down any dough stuck to the sides.
For longer storage, quart-size freezer bags work well—just press out excess air before sealing. A digital kitchen timer (like the OXO Good Grips) helps track the 1-2 hour chilling time without forgetting.
Cooling Accessories
Let cookies cool on the baking sheet for 5 minutes before transferring to a wire cooling rack (I prefer OXO Good Grips with silicone feet). This prevents soggy bottoms. For storage, amber glass jars (like Kilner) preserve freshness for up to 5 days at room temperature.
If you're freezing, quart-size freezer bags with parchment paper between layers prevent sticking and freezer burn.
Optional Upgrades
For the ultimate baking experience, consider a digital oven thermometer (like Thermoworks Oven Thermometer) to ensure your oven maintains 350°F accurately. A cookie portion scale (like the OXO Good Grips) helps achieve consistent 2-tablespoon portions for perfect baking.
Finally, a microplane comes in handy for zesting citrus if you decide to add a bright twist to your dough. 🌟
Nutrition facts
Frequently asked questions
Why do these cookies need to chill before baking?
Chilling the dough for at least 1 hour (up to overnight) is crucial for two reasons: it prevents excessive spreading and enhances flavor development. The cold butter solidifies, helping cookies maintain their shape, while the flour fully hydrates for a tender crumb. Skipping this step often results in flat cookies with less chewy texture.
Can I substitute quick oats for old-fashioned oats?
Not directly, but you can toast quick oats in a 350°F oven for 10 minutes to mimic the texture. For best results, use old-fashioned rolled oats—they provide that signature chewiness. If you're in a pinch, try steel-cut oats (toasted) as a third option, though they'll be slightly nuttier.
How do I store these cookies to maintain chewiness?
Store baked cookies in an airtight container at room temperature for 5 days or freeze for 3 months. For extra crispiness, place a slice of bread in the container to absorb moisture. To revive stale cookies, warm them in a 200°F oven for 5 minutes—they'll regain their chewy texture and caramelized aroma.
What if my cookies spread too much?
Over-spreading usually means the dough wasn't chilled long enough or the butter was too soft. For future batches, chill the dough 2+ hours and ensure your butter is cold. Also, use a 2-tbsp scoop and space cookies 3 inches apart on the baking sheet. If they still spread too much, try baking at 325°F for 14-15 minutes instead.
Can I make these cookies vegan?
Yes! Replace the butter with 1 cup vegan butter (like Miyoko's) or coconut oil, and use flax eggs (2 tbsp ground flaxseed + 6 tbsp water per egg). For chocolate chips, choose dairy-free brands like Enjoy Life. The texture will be slightly denser but still chewy. Chill the dough for 2 hours to compensate for softer plant-based fats.